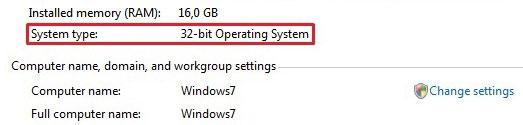
If you are wondering how to use more than 4GB RAM on Windows 7 32-bit PC’s or possibly Windows 8 32-bit, then give this a try.
Unlock 4GB+ RAM on Windows 7
IMPORTANT: Extreme caution is neccesary here. Only advanced users should try this hack and we take no responsibility for any damage on your side. Also, if something goes wrong, you need to know how to restore your PC. This can be done for example by using a boot DVD (Ubuntu Live CD, etc.) and then replace the modified system files that are broken
1. Step Download the Windows 7 SDK and locate the file makecert.exe from here
2. Step Open the Windows Explorer and go to C:\Windows\System32 – take ownership of the file and give yourself full permissions NTKRNLPA.exe using this command
takeown /f ntkrnlpa.exe
ICACLS ntkrnlpa.exe /grant administrators:F
We explained how to take ownership of files in Windows 8 here
We explained how to grant yourself permissions or take ownership of system files using a GUI here
3. Step Copy the file NTKRNLPA.exe and create a backup of it. Create another copy at C:\test
4. Step Download a hex editor for Windows 7 (the one we reviewed here works well)
5. Step Open the file NTKRNLPA.exe located at C:\test with the hex editor and search for two strings:
7C118B45FC85C0740A
7C108B45FC85C07409
6. Step Replace both strings with B8 00 00 02 00 90 90 and save the file as ntkr64plus.exe
7. Step You could start an elevated command prompt and run the following commands via CMD but we recommend to use the Windows SDK Shell instead.
Create Self-Signed Kernel File
IMPORTANT: Replace the ” quotes with real quotes or it won’t work
8. Step Open the Windows SDK CMD Shell (On your Start menu under MicrosoftSDKs)
9. Step Create a self-signed certificate by entering this into the shell:
makecert -r -ss PrivateCertStore -n “CN=[Windows732bit]”
10. Step Finally, sign the file we created in step 6 (ntkr128plus.exe) using this command (still using the SDK shell)
signtool sign -s my -n “Windows732bit” ntkr128plus.exe
(if you gave your cert another name replace Windows732bit with your own cert name)
11. Copy the file ntkr128plus.exe back to C:\Windows\System32
Creating Boot Entry
12. Open a new command prompt with admin rights and create a boot loader for this new PAE Windows 7 32-bit that fully supports up to 128GB RAM.
13. We explained how use bcdedit here, but here are the commands you need to run:
bcdedit /copy {current} /d “Windows 7 32 Bit Plus”
bcdedit /set [GUID] pae ForceEnable
bcdedit /set [GUID] kernel ntkr128plus.exe
bcdedit /set [GUID] testsigning on
14. Reboot and boot from the “new” Windows 7 32-bit”
Using more than 4GB RAM in Windows 8
We haven’t tested this yet on Windows 8 – we assume that a few modification will be required. Once we have tested it we


do you already know how to do it on win 8?
i can say that in Windows 8 its not possible make this mtethod, but in this versión of Windows not have a NTKRNLPA.exe, only exist ntoskrnl.exe
can not use this method, because in Windows 8 esixte no file exists only ntkrnlpa.exe ntoskrnl.exe