If you want to change the full computer name in Windows 7, but you are new to Windows 7 and don’t know how to do that yet, then read our small guide.
When you install the Windows 7 operating system, you must give your computer a unique name. However, if you want to change the computer name, you’ll need to dig a bit into Windows 7.
This article explains you the steps to change a computer name in Windows 7.
Step 1: Open Computer Properties
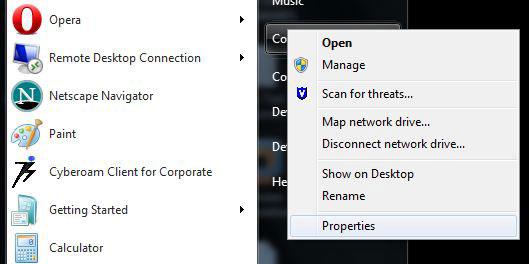
Press the Windows button on your keyboard, which will help you to open the start menu. On the right hand section of the start menu you will find a tab “Computer” Right-click on the item Computer on your Start menu.
A new windows opens. At the bottom of this tab you will find the Properties option, click on it.
Step 2: Change System Settings (Computer Name – Domain – Workgroup)
Another System Window will pop up after clicking the properties option. Scroll down! On the system window you will find a change setting link below the windows logo:
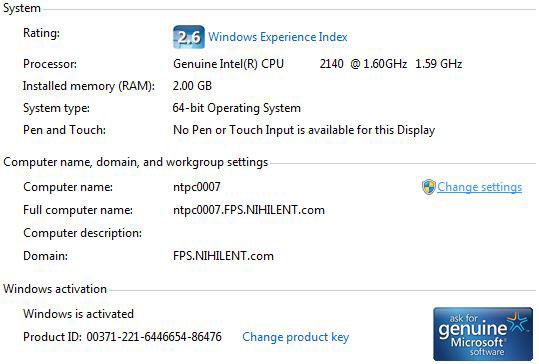
Just click on the Change Settings link, which will open yet another System Properties Window.
Step3: Changing The Full Computer Name
By default the Computer Name tab should be opened. On the Computer Name tab there is an option named “Change” below “Network ID”
Click on the “Change” button and you will get another window: “Computer Name/ Domain Changes”
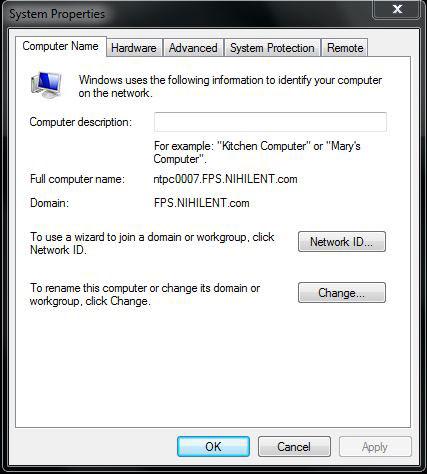
Here you have the option to enter your desired computer name. Just enter the name and click the OK button at the bottom.

Step 5: Restart
Now you have to restart the Computer to see the actual name changes.
A new name! Finally.

