 One of our readers encountered a problem with DMA, here’s a possible solution.
The problem encountered by Eric:
I’ve seen these instructions on a few different websites. However, I get stuck because, after I right-click a channel (I have two – 0 and 1 – by the way), then select properties, and advanced properties, this and other web sites, like this one, have said I have to “under Device Properties check “Enable DMA”. Unfortunately, this is where I’m lost. There is nothing showing “Enable DMA”. Here is a screenshot of what I’m talking about:
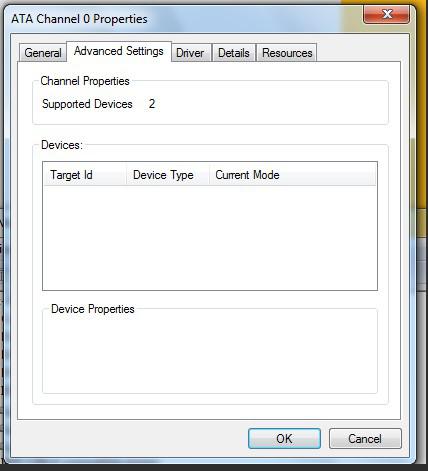
Am I missing something? Please help, as my burner has slowed to a crawl.
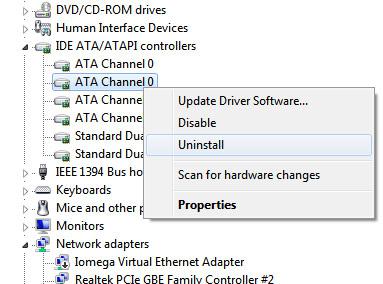
1. Step Open up the device manager
2. Step Right-click either on ATA Channel x or IDE Channel x where x can be 0,1,..
Then click on Uninstall as seen below. Don’t worry, Windows 7 will re-install them after uninstalling them and install the default drivers.
3. Step Reboot your PC and check if the “Enable DMA” checkbox appears.
4. Step Still no luck? Try to use apps like Intel® Application Accelerator to enable DMA if you have an Intel motherboard. If it doesn’t work, uninstall it and see if the checkbox now works.
5. Step IMPORTANT: Not all drives support DMA. Please check your manual to verify that it actually supports DMA!
6. Step (Optional) If you have IDE drives (Eric has ATA drives) try to change the IDE drive from master to slave or from slave to master.
Tip: ATA drives do not need jumpers. You can however use some jumpers to slow down a drive to SATA I using jumpers. Just a sidenote.

