Every time you log onto a wireless network, Windows 7 automatically creates a profile for the network and then proceed to save it in your computer. The profile will usually contain default values but you can always modify these properties. To do that, follow this guide:
![]()
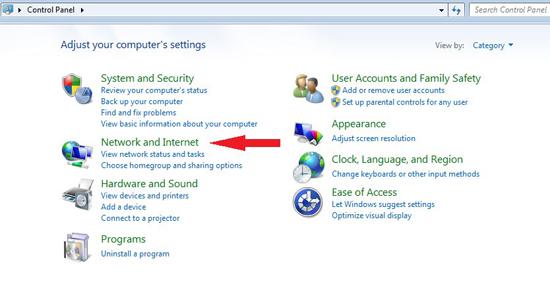
1) Click on ‘Start’ button and on the right hand side of the menu, click on the ‘Control Panel’ menu item.

2) When the ‘Control Panel’ pops up, click on the heading that says ‘Network and Internet’.
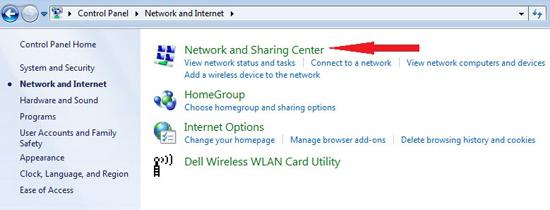
3) Then, in the ‘Network and Internet’ panel, click on the ‘Network and Sharing Center’ link.
4) On the menu at the left hand side of the panel, you will find the ‘Change adapter settings’ menu item. Click on it.

5) You will see the list of network profiles that you have. Click on the one that you wanted to change.
6) When you click on a network, the toolbar above will appear with several buttons. Click on any of these buttons to make your changes.
- Connect To
- Disable network device
- Diagnose this connection
- Rename connection
- View status of connection
- Change settings of this connection

7) Remember to click ‘OK’ or ‘Apply’ to save your changes.
The next time you connect to a wireless network, your computer will connect it with its customized network profile.

