You don’t like the themes in Windows 7 and want to disable visual themes in Windows 7 completely? E.g. to save energy or to optimize your PC for best performance? Learn how to disable the themes after the break.

Disable Visual Themes By Changing Appearance Settings
0. Enter SystemPropertiesAdvanced.exe into the search field on your start bar or follow steps 1-4
1. Step Open up the control panel
2. Step Click on System and Security
3. Step Click on System
4. Step Click on Advanced system settings
5. Step Click on the first Settings button
6. Step Select the checkbox Adjust for best performance

7. Step Click Apply
8. Step This will optimize your settings for best performance and disable visual themes in Windows 7
Disable Visual Themes By Disabling Themes Service
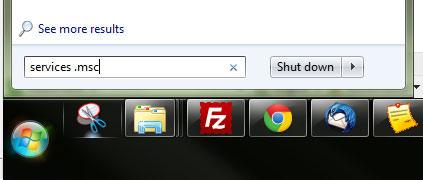
1. Step Open up the list of Windows 7 services. To do that enter services.msc into the search field on your start bar:
2. Step Scroll down or hit “T” to jump to Themes. Select Themes

3. Step On the left side you can see a link “Stop the service”. Click on Stop
4. Step As soon as you click on Stop the Windows 7 themes service stops working and you have successfully disabled visual themes in Windows 7
5. Step However, everyone who knows how to enable services in Windows 7 will be able to reactive it.
There are other ways how to disable visual themes in Windows 7, but the two methods above should be sufficient in most cases.
I believe there is also a local security policy that allows to disable visual themes – if you are a system administrator and want to make sure people can’t use visual themes in Windows 7.

