If you want to change the network type to “Home”, “Work” or “Public”, follow this Windows 7 guide. Should be easy for advanced users, but this is a beginner-friendly tutorial.
Each of our network profile or connection is linked with a network type so that the appropriate security measures can be applied when you are connected to the wireless connection. You may choose from these options: Home, Workplace or Public. If you need to change the type of network of a connection, do follow the simple steps in this tutorial. Be reminded that in order to change the settings of a wireless network profile, you will need to be connected to the connection.
1) First, click on the ‘Start’ button and on the right hand side of the Start menu, click on the ‘Control Panel’ menu item.

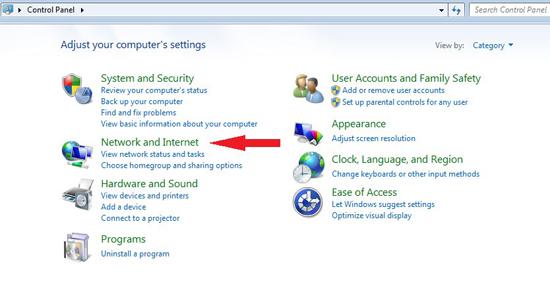
2) When the ‘Control Panel’ pops up, click on the heading that says ‘Network and Internet’.
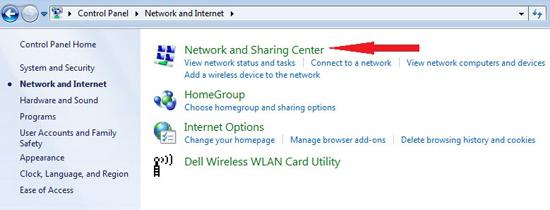
3) Then, in the ‘Network and Internet’ panel, click on the ‘Network and Sharing Center’ link.
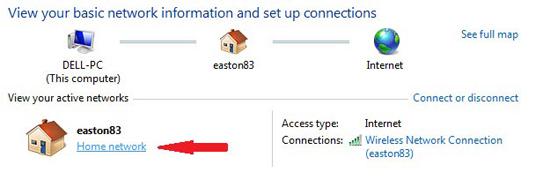
4) In the main column, find the heading ‘View Your Active Networks’. You will see the wireless connection that you are currently connected to.
5) Below the name of the network, there will be a link that states the type of network this connection has. Click on the link.
6) The ‘Set Network Location’ panel will pop up.
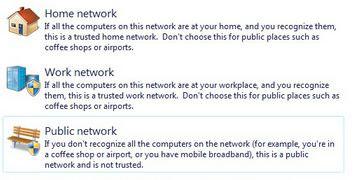
7) Select the type of network you’d like this connection to have; Home, Work or Public.
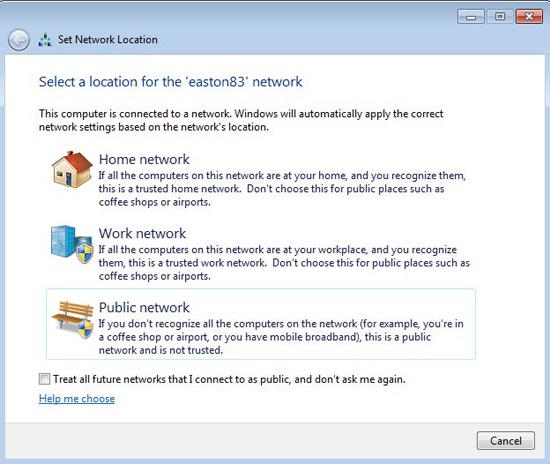
8) There is no ‘OK’ or ‘Apply’ button here, as soon as you choose and click a network type, the settings will automatically be applied.
9) If you made a mistake, repeat from step 1.
Congratulations, your new network type for this connection is now saved!

