 Do you often click on the explorer icon on your taskbar, but you don’t like the fact that it is opening the Windows 7 libraries by default?
If you want to open another folder, you can change the default folder of the Windows Explorer quite easily. Read this.
1. Step Close ALL open explorer instances. Hold down Shift and right-click on the explorer icon on your desktop at the same time.
2. Step Click on Properties.
3. Step We will modify the Target: %windir%\explorer.exe
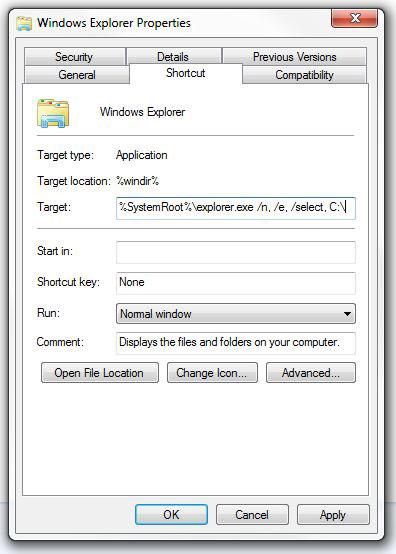
4. Step We’re going to remove the target and replace it with: %SystemRoot%\explorer.exe /n, /e, /select, C:\
Adding a path to specific folder
5. Step Optionally, add the path to the folder that you want to open, e.g. C:\MyFolder. Then you would replace it with %SystemRoot%\explorer.exe /n, /e, /select, C:\MyFolder\
Tip: If the folder that you enter does not exist the Explorer will open the User folder by default. If the folder exists it will not open the folder, instead it will open the explorer and select the folder that you entered as a target. Keep this in mind and create another subfolder if you want to open a specific folder by default.
6. Step If you want to open the folder C:\MyFolder\ add a subfolder and add this to the path, so that the target would be:
%SystemRoot%\explorer.exe /n, /e, /select, C:\MyFolder\subfolder\
I hope this will help you if you want to change the Windows Explorer default folder in Windows 7. Again, keep in mind that the Explorer will only open the root directory of a folder and select the folder, that means you have to create a subfolder or it won’t actually open the folder.

