It’s quite easy to change DNS settings in Windows 7. The TCP/IP defines how your computers communicate with other computers.
Steps to change DNS server in Windows 7
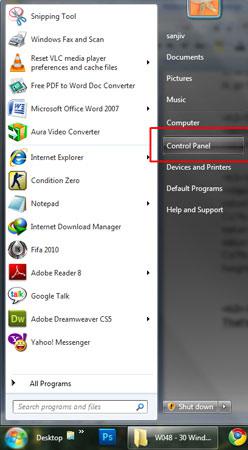
1. Step Click Start >> Control Panel
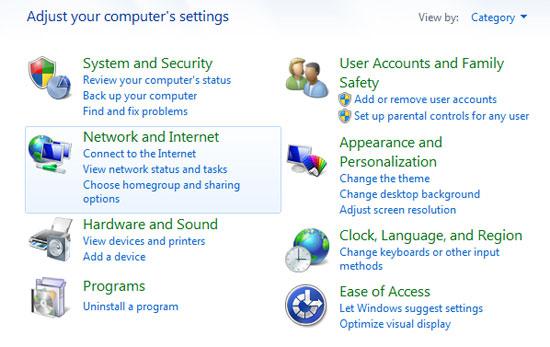
2. Step Click ‘Network and Internet’ link.
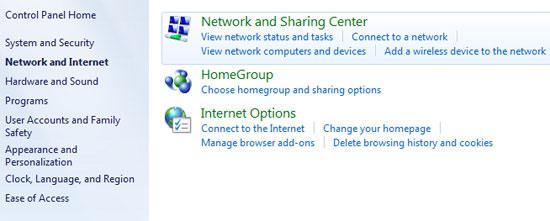
3. Step Next, click on ‘Network and Sharing Center’.
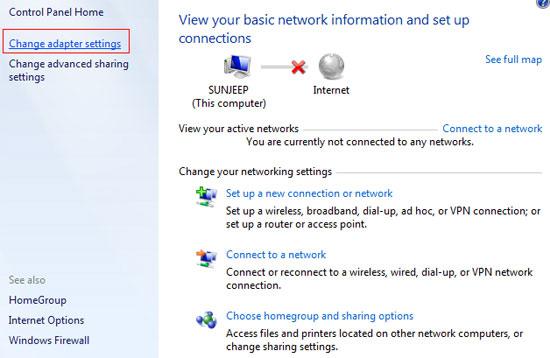
4. Step Click on ‘Change adapter settings’ on the left side of the window.
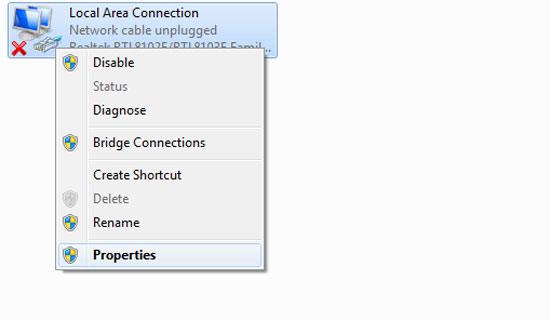
5. Step On the next window, right click ‘Local Area Connection’ and select ‘Properties’.
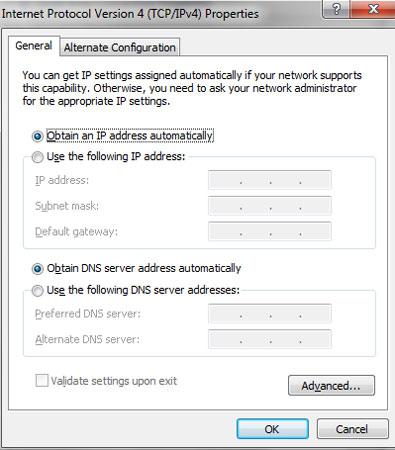
6. Step Double-click on ‘Internet Protocol Version 4 (TCP/IPv4)’

7. Step Lastly, in the ‘Internet Protocol Version 4 (TCP/IPv4)’ Properties box, you can make changes and add your DNS Server. Select the checkbox “Use the following DNS server address” and enter your DNS server IP, for example 192.168.2.254. Often, routers and other network devices use a very high IP like 254 for the default gateway. For your own IP you should therefore always pick an IP between 5-100.
Video
Conclusion
With those steps you can change dns server details in Windows 7.

