Follow this guide if you want to learn how you can install steam games across multiple hard drives on your Windows Computer.
Moving Game Installs To a New Directory
Steam does a pretty good job of automatically and seamlessly organizing your games content and installation files under their respective folders. Whenever you download a new demo or game it is unlikely you will even see a Windows explorer window as Steam takes care of all it in the background.

What happens when you run out of space and need to use a new hard drive? Or even a new computer ? As all the games are licenced to your Steam account -not your computer- there are no legal issues with moving them. The process itself is also quite simple once you know what you are doing.
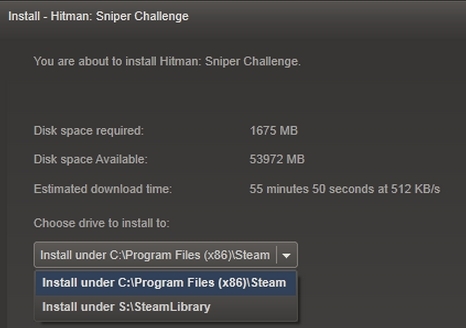
When you install steam you will be asked during the process to select a directory for all games to be installed into. By default this tends to be C:\Program Files\Steam\steamapps.
Step by Step
1. Step
First step involves logging out of Steam. Just because Steam is not open in front of you does not mean it is not running in the background so check your task manager or currently proceesses.
If it is running, sign out of the account you are using and exit Steam.
2. Step
Next you will need to navigate to the folder that is currently assigned to your Steam data files. As mentioned by default this tends to be C:\Program Files\Steam\steamapps. However this is based on the suggestion Steam gives when installing the programe so if you changed the directory during the install make sure to navigate to that folder instead.
The folder itself should be called SteamApps so you can always search it under Windows Explorer if you are having problems locating it.
3. Step
Once you have located the folder you will need to Delete all of the files and folders. All EXCEPT the SteamApps folder and the Steam.exe executable file itself. Just to make sure you got that – do not delete the SteamApps folder as that is the one containing all your Steam data that you will be moving!
4. Step
Now simply cut and paste the SteamApps folder to the location you desire. Whether this is on an external drive or another directory on your computer – do not just copy and paste. Move the content in its entirety to ensure the process goes smoothly and there are no conflicts with the Steam software later.
5. Step
You are now ready to relaunch Steam. This will take a little longer than usual so do not worry. Steam will update its directory listings with the new location of the SteamApps folder and you will be ready to get back to gaming once this is done.
Bear in mind that the directory you moved the files to will now be the default location for your future game and demo installs. If you need to change the directory in future simply repeat the steps of this guide.
Conclusion
One important thing to remember before moving your SteamApps folder is to completley back it up before you start.
It is always a good idea to back up you computer and important files regularly but especially so when you are moving directories to avoid corruption issues or the risk of files getting accidently deleted.

