To remove recent documents in Windows 7, follow the steps provided in this tutorial.

Steps to remove recent documents in windows 7
1. Step Click Start >> Recent Items. Here you will see the recent documents that you have opened in Windows 7. To disable it, follow this tutorial.

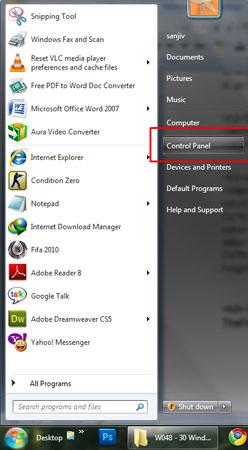
2. Step Click on the Start and Control Panel.
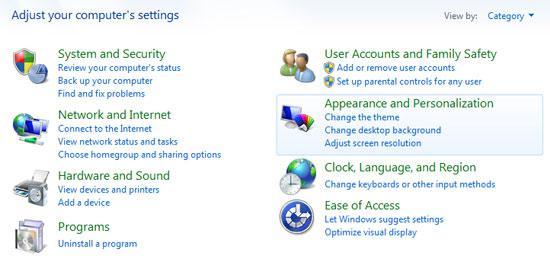
3. Step Click on the Appearance and personalization.
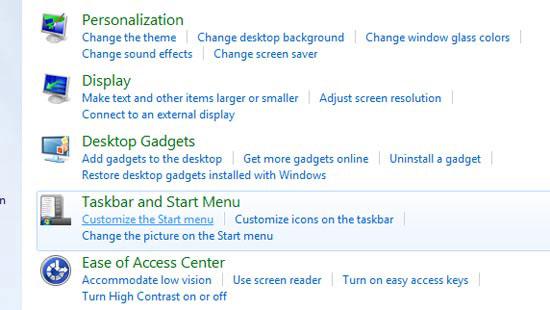
4. Step Then on the next window, click on the Customize the Start menu link.
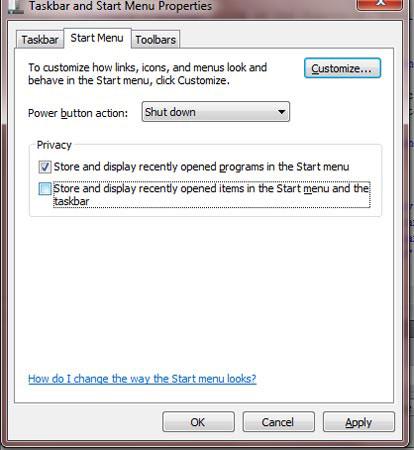
5. Step On the Taskbar and Start Menu Properties window, click on the Start Menu tab.
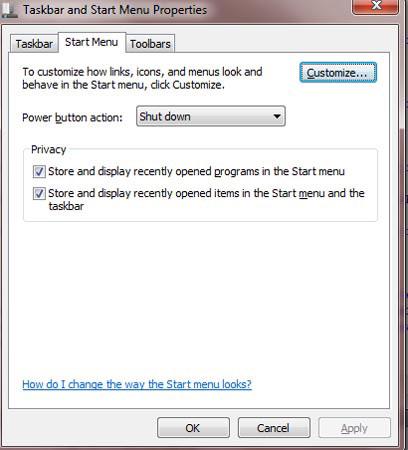
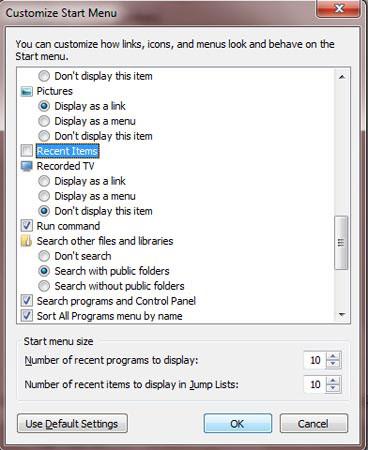
6. Step Click on the Customize. Scroll down and find Recent Items. Uncheck or untick to disable it from start menu. And finally click OK.
7. Step In next step, uncheck / untick by clicking Store and display recently opened items in the Start menu and the task bar. Then click Apply and OK. That are the complete steps to remove recent documents in Windows 7.
Videos
Conclusion
For security purpose, you may not want remove recent documents that you have viewed from your Start list.

