First of all you need to have the new font downloaded or copied to your computer that you want to add or install to your windows 7 computer.
Steps to add fonts to windows 7
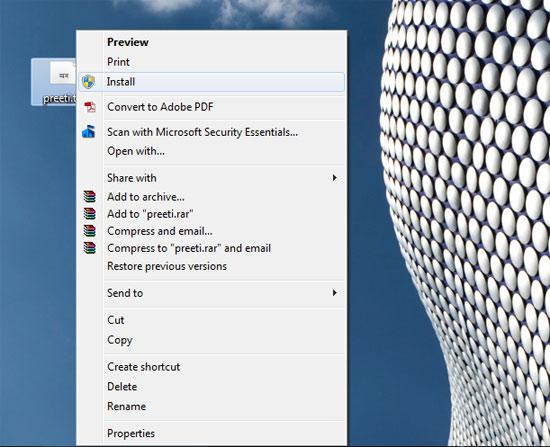
1. Step Locate the font that you want to install or download to your computer. In my case, in the desktop there is a font named ‘preeti.ttf’ that I want to install or add.

2. Step Right click the font (you want to add / install) in your desktop and select ‘Install’
3. Step Then Installing font message is shown. Once installing font finishes, the message disappears.

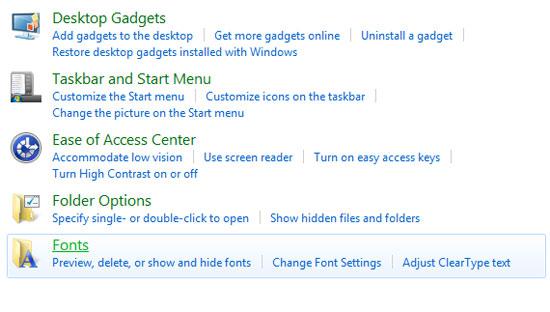
4. Step Now to check whether font installed correctly or now, click Start >> Control Panel.
5. Step Click Appearance and Personalization.

6. Step Click Fonts.
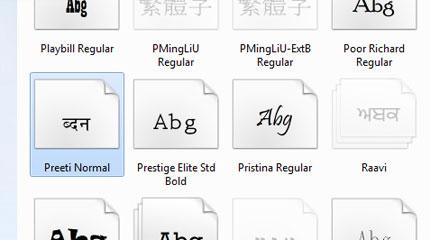
7. Step Scroll down and locate the font that you have just installed. In my case, I have just added or installed font named ‘preeti’. I can see ‘Preeti Normal’. That means, the new font is added. That’s all!

Videos
Whenever required, we have to add fonts that are not available on our system in order to display characters correctly.

