To display a message on Windows 7 startup, follow the steps provided in this tutorial.
Steps to display a message on Windows 7 startup
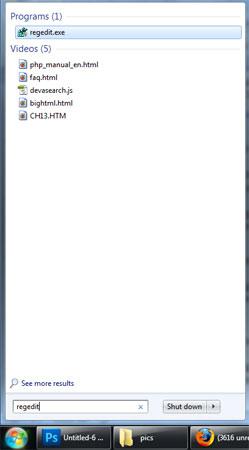
1. Step Click Start and type regedit in the ‘Search’ text box and press enter.
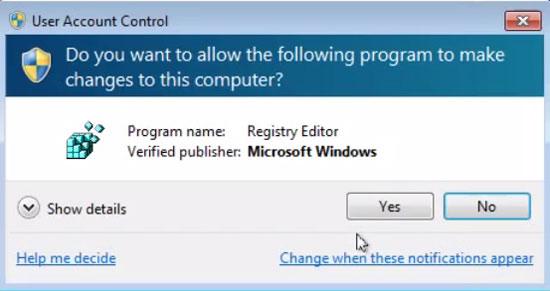
2. Step If you are asked for user access control then click yes.
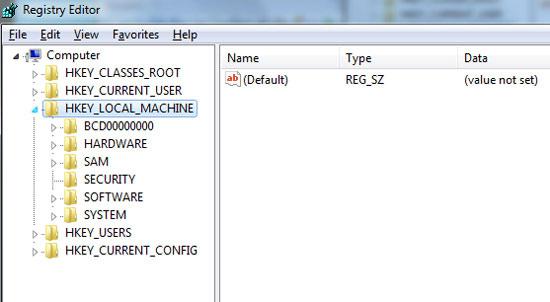
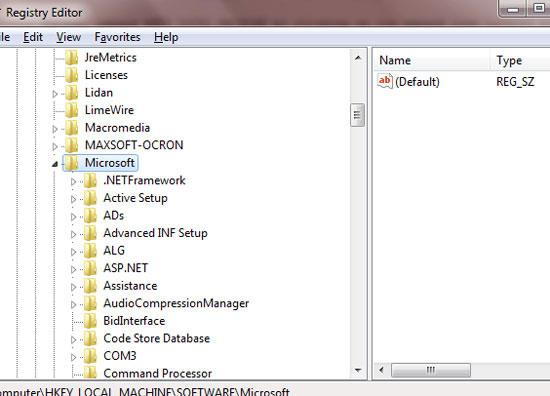
3. Step In the Registry Editor, expand HKEY_LOCAL_MACHINE by clicking on its expand icon located at its left.
4. Step Expand SOFTWARE by clicking on its expand icon

5. Step Under SOFTWARE, find Microsoft and expand it by clicking on its expand icon located at its left.
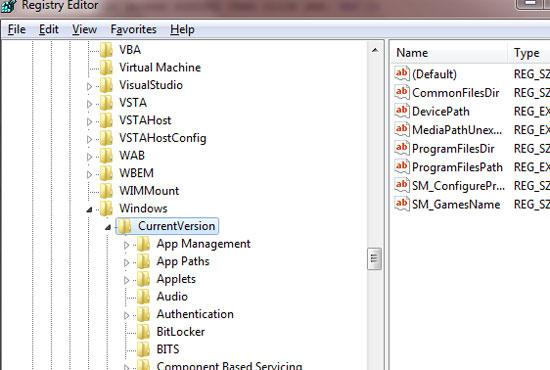
6. Step Under Microsoft, expand Windows and right beneath it expand CurrentVersion by clicking on its expand icon located at its left.
7. Step Under CurrentVersion, find Policies. Expand it. And under Policies, click System.
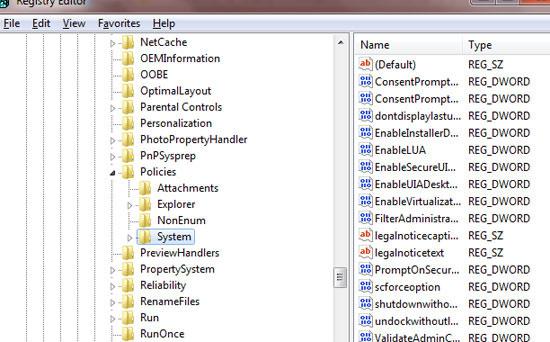
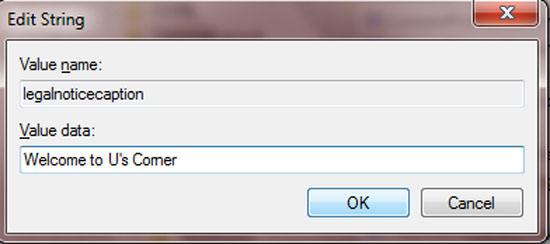
8. Step In Registry Editor, on the right side you will see LegalNoticeCaption. Double click on it to open it.
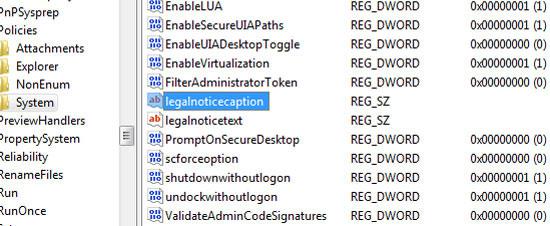
9. Step Enter the message you want to display on Windows 7 startup. Click OK.
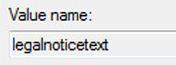
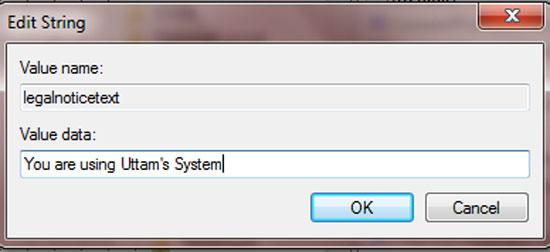
10. Step Similarly open legalnoticetext located on the right pane in the registry editor and enter the message you want to display each time when Windows 7 boots and finally click OK. That are the complete steps to display a message on Windows 7 startup.
Videos
Conclusion
Everytime when your Windows 7 boots up, you can display your own customized message. This might be helpful to display certain important messages whenever someones else uses the computer.

