Mozilla Thunderbird has a very powerful autoresponder functionality – you can easily use it to send out-of-office, vacation or any other kind of automatic email replies.
In this article, I’ll show you exactly how to set up an auto-responder in 6 steps
Setting up autoresponders on your local computer
Most of the time, autoresponders are used to reply specific messages in an automated fashion, but they are also used for automated out-of-office and on-vacation emails, too. Usually, web accounts or special servers are used, but if you can leave your office or home computer on 24/7, you can easily set it up to send the autoresponder emails.
How to set up an autoresponder email in Mozilla Thunderbird
One of the most powerful email clients for desktop computers is Mozilla Thunderbird, which has pretty much all of the features of Outlook 2010, with the added advantage of being completely free and extensible with third party add-ons. Here’s how to set up autoresponders in Thunderbird:
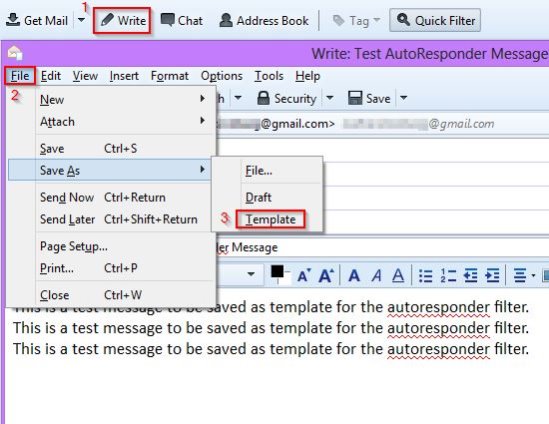
1. Step First of all, you’ll need to create your autoresponder message and save it as a template. Open Thunderbird and click on the “Write” button at the top.
Create your message, then go to the “File->Save As” menu, and click on Template. The email will be saved as a template, which you’ll be able to select later as the autoresponder message.
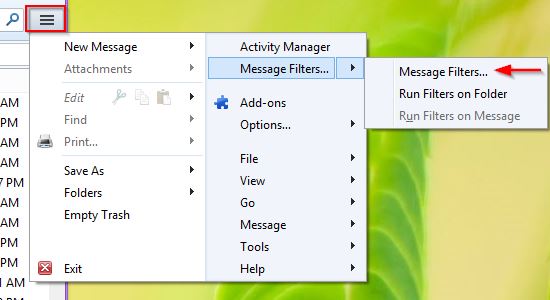
2. Step Now close the message window and click on “Message Filters…” in the “Options->Message Filters” menu.
Options are hidden behind the inconspicuous three lines button right next to the search bar in the top right corner by default – don’t know why Mozilla decided that would be a good thing.
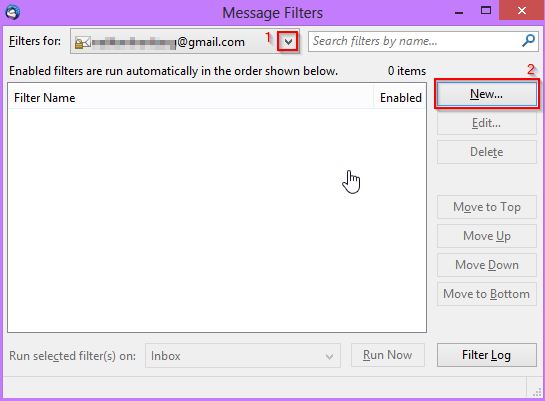
3. Step In the new window, first select the account you want to create autoresponders for (they will be sent from this address, as well), then click on “New…” to create the autoresponder function/filter.
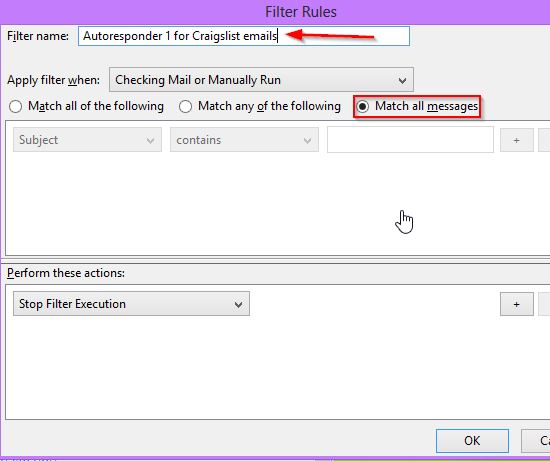
4. Step Give the filter a name, then choose the conditions when to send the autoresponder. You can choose from a wide range of conditions – respond only to emails with specific keywords in the subject/body, respond only to emails that are not marked important, emails that have attachments, and more.
In this case, let’s say I use this account for Craigslist ads, so I’ll send an autoreply to all emails (it can contain contact details, attachment with more photos of the products, more information, etc. – I don’t need to send all that manually).
Just choose “Match all messages”.
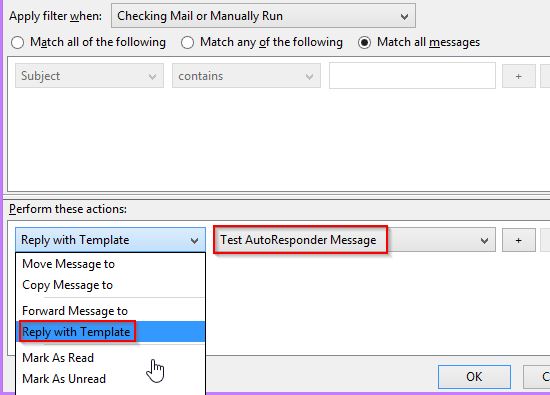
5. Step Right below, choose the action to perform – in this case, it’s “Reply with Template”. After selecting that option, you can select the template you saved in the drop down menu next to it. Sadly, you can’t send multiple replies, but you could create several of these filters for that.
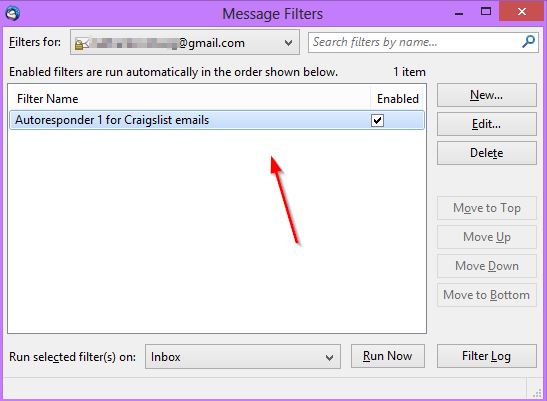
6. Step That’s it – after clicking OK, you’ll see the autoresponder filter in the list and it will be active right away. You can choose to apply it on existing emails – i.e. send the autoresponder to the messages that are already in the Inbox – using the “Run Now” button.
That’s pretty much it – with several accounts and these filters, you can automate a large portion of work – it’s a really powerful feature to have, so be sure to use it!
Conclusion
If you need to send autoresponders to your clients or simply send automatic replies when you’re out of office, using Thunderbird is a great way to do it – be sure to try the functionality when you get the chance.


Thanks for this helpful post. I’ve just installed Thunderbird, and for some reason when I try to create a filter, the “Reply with Template” option isn’t in the menu. I have everything else–Copy, Forward, etc.–but not that one. Can you help?