There are many reasons why your PC slows down after a while. It can happen due to virus attacks, many programs running simultaneously, a small virtual or physical RAM or the fragmentation status of your hard disk.
Windows 7, like its predecessors provide with the Disk Defragmenter option in order to solve this particular problem.
Fragmentation happens when files are saved, modified or deleted over time; the changed files may exist in a different location that the parent files taking up space uselessly. The Disk Defragmenter will help you to rearrange such data on your hard disk and fuse these files with its parent files so that your PC/Laptop can run efficiently like it should.
The new thing about Windows 7 Disk Defragmenter is that the user can follow the defragmenting process as it runs. In order to defragment your system’s hard drive, all you need to do is go to Start>All Programs>Accessories>System Tools>Disk Defragmenter OR you can simply type Disk Defragmenter in the Start menu’s search bar.
After you have opened the Disk Defragmenter, you can see all your drives have been displayed.
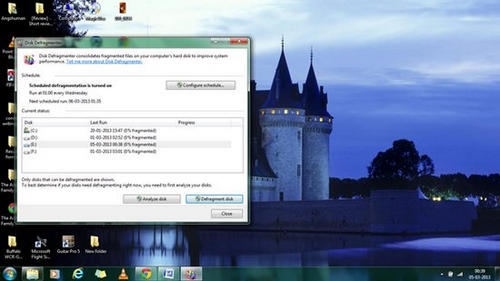
It is advisable that you defragment you disks on a regular basis or create a schedule for your computer to start the defragmentation process automatically. To activate auto-defragmentation, click on the ‘Configure schedule’ button, the following dialog box will be displayed:
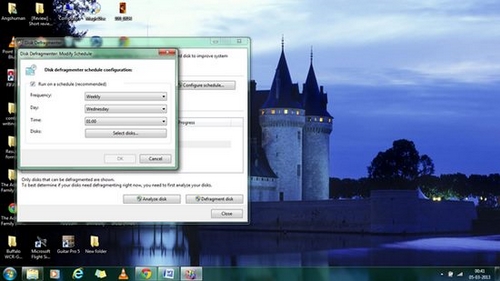
Select your schedule and then click on ‘OK’.
You can select the drives that you need to defragment by analyzing them first using the ‘Analyze disk’ button and then to start the defragmentation process, click on the ‘Defragment disk’ button. In case you want to cancel the defragmentation process, click on the ‘Stop Operation’ button and the entire process will be aborted.

