One of our Facebook readers wanted to know how to hide drives in Windows 7. We recently used the diskpart command to remove a write protection from a hard drive, it can also be used to hide drives.

1. Step Open a command prompt
2. Step Enter diskpart

3. Step Confirm the UAC prompt
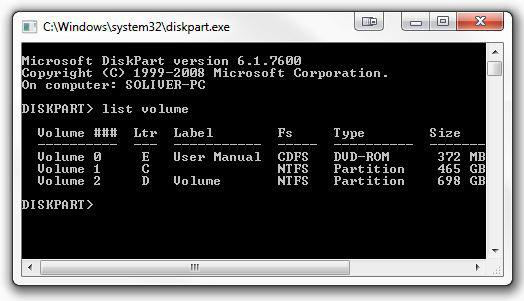
4. Step Enter list volume
5. Step Now, we are going to select the hard drive that we want to hide. If you only want to hide a partition, you still have to select the hard drive first.
Enter select volume E (replace E with the letter of the hard drive that you want to hide or with the number of the volume)

6. Step While the volume / hard drive is selected enter Remove Letter E
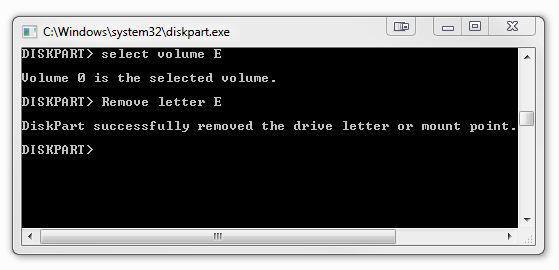
We are not removing the hard drive, we only remove the letter of the hard drive so that the hard drive will be hidden and can no longer be accessed as hard drive E.
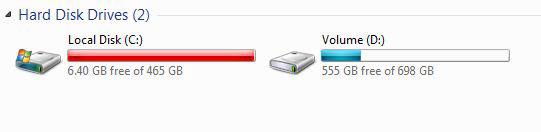
7. Step Open the Windows Explorer and you will see that the hard drive is now hidden. In this example I removed hard drive / volume E, which is now hidden.
How to unhide hidden hard drive
1. StepRepeat steps 1-4
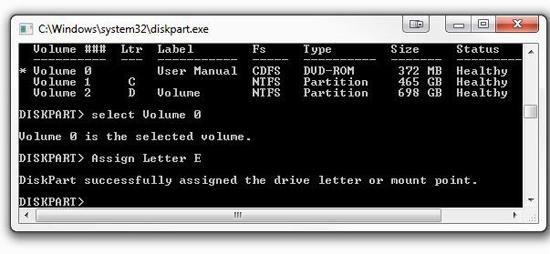
2. Step Now, there is no longer a letter assigned to the hard drive, but it still says it’s Volume 0 or Volume 1, etc.
3. Step Enter Select Volume 0 (if Volume 0 is the hidden hard drive)
4. Step Enter Assign Letter E (if you want it to be E)
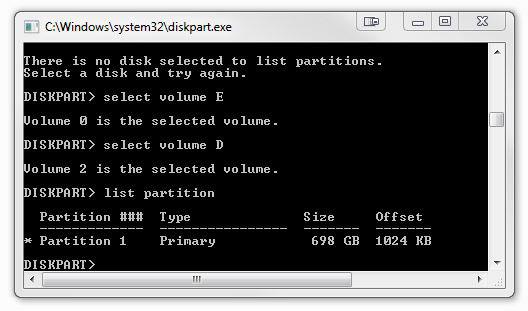
List Partitions
You can also use diskpart to list partitions, but partitions will be listed as volumes anyway, so you don’t have to change anything if you want to hide specific partitions.