In this guide, I will be testing a digital pen with handwriting recognition features – this pen is able to capture whatever you write onto a blank sheet of paper and store it in a notemanager, then export it to JPG or actual text documents
Jump directly to preparing the digital pen
Preparation: What You Need – IRISNotes and USB Extension Cable
In this guide I will be extensively testing the digital pen produced by IRIS Inc. along with their software IRISNotes.
IRIS Inc provides some of most innovative products and also provides various document scanner pens and even various cloud solutions
You can buy this digital pen here:
You will also need approx 30 minutes to follow this guide, a sheet of paper and preferably a USB extension cable because the one that IRIS includes is a little short
Step 1: Preparing The Digital Pen
Before you can actually use the digital pen, you obviously need to insert some batteries. The IRISNotes pen package should include 2 batteries
1. Step Remove the the pen cover (twist it clockwise)
2. Step Add the batteries carefully
3. Step Add one of the refills into the pen
Step 2: Add Paper To Clip
On the back of the receiver there’s a clipper – add a blank sheet of paper
Step 3: Connecting The Receiver
1. Step Correctly connect the IRISNotes USB device and make sure to install IRISNotes Express. Before using the pen wait 30 minutes until it is partially loaded
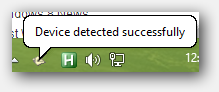
1a. To turn on the receiver you need to hold the button on the receive for 5 seconds – if it still won’t turn on you should check your USB connection or USB cable – in some cases a USB extension might not work properly
1b. After you have connected the USB receiver it will instantly turn on and show a loading bar – also in the system tray a popup should appear saying device connected
Step 4: Using The Notes Manager To Upload Notes
2. Step After successfully installing the software, waiting 30 minutes for the pen to load and a reboot you will be greeted by a program called Notes Manager
3. Step The Notes Manager program will do the work for you and recognize your hand-writing and convert it to characters – a procedure known as OCR, short for optical character recognition
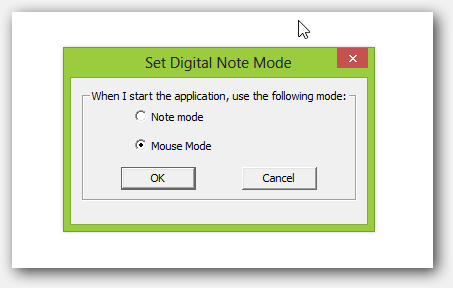
4. Step You will be asked what mode to use – you can either pick the “Mouse” or the “Note” mode – the mouse mode has the advantage that you can use the pen for “mouse” clicks
Testing The Pen
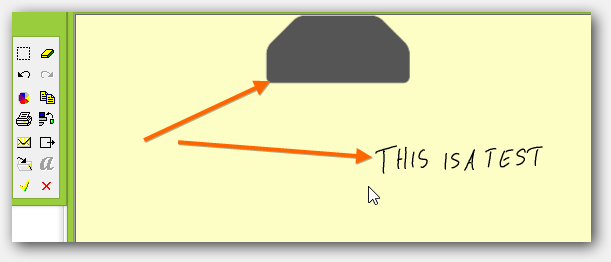
Finally, you should be all set and can start writing a first test note – to make things easier for the built-in OCR software I’ll be using capitalized writing.
When you first write a note a new window will appear
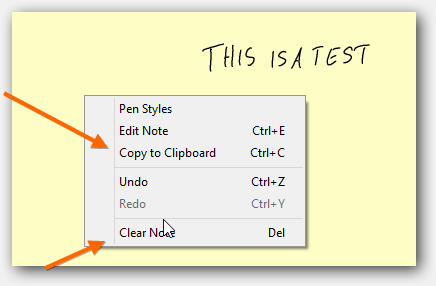
When you right-click into the note you can copy this directly to the clipboard, clear the note or edit it
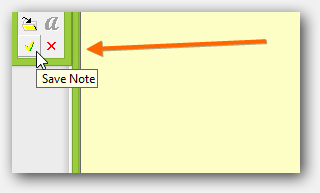
If you don’t want to edit the note, click the Save button
Your last notes will appear
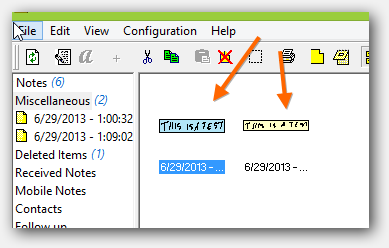
Then let’s see how well this converts to text using the built-in OCR
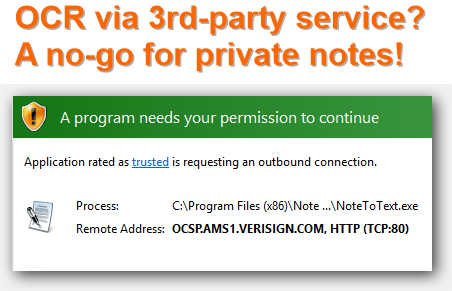
But that’s when it happens, the software is requesting an outbound connection – OCR via 3rd-party services? A no-go for private notes. This could easily be intercepted and if you intend to use this for more than private notes, this won’t do it
I will be on the lookout for full-fledged OCR software that will help to convert notes to text in an upcoming guide and let you know what alternatives there are
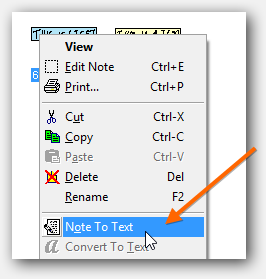
Anyway, let’s see if we can export our notes properly
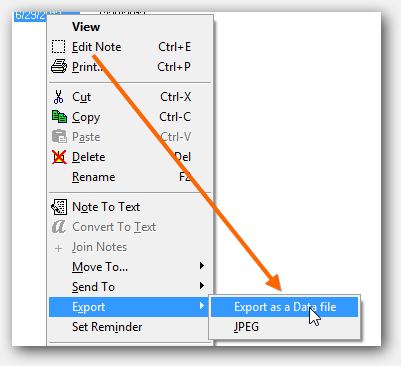
The output format is called pegvf and can be opened with IRIS’s Note Manager
However, you can also export notes as JPG files and then use professional OCR software to convert your pictures to real text documents and this is what I intend to show you next
Stay tuned for an update on this
Disclosure: I am not paid by IRIS Inc. for this article, nor am I affiliated with IRIS Inc

