 I have a NAS called “my book live duo” that I wanted to hide from my network so it could be used for backups, but how do you hide a NAS or network device?
Access Drive Via Putty
If the network device you own allows you to access it via shell, then it’s quite simple to hide it
1. Step Download putty from here
2. Step When done, open putty.exe
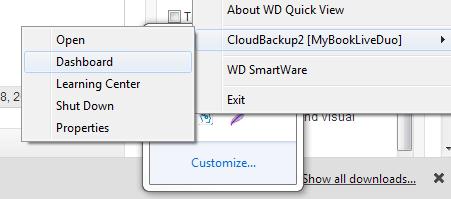
3. Step Now click on the arrow in your system tray and check if WD Quick View is active (little blue head icon) – if it’s not you need to install the software that is stored on your WD My Book Live Duo
4. Step Right-click on WD Quick View, select your device and click on Dashboard
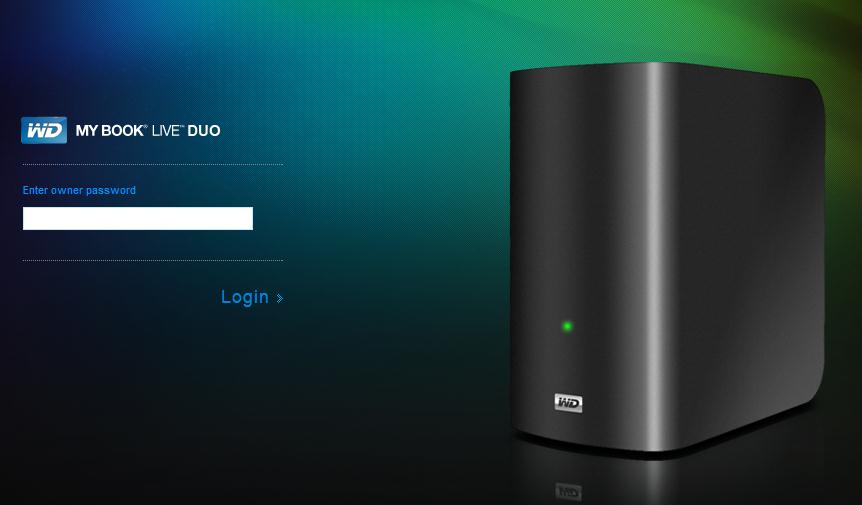
5. Step At the top you should now see something like http://192.168.2.45/UI/login
You can log into this dashboard with the username “admin” and password “admin”. From here you can change the name of the network drive and create “shares” – shares are folders that contain your files. You should create one share for every filetype e.g. one for Videos, one for Documents, one for Backups, one share for iTunes and so on. Do all of that and then RESTART your network device using the interface
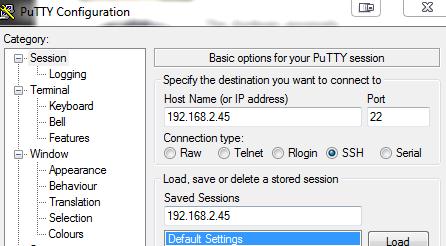
6. Step Remember the IP address e.g. 192.168.2.45
7. Step Open Putty.exe again and now at the top enter into the field “Host Name” the IP e.g. 192.168.2.45
8. Step Enter a “Saved Sessions” name
9. Step Next, click on Save to store the session and then on Open
10. Step When prompted for “login as:” enter root as the username and the password is welc0me with a zero. Do not enter any quotes
You will see this:
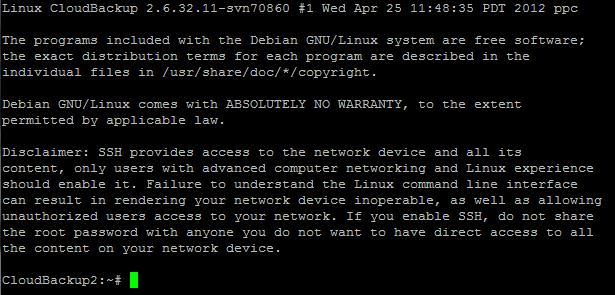
Modifying Samba Config File
11. Now enter pico /etc/samba/smb.conf
12. Right below “server string” should be an empty line. Enter browseable = no on a new line

13. Hit CTRL + O to save and hide your network device (making it unbrowsable), then hit CTRL + X to exit
Ok, what’ve done now is to change the samba configuration of the Linux supported NAS drive. You can no longer see the share when accessing the NAS drive. HOWEVER, if you know the name of the device you can simply access the NAS drive like this
1. Step Open the Windows Explorer
2. Step Into the address bar enter \\CLOUDBACKUP\\share ((where CLOUDBACKUP is the name of your NAS device and share the name of your folder or share that you created in step 5
Do you still have questions? Let us know below
Addition By Readers
1. Step Enter pico /etc/samba/overall_share
2. Step Modify browseable = yes


Great article… thanks Oliver. There’s also a way to make individual shares unbrowsable. Use pico to edit /etc/samba/overall_share as you did, and there is a “browseable = yes” line in a section for each individual share. This can be changed to “no” for the shares you don’t want browseable. Then save the file as per your instructions.
i would like to ask you a question.
is browseable=no only affect window explorer only? since i have no problem to see the folder ( i still unable to access the file due to folder ownership )
tq. sorry for my bad english.
While this article was sorta useful, it doesn’t do what the title says it should. I wish to hide the entire device from showing, but this seems to only hide the private shares and not the device itself. I wish to do the latter. I am using windows 10, followed the instructions, rebooted the device but when I go to networks, the device still shows and I can see the default public shares, but not the created private shares.
I would like a method to hide the device from even showing up in any network list.