 Most people have a lot of browser bookmarks and history that they use to quickly access their favorite sites and Web apps. Keeping all of that synced between your PC, smartphone and tablet is very desirable, and with Xmarks, it’s very easy to do.
Keeping browser data in sync across devices with Xmarks
Since smartphones became a mainstay in everyone’s pocket and tablets started to replace laptops, a lot of people now carry several devices from which they access the Internet, all of which have different bookmarks, history, passwords and open pages stored on them. Xmarks, an online service, lets you sync everything across all devices, not to mention that it basically backs up all your bookmarks to a safe online account – it’s undoubtedly a must have for any Internet user.
Xmarks can sync bookmarks, history, open tabs and even password, although the latter requires you to have a separate LastPass account. Syncing with mobile devices requires you to have a premium account, but at only $12 per year ($1 per month!) it’s definitely worth it.
Setting up Xmarks and syncing your data
I’ll show you how to quickly and easily set up Xmarks in Chrome – after the initial set up, you basically just need to download the appropriate addons/plugins/apps from the official site or the iTunes/Google Play stores and log in into your account – everything else should be set automatically.
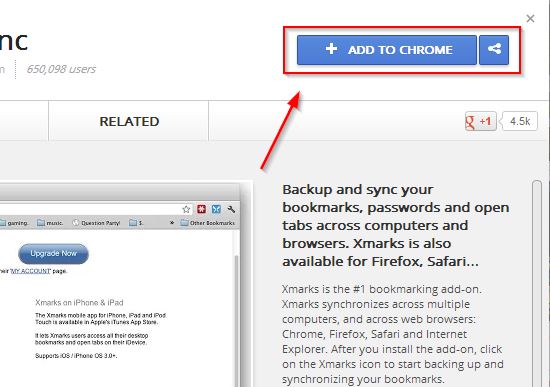
Step 1. So, open the Chrome browser and install Xmarks either from the official website (Xmarks.com) or from the Google Web Store:
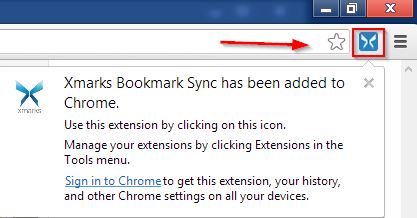
Step 2. Once installed, you’ll see the Xmarks icon and a notification in the top right corner. Click on the icon to start the initial setup.
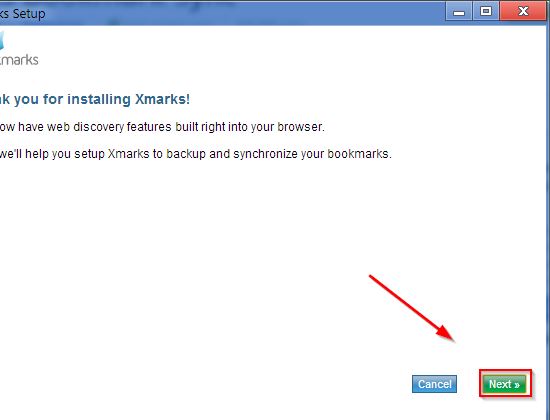
Step 3. On the new window, click Next to continue.
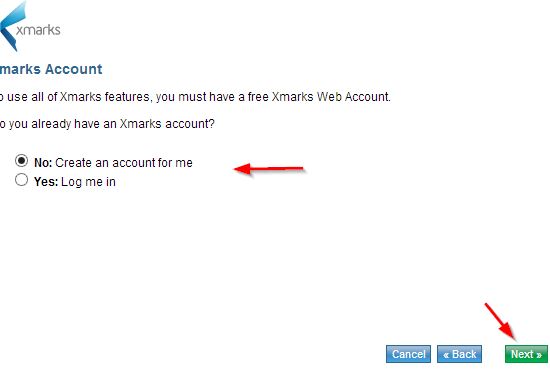
Step 4. If you already have an account, you just select “Yes, Log me in”. But since we’re setting it up the first time, we’ll need to create an Xmarks account, so select “No: Create an account for me” and click Next.
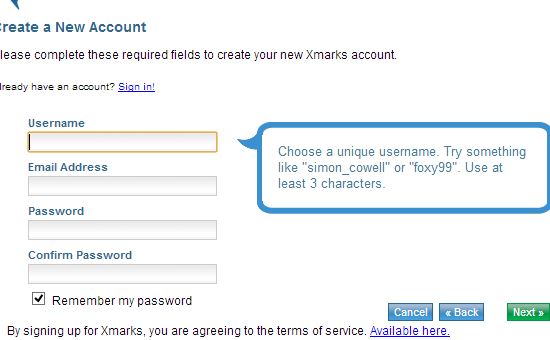
Step 5. Create an account using your email, an username and a strong password – you can leave “Remember me” checked if you’re on your computer so you don’t get asked your username and password on every sync.
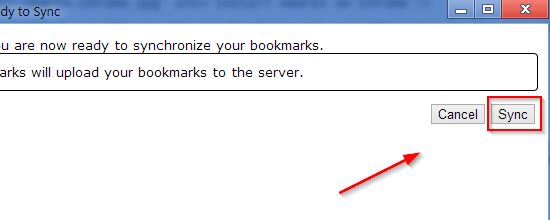
Step 6. Once the account has been created, go to your inbox and click the link in the confirmation email – you can continue the setup without that, but it’s necessary as you need to activate your account for regular sync. Click on Next and you should see the message “You are now ready to synchronize your bookmarks”. Just click the “Sync” button:
Step 7. That’s it, Xmarks will sync your history and bookmarks automatically. You can do it manually from the icon in the top right corner, too. You can view your data on your Xmarks account and change settings from the icon menu, as well.
![]()
That’s about it – the first setup is the hardest. You can install the addons on any browser, on any computer and it will sync right away once you enter your login details and automatically when you open and/or exit the browser – it’s very convenient.
Conclusion
Keeping your bookmarks and history backed up and in sync across all of your devices is very convenient – you can easily open a webpage you bookmarked on your PC on your Android phone and vice versa, for example. No more copying addresses manually or using complicated tools – just install Xmarks, configure it and you’re good to go.

