The host name aka the computer name is easy to change. If you want to change the host name in Windows 7, follow this small guide.

Host name is used to identify each user that has an account in a computer. All users will have their own separate and personal folders to store their files. In the case where you need to change the name of your computer or host name, this can be done easily. The following steps will teach you how.
1) Make sure you are signed in as the administrator.
2) Click on the Start button.
3) Then, right-click on the ‘Computer’ menu and in the context menu, click on ‘Properties’. This should open up the ‘Systems’ panel.
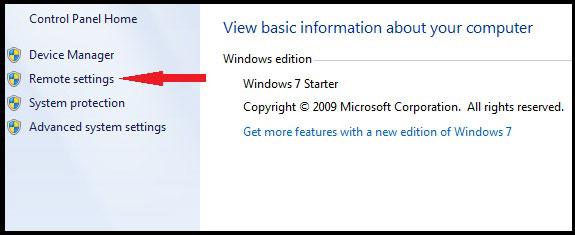
4) Click on the ‘Remote Settings’ to the left of the panel.
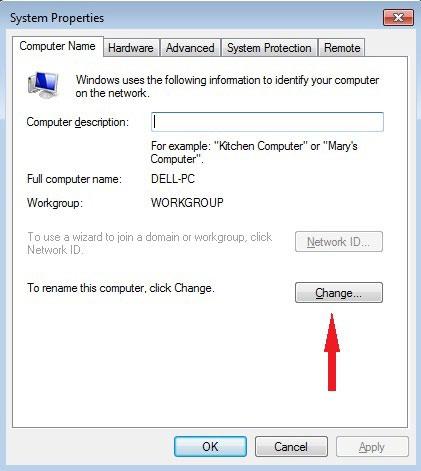
5) You will then see the ‘System Properties’ panel. Go to the ‘Computer Name’ tab. You should see a ‘Change’ button with the description ‘To rename this computer, Click Change.’
6) The ‘Computer Name/Domain Changes’ panel will pop up.
7) Click on the field where it says ‘Computer Name’ and change it to something you like.

8) Click ‘OK’ once you are done.
9) You new computer / host name is now saved.
You can change your host name as frequent as you want, and anytime you want to do so, just repeat the steps from step one.

