If you want to convert/change a M4A file to a M4R file in Windows 7, read this tutorial and you’ll have that M4R file ready for your iPhone or mobile device in no time!
m4a is a music file that is slowly gaining popularity over the more commonly used mp3 file type because of its superior file quality over the mp3s while the m4r files are music files for ring tones used in iPhone and are generally created in iTunes. If you don’t look forward spending any money on ring tones, you can create your own iPhone ring tones with your iTunes application. Just follow these simple steps:
1) Open up iTunes, or if you don’t have it, download and install iTunes. Open the application once the installation is completed.
2) Find the .m4a file that you wanted to convert to an m4r file. If it is not in the library, add it to the iTunes Music Library.
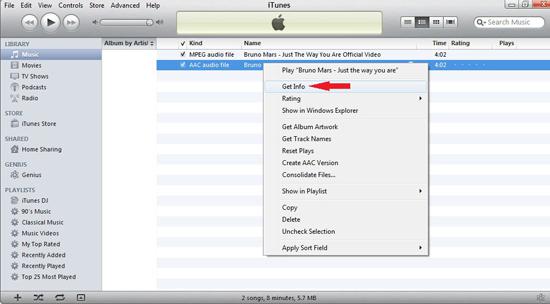
3) When you find the .m4a file in the library, right-click on the file name and click on ‘Get Info’ menu option from the list.
4) Then a smaller window will pop up, click on the ‘Options’ tab.
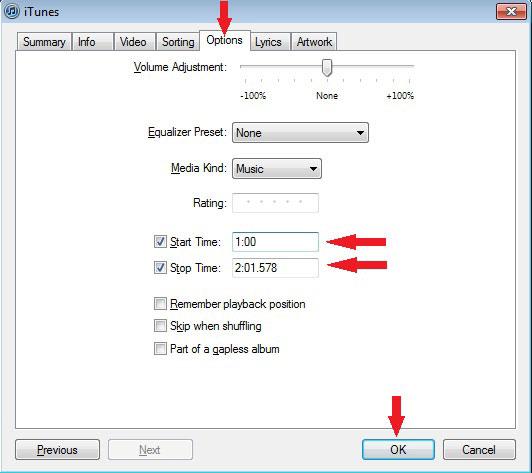
5) Enter the length that you desire for your .m4r file. Enter the appropriate values in the ‘Start Time’ and ‘Stop Time’ fields. The original .m4a file will be shorten to meet the values that you entered to make a shorter file for the ringtone. Click ‘OK’ to continue.
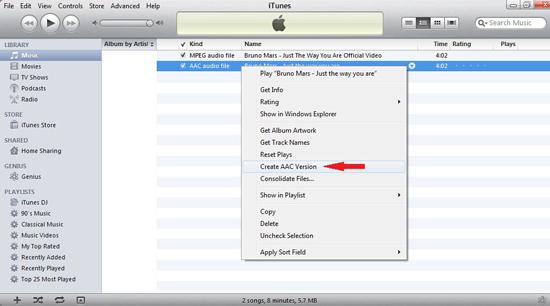
6) In the Music Library, right-click on the same file again. This time click on the ‘Create AAC Version’ menu option.
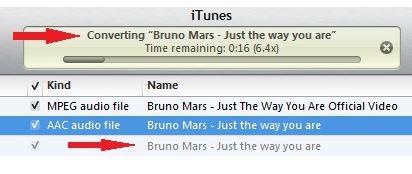
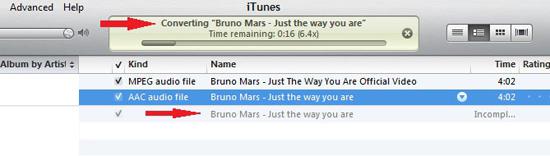
7) The cropped .m4a file will then be converted. Its progress will be shown in a grey box at the top of the window. A greyed out row for the new file will also be shown in the Music Library.
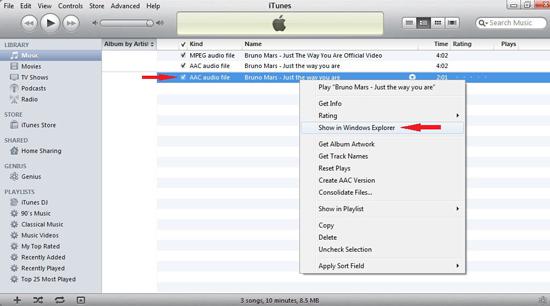
8) After the conversion is completed, the new file will be shown in the Library Music along with the other music files. To find the exact location of this new file, right-click on the new file, and this time click on ‘Show in Windows Explorer’.
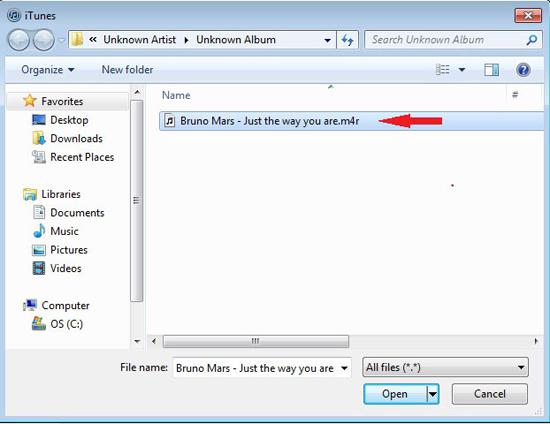
9) When you find the new file, rename the file’s extension from ‘.m4a’ to ‘.m4r’. Your ring tone file is now ready to be used.
One good reason to convert a .m4a file to a .m4r file for your iPhone ring tone is that you can crop the original song to play only the part that you like as your ring tone. Furthermore, the size of a .m4r file is a lot smaller than a .m4a file. Sure, it’s not a big deal, but it’s an advantage all the same. So go ahead and create your own ring tones today.


I am trying to make the ring tones but it doesn’t give me the option to change the file name. It isn’t able to be deleted or altered. I have Windows 7 home edition and it won’t let me. Any help???
If it isn’t working, click on Organize on the window. Select Folder and search options. This pulls up the folder options window. Click on the View tab.Uncheck the box for Hide extensions for known file types.