 Setting up autoresponder emails can be useful in a lot of situations. If you have Outlook 2010 installed on your computer, you can easily set it up to send automatic replies, and in this article I’ll show you how to do it.
Setting up autoresponder emails
Autoresponders, also called autoreply emails, are very useful in situations where you can not reply to the email yourself and when you have to send a lot of replies that contain the same message. In those cases, it makes more sense to leave the work to your computer – which obviously needs to be on and connected to the Internet all the time, but that is not a problem nowadays.
How to set up autoresponders in Outlook 2010
While you can get a dedicated email service or even server, it is not financially wise to do so unless you’re sending hundreds of emails per day or more. If you have Outlook 2010 on your computer, it is very easy to set up an autoresponder on your home or office computer. Here’s how you can do it:
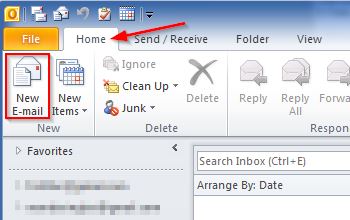
1. Step First of all, you’ll need to create the autoreply email itself. Click the “New Email” button and create your message (you don’t need to fill in the From/To/CC fields, by the way).
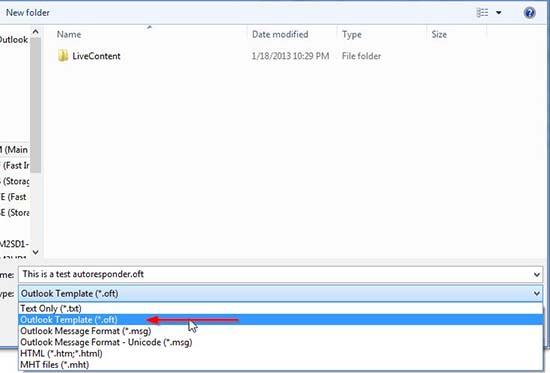
2. Step Once you’ve finished writing your message, click on “File->Save As” to save the email. In the “Save as Type” field, select “outlook Template”. The save folder may change to the default Outlook templates folder, but you can save this template wherever you want.
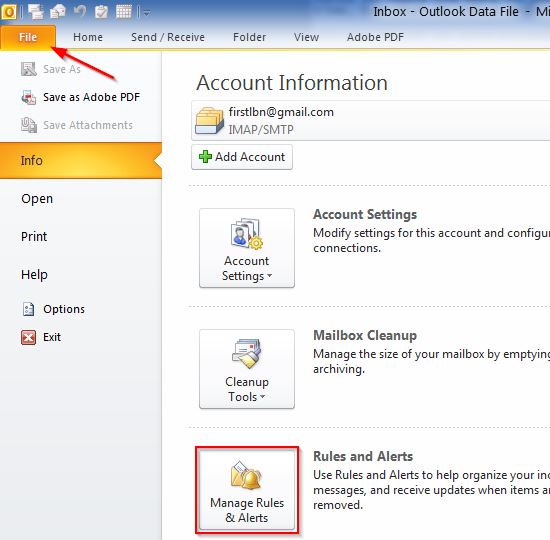
3. Step Now you’ll need to set up the rules for this autoresponder. Click on “File” then the “Manage Rules and Alerts” button.
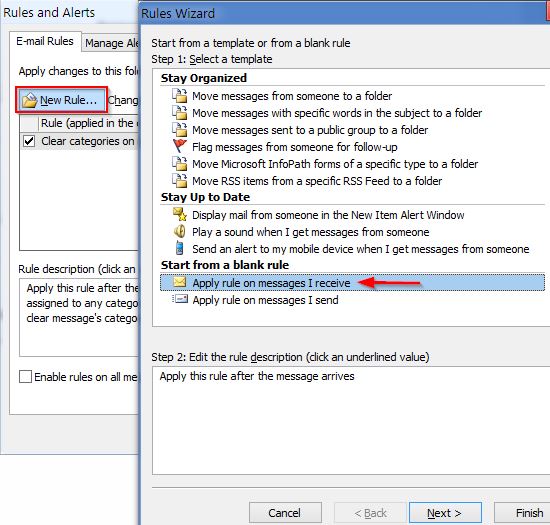
4. Step In the “Rules and Alerts” window, click on “New Rule…”, then select “Apply rule on messages I receive” in the Rules Wizard window.
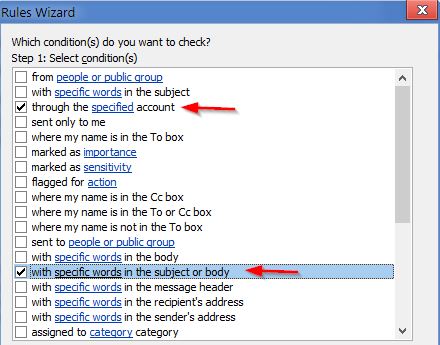
5. Step Unlike its predecessors, Outlook 2010 is really powerful when it comes to autoresponders – it lets you specify a lot of variables for a wide range of conditions. You can choose to send an autoresponder based on account, email size, date, importance, attachment, contact or even specific words in the Subject/Body/Address/Header.
The latter is extremely powerful – say you want to send a specific email (created beforehand as explained above) only to people who write about a certain product, let’s say it’s called “CarHydroX”. In 95% of cases, the product name will be mentioned in the subject field or email body, so you can let Outlook check for that keyword and send a reply automatically. In this case, you’d choose the conditions “Through the specified account” (just in case you use multiple accounts) and “With specific words in the subject or body”.
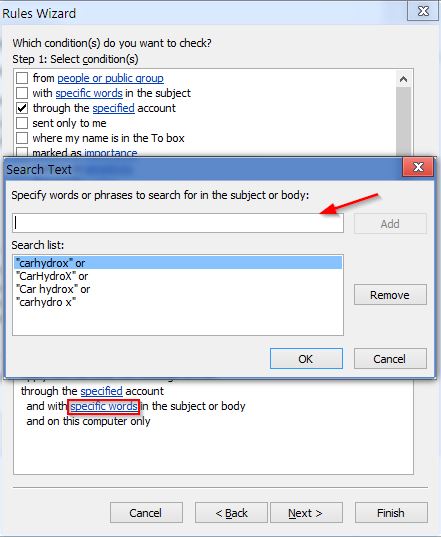
6. Step Right below the conditions list you’ll need to set up the chosen conditions themselves (by clicking the underlined values). In this case, you’ll need to select the specified account and the specific keywords – the latter in this case would be “CarHydroX, carhydrox, car hydro x, carhydro x” and any other combinations for the best accuracy.
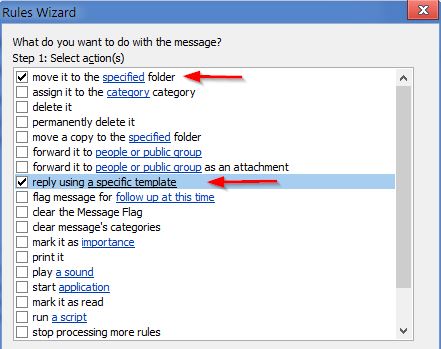
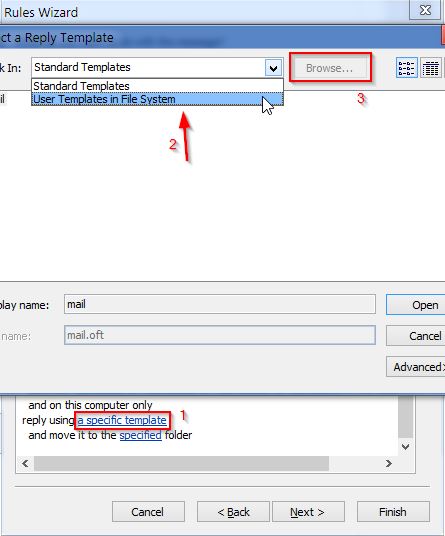
7. Step Next, you’ll need to select an action – in this case, I’ll choose store the email in a specific folder (for easier management), then send the autoresponder I’ve prepared.
8. Step Obviously, you’ll need to finish setting up the actions by specifying the folder and selecting the autoresponder below in the “Step 2: Edit the Rule Description” box. If you saved the autoresponder template in a custom folder (not the one auto-selected by Outlook), you’ll need to select “User Templates in File System” then choose the right folder using the “Browse” button.
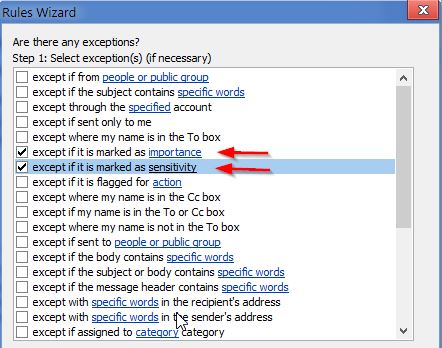
9. Step You can already finish the set up, but you might want to go through the next step, too – you can select exceptions for the rule. In this case, you could select not to send the autoresponder if the message is marked as high importance or as private/confidential, for example.
10. Step And finally, you’ll need to give your new rule a name. You can turn it on/off from here, as well as choose to run it once on all the existing emails in the Inbox folder (which makes it easier to manage the existing emails, but in this case it means clients will potentially get a duplicate reply).
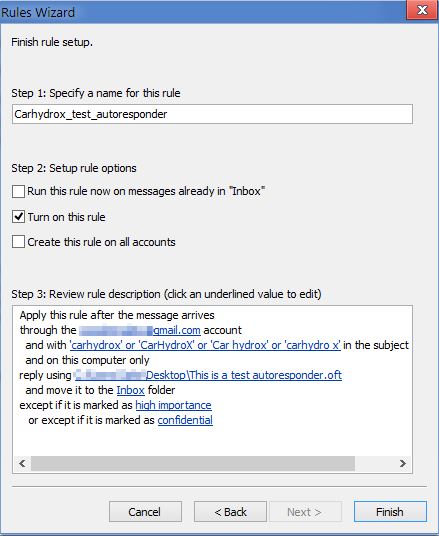
That’s it, once you click Finish, you will see the rule added to the list and you can test it out by sending an email from a third party mailbox inquiring about the product – Outlook will retrieve it, send the autoresponder and then move the email to the selected folder. Very neat! With a few of these autoresponders and rules set up, you can potentially make your computer do your work for you, or at least make it a lot easier.
Conclusion
Whether you want to set up an autoreply for when you’re out of office (for the weekend or on vacation, for example), or you want to set up a more complicated autoresponder system for your contacts/clients, Outlook 2010 can manage that. Just follow the tutorial and setting up autoresponders will be a breeze.

