If you need to automatically forward emails to other addresses, you should know that it’s very easy to do using Microsoft Outlook 2010 – in this article, I’ll show you exactly how to do it.
Automatic email forwarding

Automatically forwarding email can be really useful, and even though a lot of the online email services offer this feature, it’s often pretty limited. It’s also pretty much absent from most corporate accounts, which is even worse. Fortunately, you can set up some pretty advanced forwarding using your office or home computer (which need to be always powered on) and Outlook 2010.
Auto forwarding emails using Outlook 2010
Outlook 2010 has a lot of new features for automation – it’s got support for advanced filters, rules, autoresponders and of course, email forwarding. Setting up forwarding is really easy, even if you need to have an advanced setup. Here’s how to use Outlook 2010 for email forwarding:
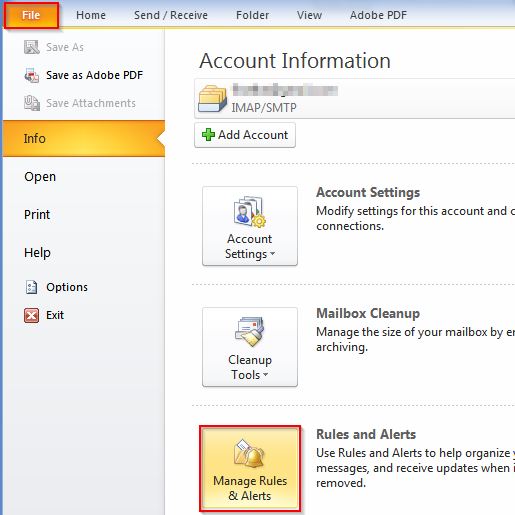
1. Step Open Outlook, then go to the “File” menu and click on “Manage Rules & Alerts”.
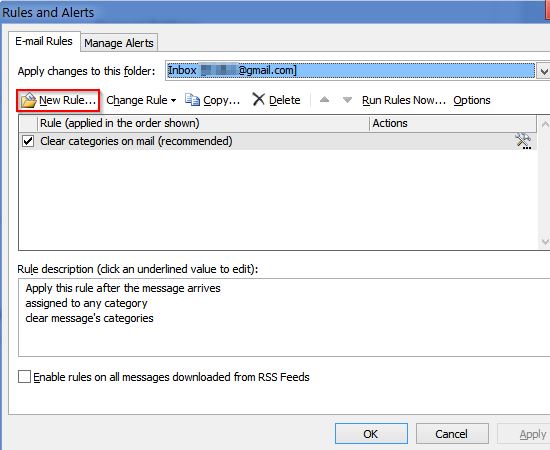
2. Step You will see a list of rules, which are used to process all emails for the given accounts in Outlook 2010. Click on “New Rule…” to create a new rule, for email forwarding in this case.
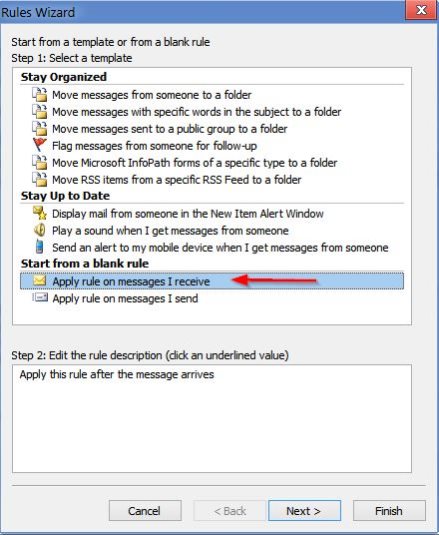
3. Step In the new Rule Wizard window, you’ll need to select “Apply rule on messages I receive” in the “Step 1” list box.
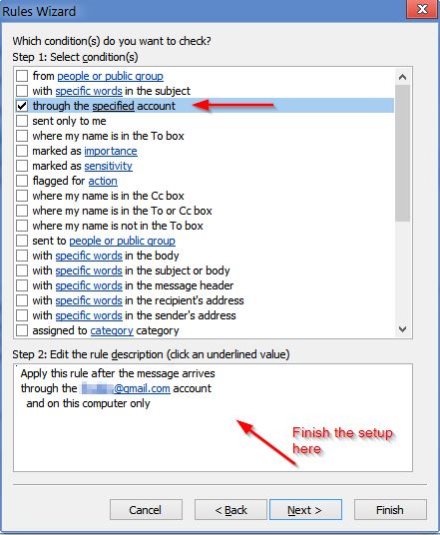
4. Step After clicking Next, you’ll be given a list of conditions to select from. There is a wide range of possibilities here – you can, for example, choose to forward all messages, only messages containing specific keywords, messages from specific addresses, only messages that have an attachment, and more. You should choose whatever you need here, and definitely experiment with various conditions to get a better understanding of how it works.
For this example, I’ll simply choose to forward all messages from one email account by checking “Through the specified account”. The conditions themselves appear in the “Step 2” box below the list, where you can click on them to finish setting them up – in this case, just choose the account that will have all of its emails forwarded.
5. Step Next up is the Actions window – this is where you set the email to forward to any address you want. Just select “Forward it to people or public group” in the list and add the email in the “Step 2” box below. You can add several emails to forward to, of course.
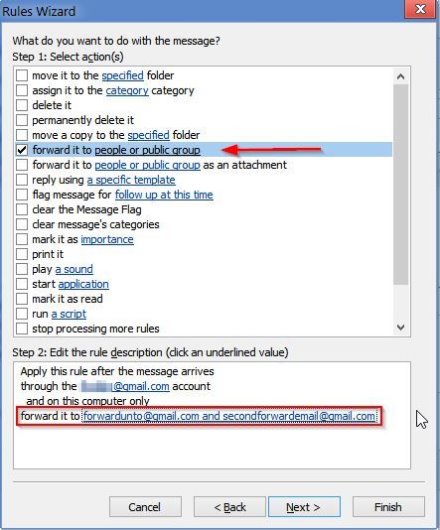
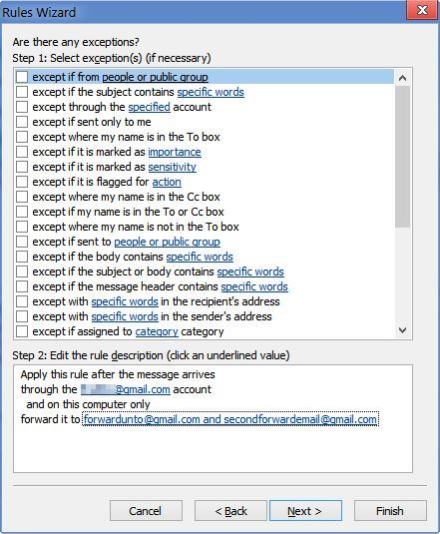
6. Step You can also add exceptions if you need to – for example, you could exclude specific addresses, emails with specific keywords, emails marked as important or private, and more. I won’t choose any exceptions in this example.
7. Step And finally, you can give the rule a name and choose to apply it on emails that are already in the inbox folder – meaning they will all be forwarded to the specified addresses. You wouldn’t want to do that in most cases, but it could be useful.
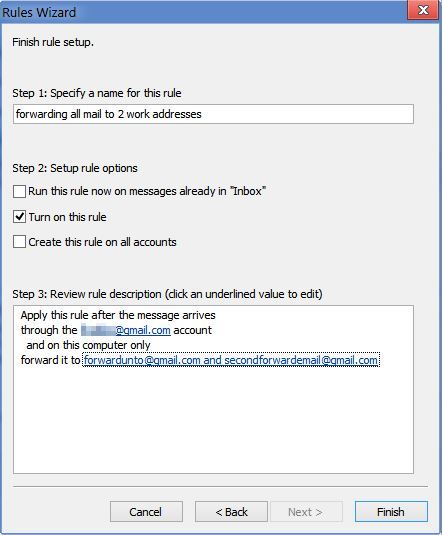
That’s it – once you click Finish, you’ll see the rule added to the list and you can test it out right away by sending an email to this address – Outlook 2010 will automatically forward it once it receives it – of course, the computer running Outlook needs to be always powered on.
Conclusion
If you need to forward emails and you’ve got Outlook installed on your computer (and every office PC should have it), you should definitely try to use it for the purpose first – it’s really easy to set up, it’s got powerful forwarding features and since you’ve already got a license, you don’t need to spend more money.

