In this tutorial, we are showing you how to change the DPI in Photoshop and giving you a rough idea about DPI and PPI.
About DPI and PPI
DPI = Dots per inch
PPI= Pixels per inch – which is important for monitors
For example, if you are creating and preparing images for your next Windows 7 themes, you should know that the modern monitors are perfectly happy with 72 PPI (Pixels per inch) – However some monitors can use up to 300 DPI, so this rule won’t be valid much longer. Still, the eye can only see details up to 300 PPI anyway.
Steps to change DPI in photoshop
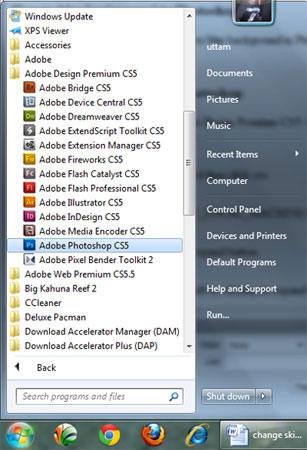
1. Step First of all open the Photoshop program. To open, click on the Start >> All Programs >> Adobe Design Premium CS5 >> Adobe Photoshop CS5.
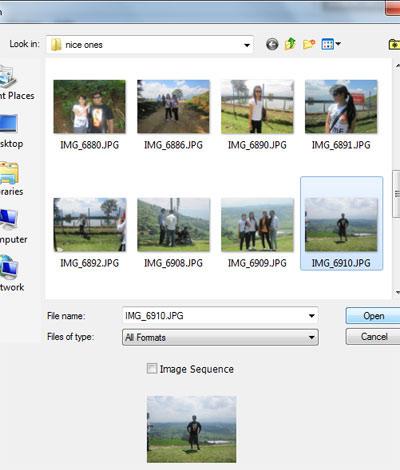
2. Step Next, click on the File >> Open and select the file you want to open. Then click on the Open.
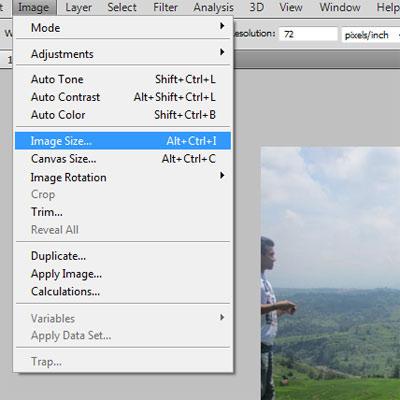
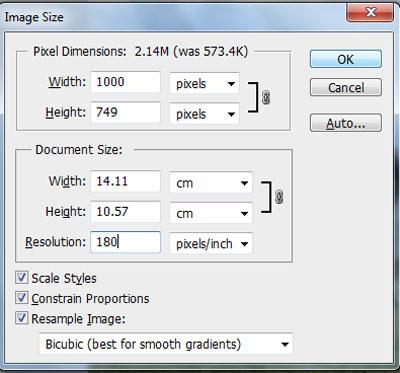
3. Step Click on the Image >> Image Size..
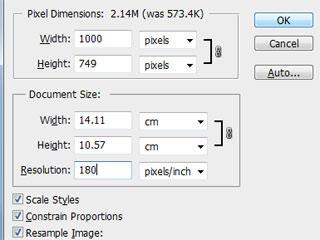
4. Step Now, change the Resolution and click on the OK button. That are the complete steps to change dpi (resolution).
The term ‘DPI’ is used to describe the resolution of dots per inch in a digital print and the printing resolution of a hard copy print dot gain; the increase in the size of the halftone dots during printing.

