Do you need know how to repair corrupt system files? If your system is broken and you can’t even start Windows, you will have to scan and repair your system files immediately. Windows comes with some useful built-in tools to scan, validate and repair system files!
Note: The following guide was written with Windows 7 users in mind, however you can apply the same to Windows 8, 8.1, 10 and previous versions including Vista. All versions of Windows include the command prompt and the commands continue to be the same.
When do system files require repairs?
If you modify Windows 7 system files it can happen that your system files become corrupt or that Windows won’t start at all. This often happens when you replace Windows 7 system files with corrupt/wrong files, not knowing for example that there is a difference between Windows 7 32-bit and Windows 7 64-bit. Beginners should stay away from modifying the system files anyway, although you can learn quite a lot by breaking and repairing your own system.

Important Disclaimer:
If you follow this tutorial to scan and repair your Windows 7 system files you have to keep in mind that you will possibly lose all of your modifications to those system files. This is often intended, but should be aware of it!
How To Repair Windows System Files (If you can start Windows)
1. Step Open an elevated command prompt
2. Step Enter sfc.exe /scannow
3. Step If you get a warning that a computer repair is currently in process, reboot.
4. Step Get a tea or wait some time. The scan will take approx. 5 minutes:

5. Step If you are prompted to insert a Windows DVD, insert it. Sometimes you will have to replace system files with the original files.
What is sfc.exe ?
Sfc.exe stands for “System File Checker” and is capable of scanning your Windows 7 system files and if necessary repair or replace them. If you have to replace system files it can become necessary to insert your genuine copy of Windows 7. If you want to know how exactly the scan works, you should check the Microsoft documentation or Windows 7 Help.
How To Repair Windows System Files If you can’t start Windows
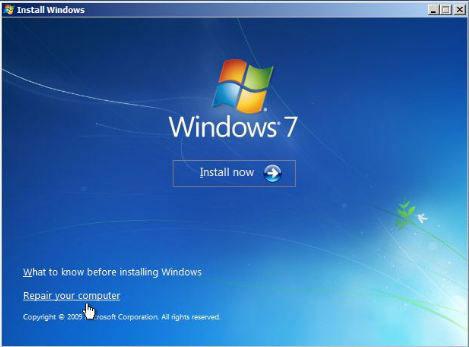
1. Step Start PC, Insert Windows 7 DVD and hit a key when asked to. You may have to change your boot order to boot from DVD!
Important: It is NOT necessary to to boot from your Windows 7 DVD to repair system files, but it is highly recommended.
2. Step Click on “Repair your computer“:
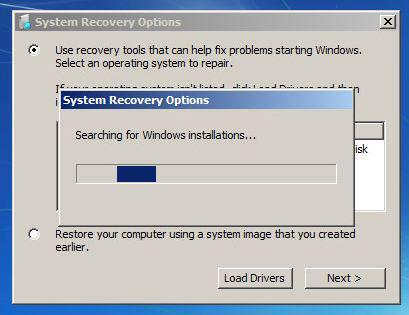
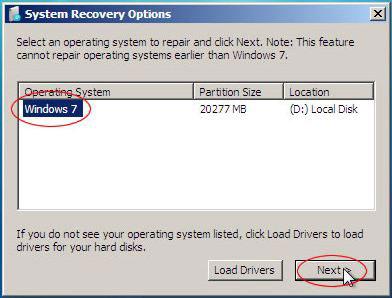
The installer will scan your PC for previous Windows installations:
4. Step Click on Command Prompt
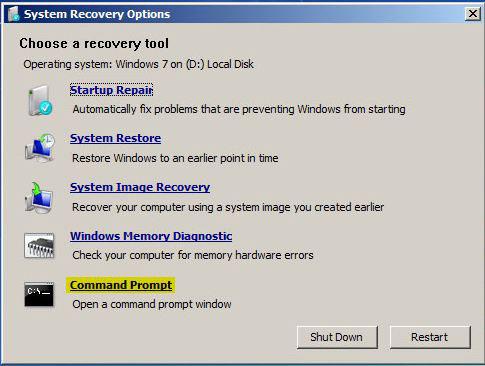
6. Step Wait until the scan has been completed and your Windows system files will be repaired / replaced with the original Windows system files.
I hope this answers all questions how to repair your system files in Windows.
Should you still have questions or if you are still not able to start Windows 7/8/10, then feel free to leave a comment.


Hi im having a bootmgr missing problem so i tried to run the windows 7 repair like in your guide but when i get to the system recovery menu my OS is not listed, dont know what to do from here plz help
When i run the scanner i get this message “Windows Resource Protection could not perform the requested operation.”
What should I do?
hi. my laptop crashed when I’m saving a video presentation using moviemaker. i tried fixing it by using sfc.exe and the message says there is a pending repair. I also tried the fixmbr and chkdsk but they are all not working. Can I do something without losing all of my datas stored in the drive? tnx
I tried the scannow and it did fix a few problem but not all of the corruption. What do you suggest?
Mike .. sorry to hear. Have you tried identifying the corrupt files (usually DLL files) and tried to download them from one of the big DLL download sites? I’m wondering how you even know that it fixed not all corrupt files..
If it’s a really severe case, I would suggest making a backup and re-installing Windows – you never know when you will lose access to your system when there are a lot of corrupt system files
Dear Sir,
When I insert the DVD of Windows 7,it hangs up at the “Starting Windows” Screen. Now , how to correct that ? Or, is there any alternative way ?