 Ok, today we are going to take a look at how we can fix system interrupts and high CPU spikes caused by Deferred Procedure Calls (DPC) and Interrupt Service Routines.
Quick Links
5 instantaneous, possible solutions:
- 1 Disable USB Root Hubs
- 2 Download Hotfix
- 3 Kill Processes And Disable Startup Items
- 4 Check And Kill Processes With High Disk IO
- 5 Disable Sound Effects
2 more advanced solutions:
Test 1: Disable USB Root Hubs
A good idea is to see if any hardware is causing problems and making your CPU spike. Got some old USB hardware, it’s possible we have found a winner here, because USB hardware is known for causing system interrupts.
1. Step Open the Device Manager by entering Device Manager into the search bar on your Start menu
2. Step Scroll all the way down to Universal Serial Bus controllers:
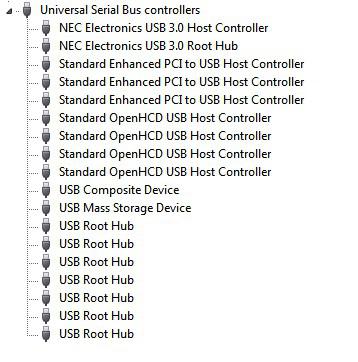
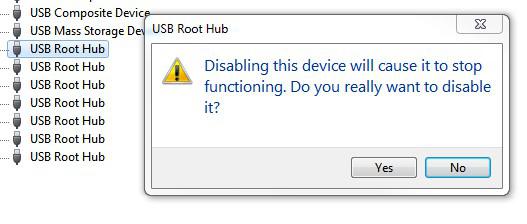
3. Step Right-click on all devices, and click Disable.
Make sure your mouse and keyboard are not connected to one that you want to disable or they will stop working. If you have a USB 3.0 controller, use that one as it’s easy to identify, it will be called NEC Electronics USB 3.0 Root Hub or similar.
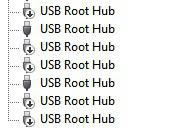
Ok, great, should look like this now:
Last step is to see if this fixed any issues. Open the task manager via CTRL + ALT + DEL to find out whether your CPU load is going down. Open up the resource monitor to monitor it. If you are new to this please read our guide how to monitor your computer load using the resource monitor
Test 2: See If There Are Any Windows 7 Hotfixes Available For Known Problems
Sometimes, you can fix system interrupts using patches. It can help to simply download some hotfixes from microsoft.com. In this case hotfix KB976972 might be related. Download the Update for Windows 7 for x64-based Systems (KB976972) and install it. If you are on an AMD motherboard you probably don’t need it, it’s labeled as a fix for Nvidia/x64 USB transfer issues
Test 3: Make Sure To Kill Processes That Are Not Needed And Disable Them via Startup
Got any programs you don’t need a lot? Consider disabling them via Startup and then do a reboot or if you only want to test it, simply kill the processes using the task manager.
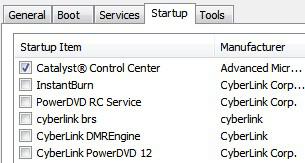
We explained previously how to disable and get rid off startup items so read that tutorial if you want to learn more. Anyway, go to the tab Startup and uncheck options like Cyberlink brs, CyberLink DMREngine, CyberLink PowerDVD 12, InstantBurn – all those programs really should not run on startup and should be launched only when needed, unless you are constantly watching DVD’s of course.
Test 4: Kill High Disk IO Processes
System interrupts can be caused by high disk IO processes. So, while we’re at it, we should probably take a closer look at the resource monitor and monitor all processes with high disk IO (read, write queries).
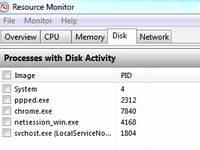
Ok, so open up the Resource monitor as mentioned in the link above and go to the tab Disk
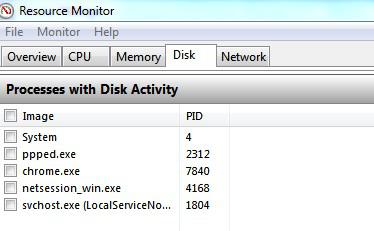
On the tab you will get a list of processes with disk activity. Inspect all of them. In my case I had a .exe file called ppped.exe that I wanted to inspect a little closer. As it turns out this processes belonged to my APC monitoring tool and was constantly writing the APC watt values to an XML file. What an annoyance. It’s cool if you want to log stuff like that, but if it’s slowing down my disk then I have to kill it.

Ok, so go back to the tab Overview and find the process e.g. ppped.exe and right-click on it and click End Process to get rid off it.
Test 5: Disable All Sound Effects In Windows 7
If you frequently make use of sound effects it’s possible they are causing high CPU due to system interrupts. Keep in mind whenever you play audio/video the system interrupts will go up. If you don’t know whether or not your sound card has automatically enabled sounds effects, it’s worth checking that.
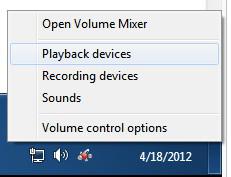
Right-click on the volume icon and select Playback devices:
Double-click the default speaker e.g. Speaker Realtek High Definition Audio:
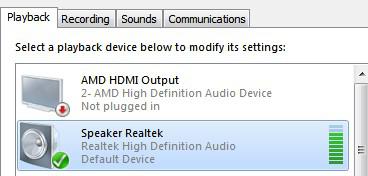
Now go to tab Enhancements and check the box Disable all sound effects:

Hopefully the tips above will help you to fix your high CPU spikes caused by system interrupts.
6 Locate Corrupt Drivers With A High DPC Latency
One probable cause for system interrupts is a corrupt driver.
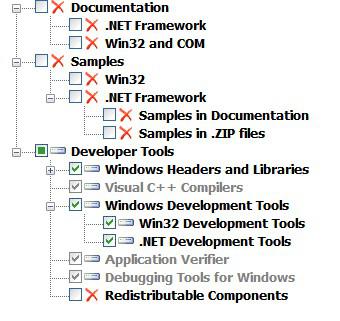
Download the Windows SDK (Win32 and NET Development Tools) from Microsoft, which includes the Windows Performance Kit. The performance kit includes a tool called DPC Latency Checker. Corrupt drivers often cause a very high DPC latency. Once you found drivers with a latency, you can remove them
Find out more about DPC Latency Checker
7 Fix IRQL Conflicts Causing Issues
Another common issue that is causing system interrupts are IRQL issues. Basically, whenever you plug in USB devices and install PCI devices such as sound cards they may share a similar IRQ channel (for interrupt requests). When that happens, so called IRQL conflicts can dramatically increase your chance of system interrupts whenever a device is sending out an interrupt signal. To better understand how this all works, you should read up a little on IRQ channels.
If you are only interested in fixing high CPU load caused by system interrupts, you can use our guide to fix any IRQL conflicts


In general it is a good idea to do this step by step, do one thing, then use the DPC latency checker to see if the problem persists. Also knowing how to trigger system interrupts on demand can help you to better analyze the root cause. Once you know how to trigger it, you will have a much easier time to identify corrupt drivers or devices such as your sound card drivers.
If you are not interested in a systematic approach, you can simply do many things like removing USB root hubs etc and see if anything fixes it but if the issue occurs again you will not know the root cause, therefore it is a much better idea to do it step by step and find possible triggers.
Just something I wanted to mention :)