 Windows 8 is super handy to have, you can add network drives right to your Start screen and launch them from there
If Your Network Drive Shows Up Under “Network” Already:
1. Step Make sure your NAS is properly connected. Log into the NAS admin configuration and put a password on it – this will require you to log into the drive before you can access it and is a security measure. If you have a decent router, you can see the IP in your router software
2. Step Open the Windows explorer by using Windows key + E
3. Step Scroll down until you see the Network drives
4. Step Important: If the drives not show up, let’s see if we can connect to it
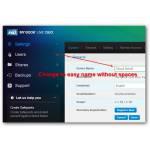
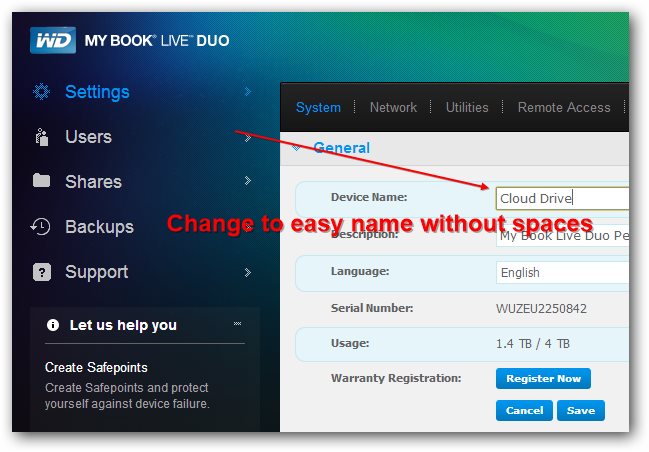
Not Showing Up? Log Into NAS Configuration And Change Device Name
5. Step Log into the NAS config page e.g. http://192.168.2.20/UI/# (you need to replace this with your own IP) – if you have no idea how to get the IP, try our MAC address finder it can also help you locate network devices
6. Step Go to Settings or if you have a different brand than Western Digital check your device manual
7. Step Change the Device Name to something without space, for example CLOUDrive and save the changes
8. Step After saving the changes, the network drive should re-connect. After that you can connect to it by entering this into the Windows explorer address bar: \\CLOUDrive\
9. Step If you have created a share already, you can access it directly by pasting the share name at the end e.g. \\CLOUDrive\Backups
10. Step If you still need help with setting up your NAS drive, we have a detailed guide for IOmega drive users as well

