(Guest Post) Now we shall create a nice button in Photoshop. You need to have either Adobe Photoshop CS3 or CS4 or CS5. Here in the tutorial, I am using Adobe Photoshop CS3.

Steps to create button in Photoshop
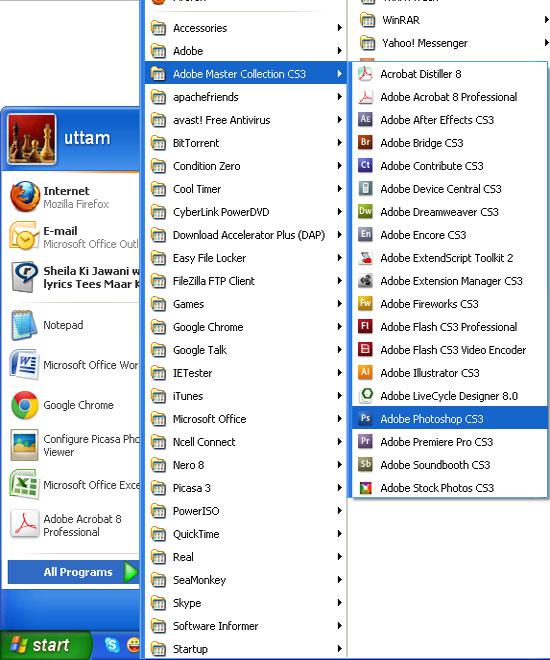
1. Step Click Start >> All Programs >> Adobe Master Collection CS3 >> Adobe Photoshop CS3
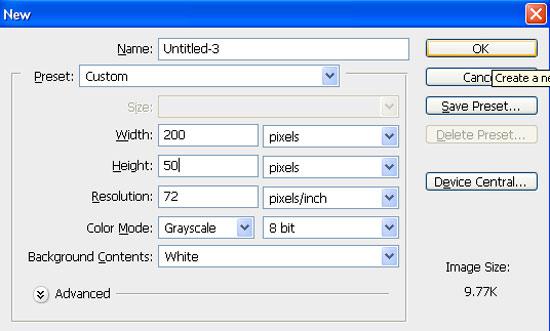
2. Step Now in your Photoshop, click File >> New and in the opened window put width = 200 pixels, height = 50 pixels and click OK
3. Step Now select, Rounded Rectangle Tool (Shortcut – U) and in option bar, make sure ‘shape layers is selected’ and put Radius = 5 px.
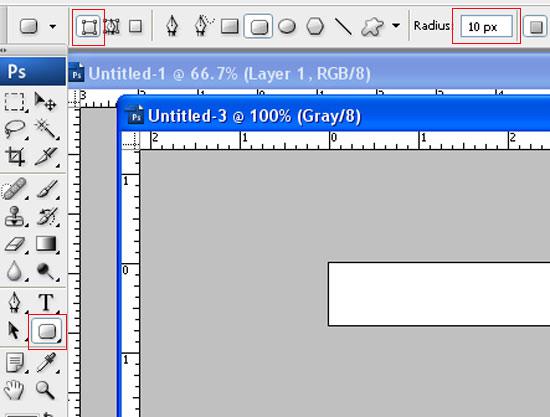
4. Step Draw a rectangle in the document area. Make sure you have set your foreground color to black.
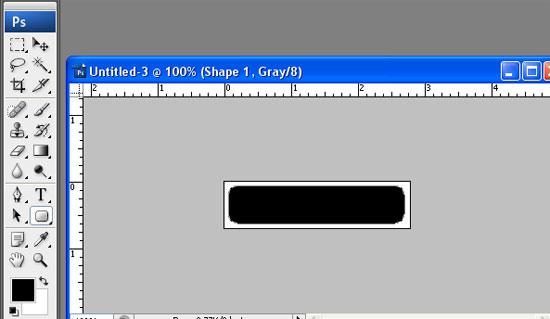
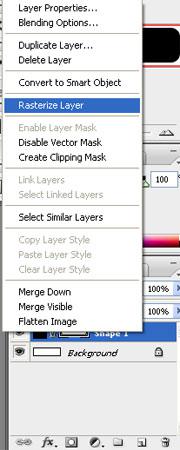
5. Step In your layers box (shortcut – f7), you might have noticed shape layer. Right click on it and select ‘Rasterize Layer’.
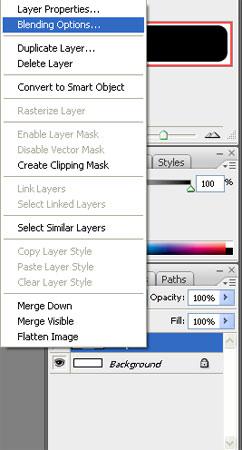
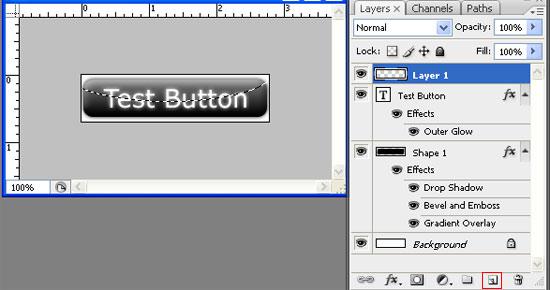
6. Step Right click the layer (shape 1) in layers box and select blending options.
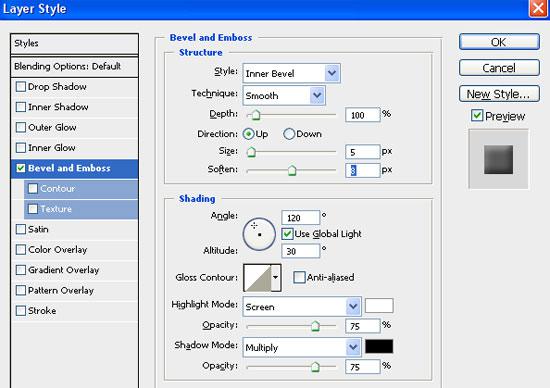
7. In Layer Style window, select Bevel and Emboss and fill the details as shown in the screenshot.
8. Step Again, select ‘Gradient Overlay’ and fill details as shown in the screenshot.

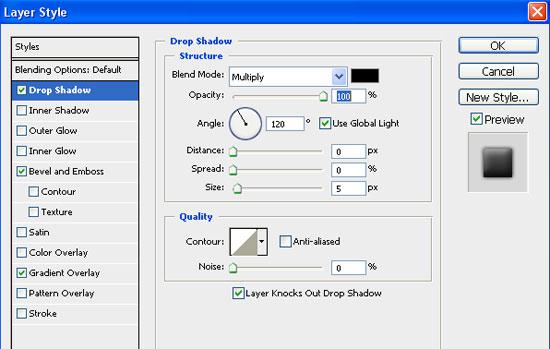
9. Step Add ‘Drop Shadow’ and fill details as shown in the screenshot.
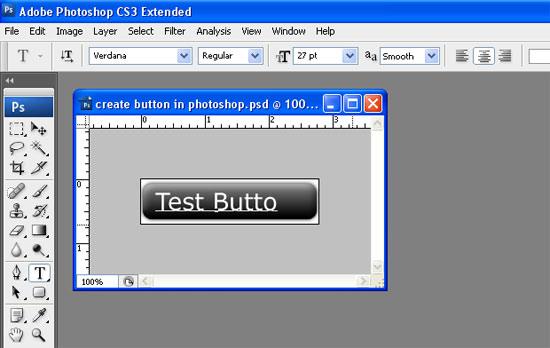
10. Step Select text tool (Shortcut – T), you may choose font you like from option bar at the top. Then type your text.
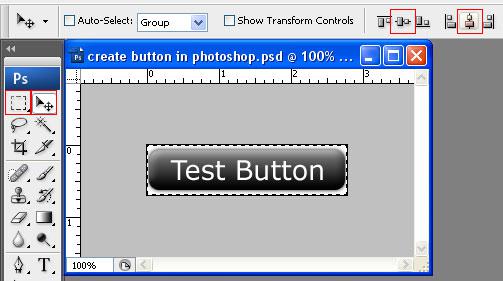
11. To automatically align your text at the exact center and uniform spacing on its side, select ‘Rectangular Marquee Tool’ (Shortcut – M) and select entire content or just Press Ctrl + A and then select Move Tool (Shortcut – V). Then click ‘Align vertical centers’ and ‘Align horizontal centers’ respectively.
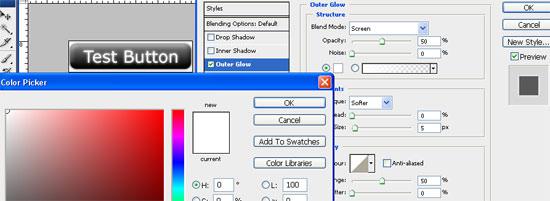
12. Add some layer style to the text by right clicking text layer in layer palette and select ‘Blending Options’. Select ‘Outer Glow’ and fill settings as shown in the screenshot.
13. Lastly, lets add a glass effect on button. Select ‘Elliptical Marquee Tool’ (Shortcut – M). You will find it inside ‘Rectangular Marquee Tool’. When u keep holding it, you will see ‘Elliptical Marquee Tool’. Draw half as exactly like in the screenshot over. Now create a new layer in layer palette by clicking ‘Create new layer’ located at the bottom or layer palette or from menu bar click Layer >> New >> Layer (Shortcut – Ctrl + Shift + N)
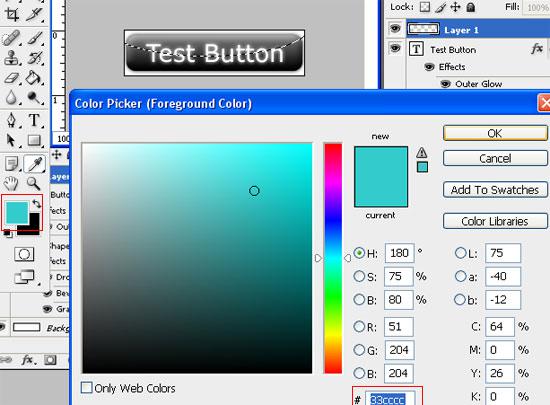
14. Click ‘foreground color’ located below the tools and select color as : #33cccc. Then click ‘OK’.
15. Make sure the topmost layer you just added is selected. Click ‘Paint Bucket Tool’ (Shortcut – G) lying just below the Gradient tool and fill on the selection.

16. Lower the opacity of the selected layer to 10% and deselect the selection by pressing Ctrl + D or from menu bar click Select >> Deselect.

Video
Conclusion
That’s all you need to do to create a beautiful button in Photoshop.
TOP: Download our Photoshop sample files below for this tutorial and many others:
- Download How To Resize Image In Photoshop
- Download How To Age Photo In Photoshop
- Download How To Blend Images In Photoshop
- Download How To Whiten Teeth In Photoshop
- Download How To Create Fire In Photoshop
- Download How To Resize Image In Photoshop
- Download How To Create Button In Photoshop

