Installing screensavers on Windows 7 is really simple. Here’s a short how-to guide that will give you step-by-step instructions. Intermediate users might want to read about customizing their screensavers (e.g. number of Bubbles). Advanced users will get instructions how to install a logon/logoff screensaver.
Windows 7 makes installing screensavers as easy as 1,2,3. However, you should take GOOD care before installing a screensaver. Often, screensavers can be harmful files. Because they will be copied into an important system folder (system32) they can be used to infiltrate your system.
Quick Links:
Installing Screensavers Automatically
Change Screensaver (After Installation) (on Windows 7 Starter + Logon/Logoff)
Customize Windows 7 Screensaver
Installing Screensavers Manually
Installing Screensavers Automatically
1. Step Download a screensaver. Screensavers use the file format .scr, which means the name will be Screensaver.scr. If you don’t have such a file it’s properly not a screensaver.
2. Step Right-click on the .scr file and then click on Test to preview the screensaver:
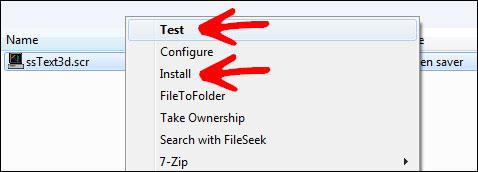
3. Step Finally, click on Install and Windows 7 will automatically install the screensaver for you. Easy, huh?
4. Step Did not work for you? Proceed below.
Change Screensaver
Are you on Windows 7 Starter? Instructions how to change Windows 7 screensaver
When the screensaver is installed, you might want to change it again. To do that, you can either follow the instructions above to simply install a new screensaver or you can select a screensaver that is already installed on your system (if you previously installed any screensavers).
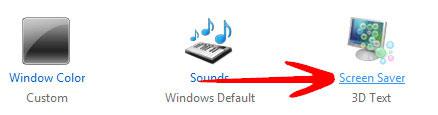
1. Step Right-click on your desktop and then click on Personalize
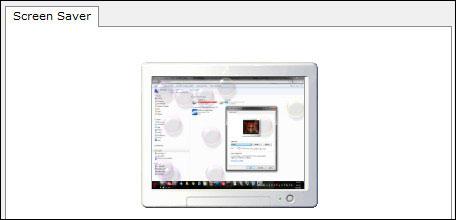
2. Step Now at the bottom, there’s a hyperlink Screensaver, click on it:
3. Step Next, select a screensaver from the dropdown.
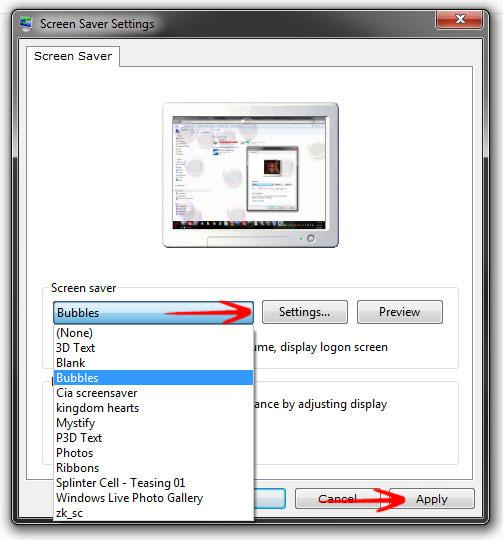
4. Step Click on Settings to customize it.
5. Step Finally, click on Apply to change the screensaver.
Is the screensaver that you just installed not listed? You did not correctly install the screensaver or the .scr file is corrupt. Try to download the .scr file again and copy it manually into the folder C:\Windows\System32 and C:\Windows\SysWOW64
Follow the instructions below to install the screensaver manually.
Want to change logon/logoff screensaver as well? Here’s how: Change Logon/Logoff Screensaver
Customize Screensaver

You can customize the Windows 7 default screensavers, e.g. you can modify the numbers of Bubbles or the Aurora screensaver.
Customize Windows 7 Screensavers
Installing Screensavers Manually
Of course you can also install screensavers manually.
1. Step Select the .scr screensaver file and then hold down CTRL + C
2. Step Open the Windows Explorer (Windows key + E)
3. Step Go to C:\Windows\System32
4. Step Hold down CTRL + V to copy the screensaver file into the folder
5. Step Confirm the UAC prompt
6. Step Double-click on the screensaver to install it.
The screensaver will now be listed in the Personalization Control Panel (as described here)
Matrix Dual-Monitor Screensaver
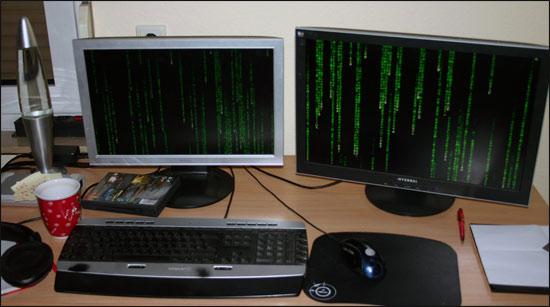
Some screensavers support dual-monitors. Here’s a Matrix Dual-Monitor Screensaver


After I install it in the system32 folder it says ‘unable to load screensaver extended data. aborting’ and it doesn’t work. What should I do?
After I install it in the system32 folder it says ‘unable to load screensaver extended data. aborting’ and it doesn’t work. What do i do help meeeeeeeeeee!!!