The search index is a useful feature, here’s how to change the indexing options
Indexing options define how Windows would index the hard drives or any other hardware connected to your system. Just like Google, Yahoo and Bing index webpages to their databases, Windows does the same by indexing the files and folders of your hard drives so that they can be better searched faster than non-indexed hard drives.
Windows 8 Consumer Preview provides the indexing options which you can tweak easily according to your needs. Here is how to do it:
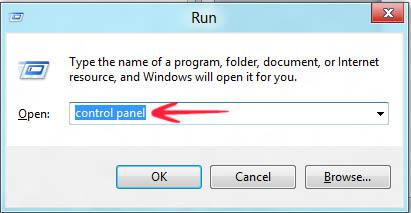
1. StepInitiate Run (Press Windows Hot Key + R). Now type in Control Panel and press Enter of your keyboard:
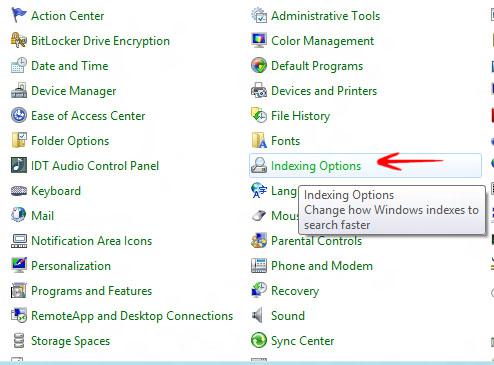
2. StepOnce you are in Control Panel, you need to click Indexing Options
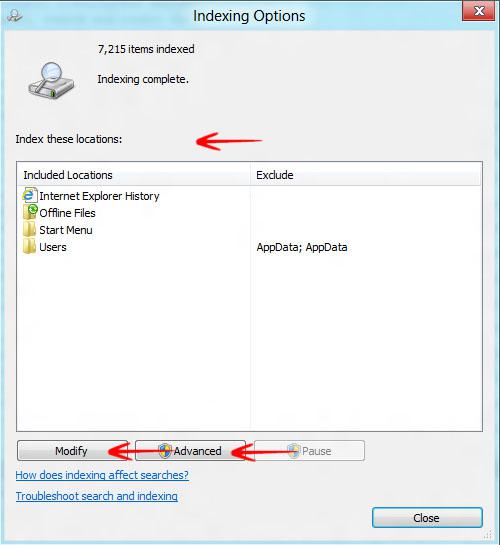
3. StepA new window of Indexing Options would pop up. It would show how many files have been already indexed and what changes you can make in order to speed up the process for better search results:
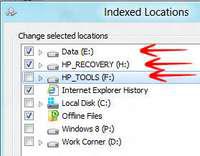
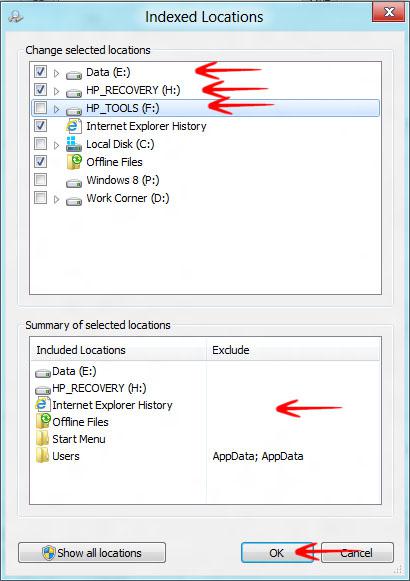
4. StepFrom this window, you can select the options and make changes. Now you need to click Modify and check all hard drives connected to your system. This would index all of your hardware devices so that the searching process of Windows get a whole lot faster than before:
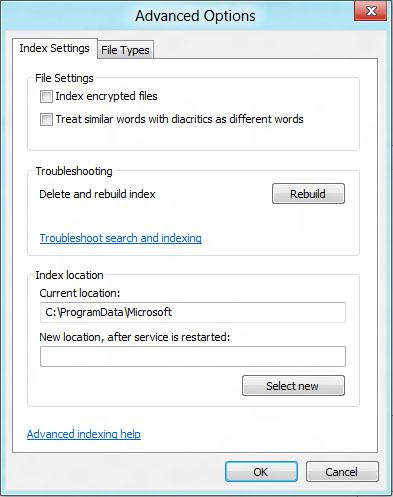
5. StepOnce done, Click OK and be patient while the indexing gets completed. Now click Advanced and make changes to the types of files to be indexed. You can check or uncheck the settings for encrypted files under the File settings options. You can also click on File Types tab and select the types of files with their extensions that you want to get indexed.
Conclusion
Indexing helps a lot to make your work easier than ever. The search process in Windows 8 Consumer Preview gets a whole lot faster than before and you enjoy immediate search results when you type in any query.
