 Do you want to reduce the Windows 7 border padding so that it’s thin and more elegant? That’s pretty easy. You can define a border padding in Pixel, but the default is set to 4px, that’s why the default Windows 7 border padding is so large.
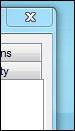
Default Border Padding
By default the border padding in Windows 7 looks like this:

Thin Border Padding
That’s not very beautiful, so we want to make it a lot thinner. Let’s get to it:
1. Step Right-click on your desktop and click on “Personalize”
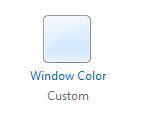
2. Step At the bottom click on “Window Color”:
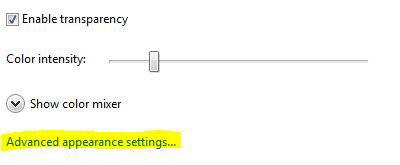
3. Step At the bottom click on the link “Advanced Appearance Settings
4. StepNow, from the dropdown select “Border Padding” and change the size to “1”:
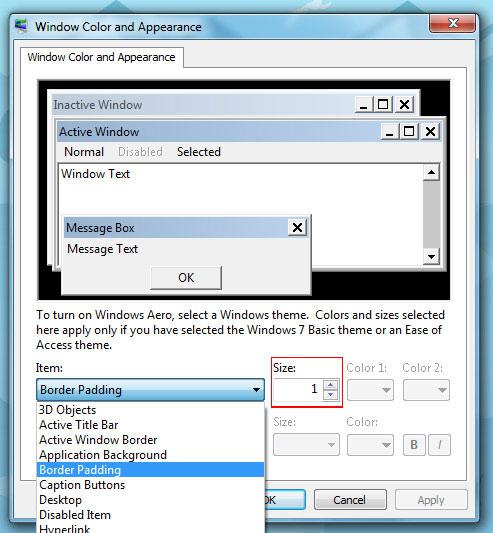
Voilà, you just changed the border padding in Windows 7. If you want to completely remove the border, you’ll need to apply a 3rd-party theme, but a 1px value should be ok for now.


Thanks! This helped me get rid of an odd glitch where any system-specific windows would have the border far too thin. I set it to 1 and the difference is barely noticeable, other than the glitch being worked around. Great tutorial!
It works!
Since Windows 95 I have been writing out instructions on how to do and change things in Windows for people I know. I now have over 550 up through Windows 7 Professional.
I’ve always prided myself in spelling out instructions on how to do things as clear as possible so even a complete novice can follow what I write and get it done.
I’ve read many instructions on the Internet. Some are “just ok”, some are impossible to follow, and then there are your instructions.
They are the clearest and easiest to follow I’ve ever read.
Keep up the good work and I hope everyone finds your site.
Paul Berkow
Typical of the stupid M$ mofos to hide something like this under ‘Color’…wt f ??
Thanks for this tip, is there a way to remove the stupid top padding in explorer too ? its taking up so much real estate and it is blank all the way with the 3 buttons at the end. I did reduce the size of the Active & Inactive Titlebars, but you can only reduce it relative to font size. Which is stupid, as there are no words on this bar.
rq, yes there are various 3rd-party shell themes that decrease the explorer padding size but that will require some work and you’d have to work through our tutorials that explain how to install custom theme
You’d then have to browse through this http://windows7themes.net/198-best-windows-7-themes-custom-shell.html or look for it on Deviantart
On my version of Win 7 the Advanced Appearance Settings link does not appear when I follow your directions to increase window border size. In fact, my screen looks nothing like yours when I open Window Color.
Are you on Windows 7 Starter or something? It’s possible that you have to modify the registry for this or it is not possible on your system