Microsoft Security Essentials, replaced by the pre-installed Windows Defender in Windows 8, is a free antivirus software, offering protection against common security threats such as viruses, malware, spyware, Trojan horses, and rootkits.
While the previous versions of Windows Defender had limited capabilities and were successful at identifying and neutralizing only well-known threats, the Windows Defender in Windows 8 is a true Microsoft Security Essentials successor and has inherited not only its easy to navigate interface, but most of its features as well.
Using and configuring Microsoft Security Essentials
Let’s take a closer look at Microsoft Security Essentials and change a few of its configurations. If you are running Windows 7, you will have to download and install the software first.
Step 1. Launch Microsoft Security Essentials
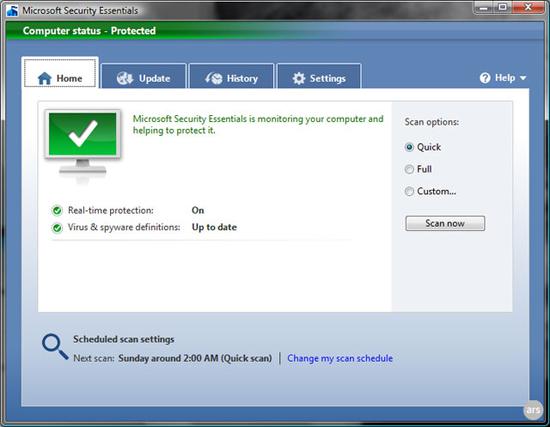
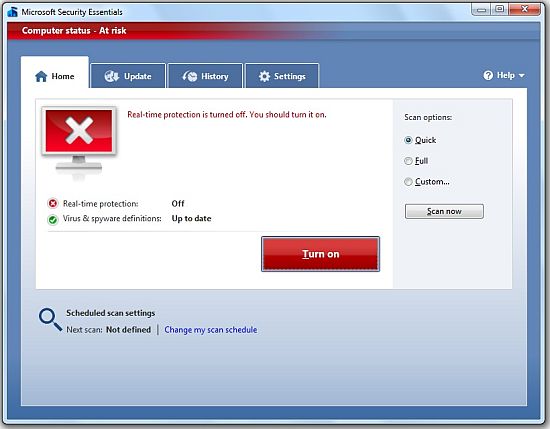
The large icon that you see on the left-hand side of the Home tab indicates the software security status. Green indicates that your computer is fully protected, light brown indicates that you might need to change some of the settings for better protection or you haven’t run a scan recently, and red indicates that your computer is at risk.
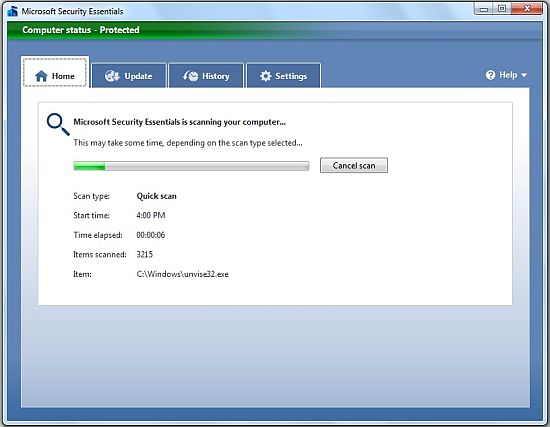
From the home tab, you can change the Scan options, choosing from Quick, Full, and Custom, change the Scan schedule, or start scanning your computer by pressing the Scan now button.
Step 2. Updating Microsoft Security Essentials
Open the Update tab – if you do not see the green “Up to date” message, press the Update button to download the latest virus and spyware definitions.
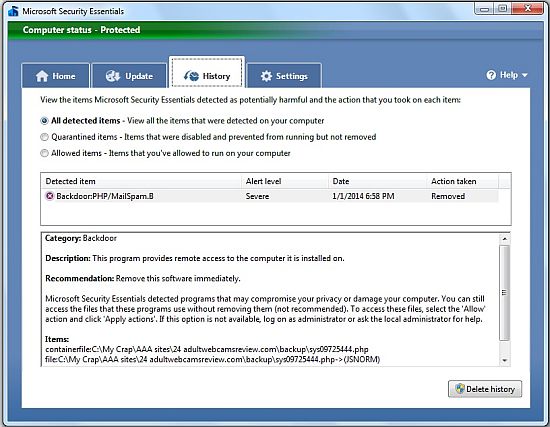
Step 3. Detected threats – open the History tab if you want to examine some of the potential threats that Microsoft Security Essentials has detected as well as the Allowed and Quarantined items.
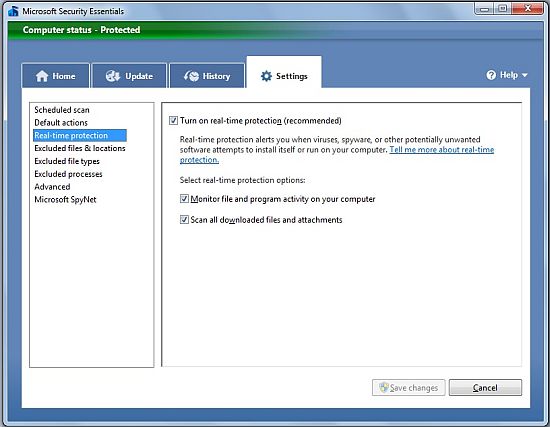
Step 4. Configuring the Settings. This is the tab, where you can customize Microsoft Security Essentials. Configuring the Scheduled scan and the Default actions is quite straightforward, you can schedule the scan to run daily or once a week and you can also select the Default actions that MSE performs when it detects a new threat. The next option, Real-time protection, is the one that you should keep on at all times.
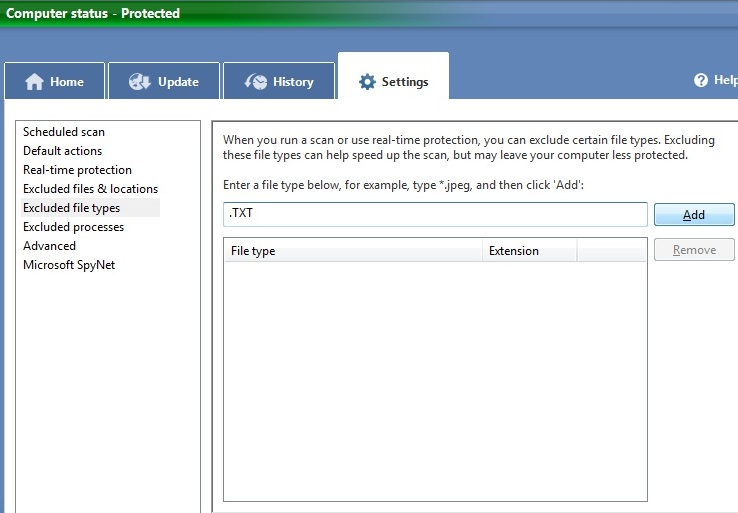
Excluding files and locations – even though MSE is quite unobtrusive, if you happen to download and use lesser-known software, you might start getting several pop-ups daily prompting you to upload the software, so that it can be scanned for possible threats. This is the main reason for you to add certain trusted files and locations to be excluded. The next two options, Excluded file types and Excluded processes are similar, so let’s add a file under Excluded file types; one reason to do that would be to prevent a conflict between MSE and other software programs. Click Excluded file types, type .TXT in the text files and press the Add button, then click the Save changes button.
The Advanced options are also quite straightforward, so let’s examine the last option, Microsoft SpyNet. When the Basic membership is selected, MSE will automatically send information to Microsoft about lesser known software that you run, or viruses and other threats that have been detected. When the Advanced Membership option is selected, the information sent back is far more detailed. You can learn more about SpyNet here.
One of the main reasons Microsoft Security Essentials gained its popularity is its simple interface, the fact that it uses very little system resources, and it offers adequate protection, while quietly running in the background.
