In this tutorial we are explaining how to enable the Loopback adapter in Windows 7.
What Does It Do?
The Loopback Adapter in Windows 7 is a testing tool for virtual network environments, where a network is not available. It may also be used for Network configuration in case of Network Adapter Driver conflicts, to retain network information. Here are the steps to enable it.
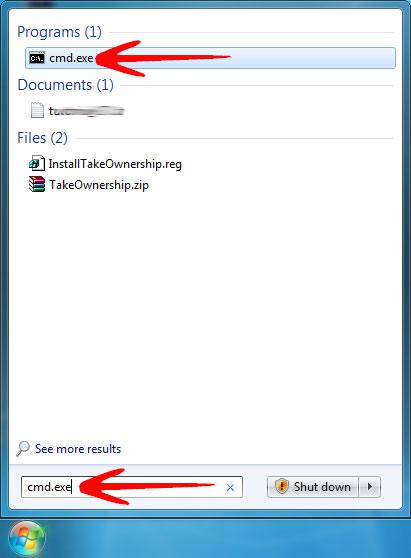
1. Step In the Start Menu search bar type cmd.exe and press SHIFT + CTRL + ENTER to launch with Elevated Privileges.
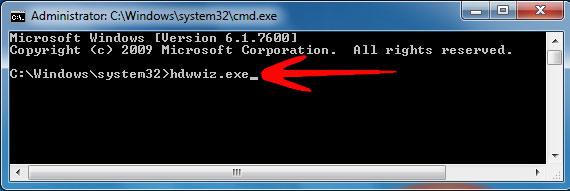
2. Step In the command prompt type hdwwiz.exe.
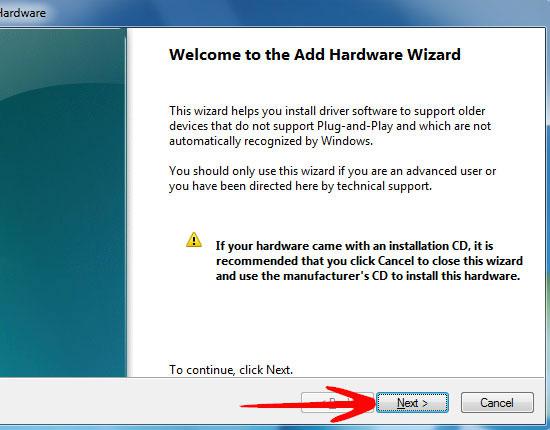
3. Step The Add New Hardware Wizard window will launch, click Next to continue.
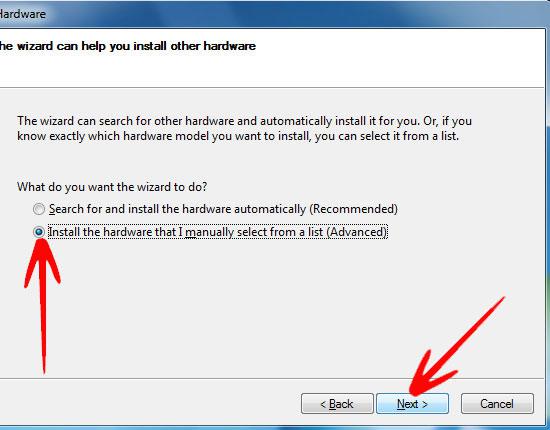
4. Step In the Next step Select “Install the hardware that I manually select from a list (Advanced)” and click Next.
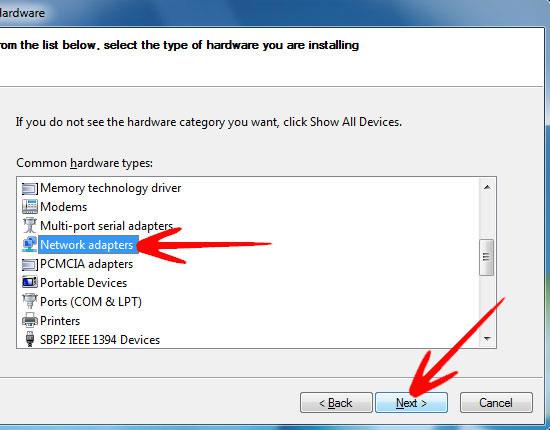
5. Step Select “Network adapters” from the list and click Next.
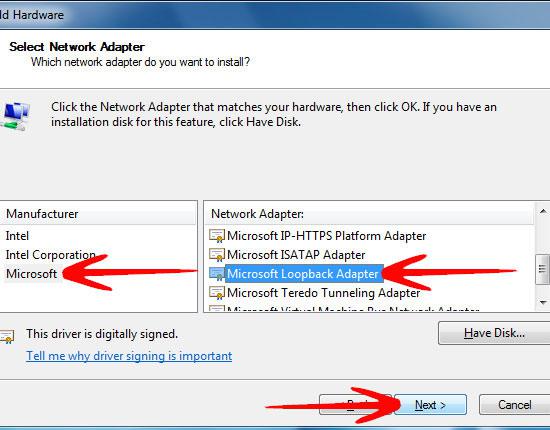
6. Step In the Manufacturer list select “Microsoft”, then select “Microsoft Loopback Adapter” from the Network Adapter list. Click Next to continue.
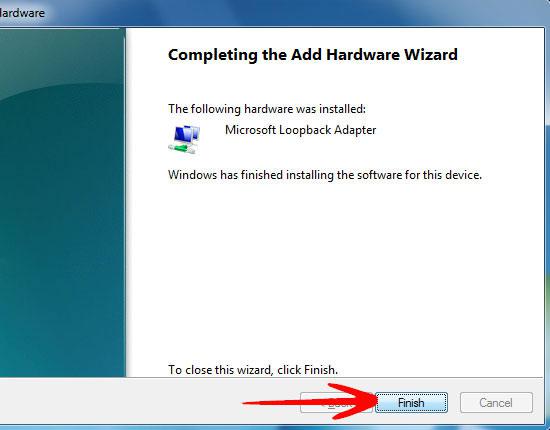
7. Step The Wizard will now tell you that its going to install “Microsoft Loopback Adapter”, click Next.
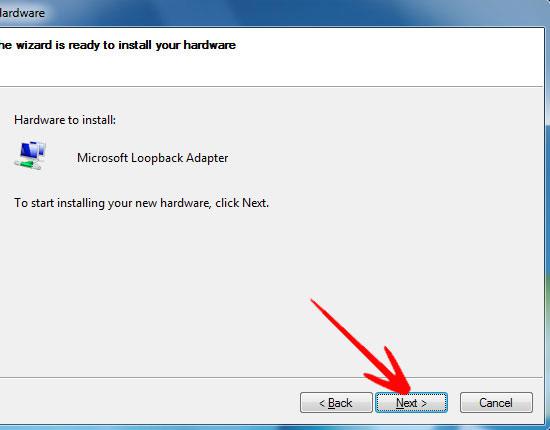
8. Step After a while Microsoft Loopback Adapter installation will complete. Click Finish.
The Microsoft Loopback Adapter is a Virtual Hardware. It can be useful in situations when an application (RDBMS) does not install unless a Network Adapter is present.
The loopback adapter will also be installed when you install programs like Tunngle. Tunngle for example can be used to play Resident 5 co-op
