 This is a Easter special: I’ve extensively described how to set up AVG for checking encrypted emails over a secure SSL POP3 or IMAP connection routing email through 127.0.0.1 and a pre-defined port. A top guide!
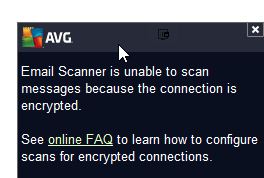
Do you get this pop-up when you fetch emails using your email client like Thunderbird or Outlook? If so, follow this detailed guide on setting up AVG for encrypted email servers
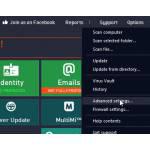
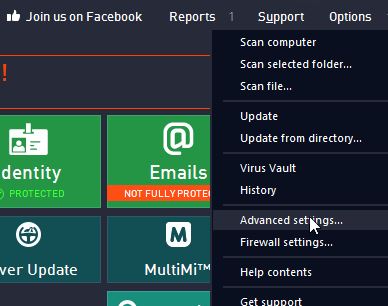
1. Step Open AVG and click on Options, then on Advanced settings:
2. Step Next, uncollapse Email protection and Email scanner.
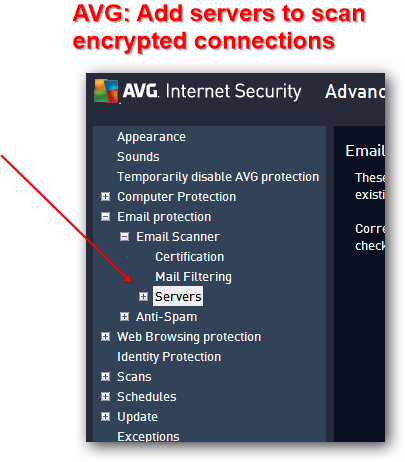
3. Step Click on Servers and then on the right pane click Add new server
4. Step Enter pop.gmail.com if you want to check a Gmail account
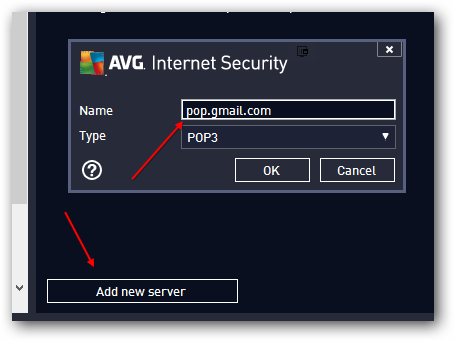
5. Step If you want to scan emails for another email server, look up the POP3 domain (usually found in the control panel of your email Provider). To do that simply enter something like “pop3 domain (your email provider)” into Google and you will quickly find the POP3 server for your email provider
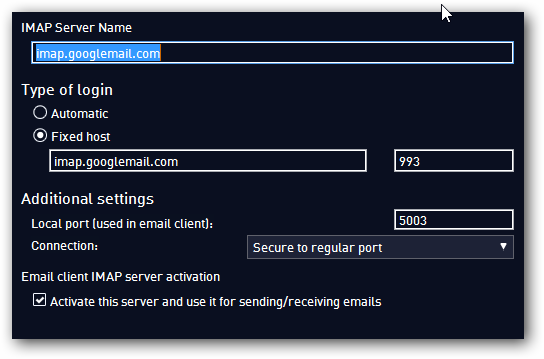
IMAP SERVER
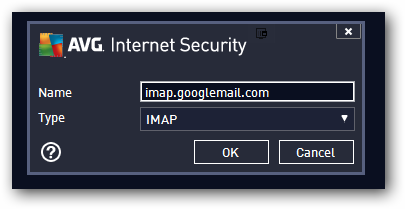
6. Step Alternatively, if you are using an IMAP server to get your email, enter the IMAP address (IMAP servers have the advantage that a copy of your email stays on the server – you are basically fetching a 1:1 copy of your email inbox)
7. Step To be exact, you did not have to enter the POP/IMAP domain in step 4 because it’s simply an identifier, but it’s good to do that. Now that you know the POP3 domain, also look up the port – you can simply copy and paste the settings from your Thunderbird or Outlook settings:
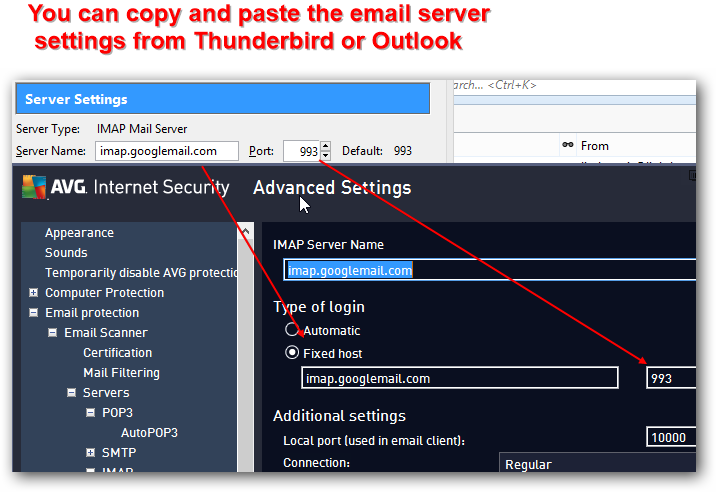
Picture: Copying the Gmail server settings from Thunderbird
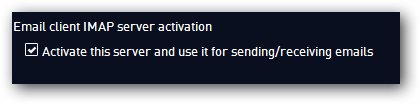
8. Step Make sure to check Activate this server and use it for sending/receiving email messages
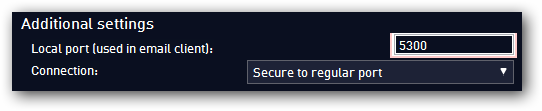
9. Step You will need to define a local port (mandatory!) –
- IMPORTANT: This port will be used in your email software to connect to the AVG email scanner, you may have to forward this port and allow it in your firewall.
Basically you give AVG your POP3 server information, it scans them and retrieves the mail locally, re-routing them via a pre-defined port. Via your email client you can then receive emails using the IP 127.0.0.1 (localhost) and the port defined in this step.
- Also select Secure to regular port from the dropdown (for SSL connections)
The Final Settings And Confirmation
You should now have something like this:
9. Step Click the Apply button and confirm the UAC prompt
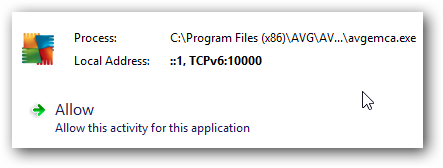
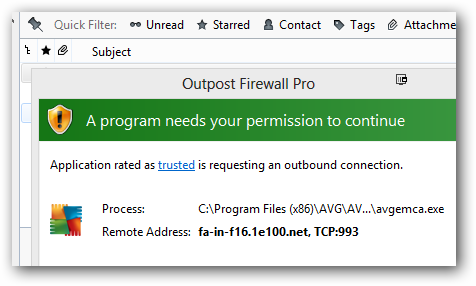
10. Step If you have a 3rd-party firewall you will be asked to allow avgemca.exe
11. The Apply button should be greyed out now – confirm with OK
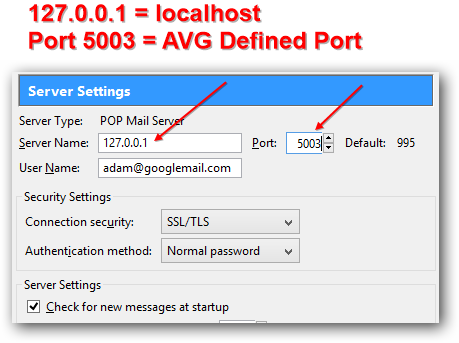
Go Back To Your Email Client And Add Localhost Email Server With Port 5003
1. Step Download an email client like Outlook or Thunderbird and open it
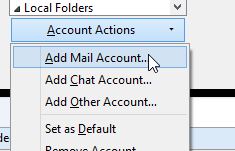
2. Step In Thunderbird click on Tools => Account Settings

3. Step Add a new email account to Thunderbird
4. Step Next, in Thunderbird enter 127.0.0.1 as the server name and add port 5003 as defined in AVG
5. Step Use your regular user name e.g. [email protected] or [email protected]
6. Step Select SSL/TLS from the connection security dropdown field
7. Step ALRIGHT! Confirm with ok and select your newly added Email account – Thunderbird should automatically fetch emails now. When that happens and you have another firewall you will have to allow avgemca.exe AGAIN (or create a rule)
8. Step Done! AVG scans your email before it lands in your inbox. Neat, huh?
If you still have questions, either post a comment below or ask a question on our QA community site. Cheers and happy Easter holidays!


You can also set up a SMTP server in the same way – but obviously that is not required unless you want to make sure that files you send via mail are virus free (obviously you can simply do a manual check as well)