In order to install Windows 7 shell themes manually, you will have to replace the shell32.dll. You basically can follow our guide that explains how to replace the explorer.exe file, but I wanted to give some very precise instructions for replacing this particular file.

Update 8/7/2010: The easiest and shortest way to replace the explorer.exe and any other system files is to download a registry hack that will add the option Take Ownership to your right-click context menu.
Download this script: Download TakeOwnership.zip and double-click on the .reg (registry) file to add an option “Take Ownership” to your contextual menu (the right-click menu).
You can then right-click on your system files and take ownership of them. After that, you can rename all files and replace the system file / explorer.exe easily.
Important: It can happen that you are not able to copy modified system files into the Windows\system32 folder. I haven’t figured out when this happens, but when it happens to you, you should simply use the command line tool to copy the files (explanation below).
Replace Shell32.dll via Command Prompt (Recommended, Shorter)
1. StepOpen up an elevated command prompt
2. Step Enter cd C:/Windows/system32
This is often not necessary, system32 is usually the default directory.
3. Step Enter TAKEOWN /f shell32.dll
Now we’ve taken ownership of the file. But that is not enough! Now that we have taken ownership of shell32.dll we need to give our account permission to modify the file. Or you will get a error message: “You need permission to perform this action” if you try to rename shell32.dll.
4. StepEnter ICACLS shell32.dll /grant USERNAME:F
Replace USERNAME with your username. Enter your username exactly (I’m not sure if this is case sensitive, so make sure you get it right).
5. StepYou can now rename shell32.dll manually or via command line: rename shell32.dll shell32.dll.backup
6. Step Copy your modified shell32.dll into the folder: copy PATH_TO_MODIFIED_SHELL32.dll C:\Windows\system32\
Replace PATH_TO_MODIFIED_SHELL32.dll with the path to the modified shell32.dll. If you can’t make this work, simply CD into the folder and then run this line: copy shell32.dll C:\Windows\system32
Tips:
Close your control panel and all other Windows. If a Windows processing is accessing the shell32.dll you can’t actually replace it, that’s also the reason why you have to terminate the process explorer if you want to replace the explorer.exe.
If you receive the error message: No mapping between account names and security ID’s was done, make sure the user actually exists and you typed it in correctly.
If everything fails, follow the beginner tutorial below to take ownership of shell32.dll via Windows File Properties.
Replace Shell32.dll via GUI (Not Recommended)
It is possible to replace the shell32.dll via GUI (graphical user interface). However, I strongly advise you to become familiar with the command line tool, which is a bit more difficult.
1. Step Open the Windows Explorer (Windows key + E)
2. Step Go to C:\Windows\System32\shell32.dll
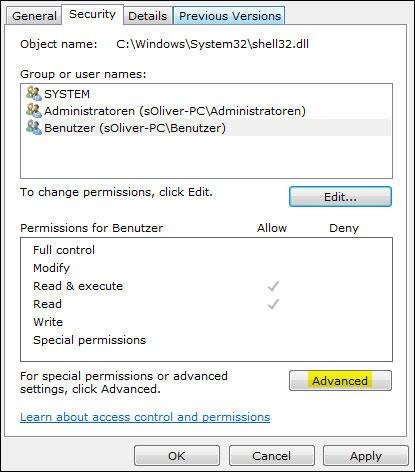
3. Step Right-click on shell32.dll and click on Properties
4. Step Go to the tab Security at the top.
5. Step Click on the Edit button:
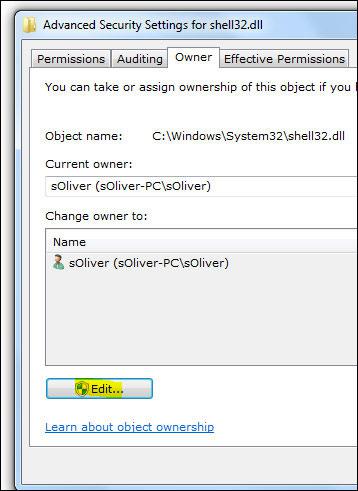
6. Step Go to the tab Owner
7. Step Click on Edit:
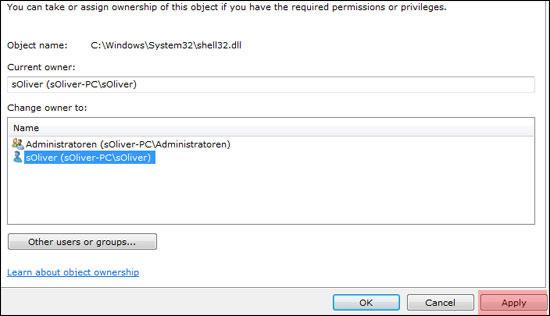
8. Step Select your username and click on Apply to take ownership of Shell32.dll:
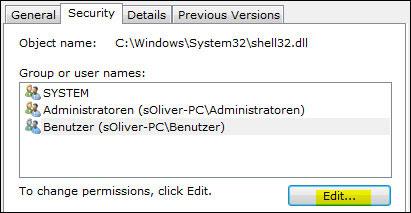
9. Step Repeat 1-4 and go to the Shell32.dll Security tab
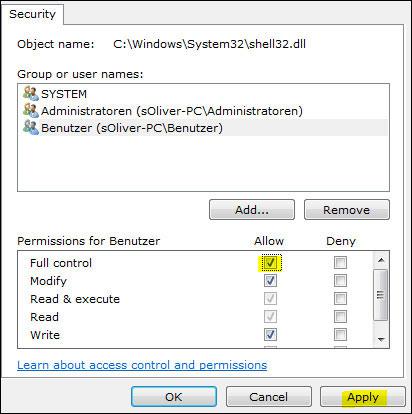
10. Step Select your username from the list of “Group or other usernames” and click on Edit:
11. Select your username and check the option “Full Control”, then click on Apply:
12. You have now permission to rename shell32.dll. Rename it!
13. Copy the modified shell32.dll into the system32 folder.
Important: MUST-Read for Windows 7 64-bit Users
If you are on Windows 7 64-bit, you will have to copy the 32-bit shell32.dll into the folder C:\Windows\sysWOW64\
For more information, please refer to our guide how to install Windows 7 shell themes!


If I have the 64bit shell32.dll file, do i still have to copy the 32bit file to the C:\Windows\sysWOW64\ folder?
If you are on Windows 7 64-bit, you will have to copy the 32-bit shell32.dll to sysWOW64, that is correct.
I am trying desperately to get a client’s machine to work with “Mac Snow Leopard for Windows7” theme. I have all the files, but the issue lies in editing system files to support full theme feel. Permissions work has been a nightmare and twice I’ve had to do system reinstalls. Each time I try to commandline’s version I get an “access denied” at doing anything to do with Shell32, no matter what I’ve edited. (And I have INDEED edited its permissions with GUI -and- command line, I still cannot move any files in. The problem is that Win7 is blocking my access to copying files (Modified Oobefldr.dll, ExplorerFrame.dll and Shell32.dll) into the Sys32 folder. I can find no way to allow myself to do this — If I try to edit Sys32 permissions, the Edit prompt will not open at all! I have all system files backed up, but as it is I’m stuck working on this client’s machine with a half-backed Mac OS look. Can anyone offer me some help?
Jeff, you could give our theme a try which is very easy to install even for beginners. And no offense, but you are a beginner when it comes to Windows 7 permissions. Who would do a system reinstall because of a permission problem? Do a sfc.exe /scannow and all of your original system files will be restored.
The information how to replace system files in Windows 7 can be found on our site and I will not repeat myself here (sorry), you just need to actually read it.
Guyz, i need help whenever i wanna takeown\f shell32.dll there is a error saying this user currently logged on doesnt have privileges!!
Any suggestions ?
hossein, log into the admin account.
Here’s how: Active admin account guide
fix for “file currently in use by another processes”
TASKKILL /F /FI “MODULES eq shell32.dll”
Hello, for the In Vitro theme is it normal for in windows like control panel which have the white side bar, that is the only thing that won’t go completely transparent. is that normal? Also I replaced the shell32.dll inside c;\windows\ not inside c:\windows\sysWow32\ what should I do. How do I get the file back that I shouldn’t of replaced inside the windows directory?
When I use the taskkill command, then copy, I still get the error. If I use the command again, it will say “INFO: No tasks running with the specified criteria.”
OK, great tips, but still some uncertainty for 64-bit users.
Do you modify only one shell dll?
Do you copy that to one location (sys32)?
Is there a way of quickly seeing bit-type of dll’s (32/64)?
Trying to clean my context menus, looking for ‘menu’ and ‘stringtable’folders in shell dll’s… nothing there.