 If you want to know how to add or remove the Compatibility Tab on the File properties page, simply follow this guide
Whenever you right-click on a program’s (.EXE, .BAT, .CMD, or .MSI) shortcut and click on Properties, the File Properties window appears. A lot of tabs are available on there. You can add or delete the Compatibility tab using the Windows policy editor
Important: You will need administrator privilege to perform the following steps.
Steps to add or remove compatibility tab in Properties Page (Works on 7/8)
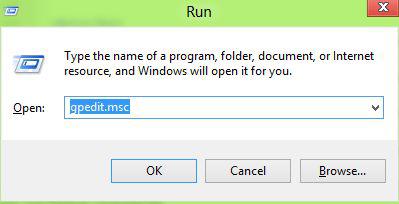
1. Step Press Windows + R to open Run and type gpedit.msc, and click OK.
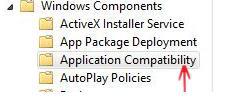
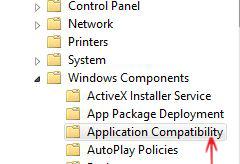
2. Step The Local Group Policy Editor window will open. In the left pane, navigate to Computer Configuration-> Administrative Templates-> Windows Components-> Application Compatibility by expanding the corresponding triangle icons.
3. Step Now, in the right pane you will see Remove Program Compatibility Property settings. Double click on it to edit.

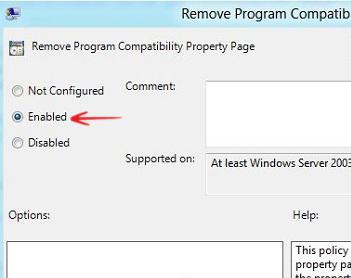
4. Step A new window will appear. You will see a radio button which is by default set to Not Configured
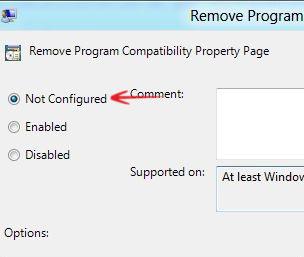
5. Step Now, to remove Compatibility Tab from Properties simply set the radio button to Enabled
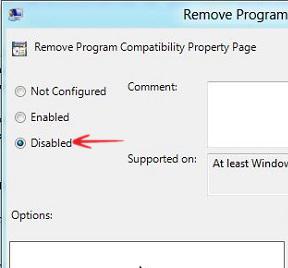
6. Step To re-add the Compatibility tab to the Properties page choose Disabled
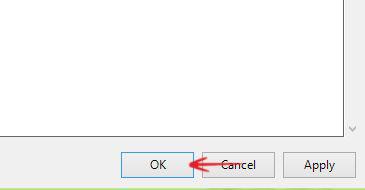
7. Step Click on OK to save the changes and close the Local Group Policy Editor window.
That’s it. These are the complete steps to add or remove compatibility tab in Properties Window in Windows 8.

