 Keeping two folders and all their files in sync can be useful in a lot of situations, and fortunately, it’s very easy to do that in Windows using Microsoft’s own free SyncToy utility.
In this article, I’ll show you how to completely automate the sync process.
Keeping two or more folders in sync
Whether you want to keep your work files up to date between computers or you just want to have your music collection on your smartphone filled with the latest songs from your PC, syncing folders is a great way to do it. There are plenty of tools out there that let you do it, but most of them are paid and there’s really no reason to go for them when Microsoft offers an utility of their own, SyncToy, which may seem simple at first, but is pretty powerful under the hood.
Automatically syncing two folders and all their files using SyncToy
SyncToy lets you keep two folders (or more, either as pairs or daisy-chained if you wish) synced in three different modes (Synchronize, Echo and Contribute, which differ in the way file deletions and renames are handled). It’s a powerful tool in the right hands, and it works on Windows Vista, 7 and 8, although you will need to install .NET Framework 3.5 from Microsoft’s website or by simply going to “Control Panel/Programs and Features/Turn Windows Features On or Off”. SyncToy also has a CLI utility that lets you automate synchronizations using Task Scheduler (or even batch files), and I’ll show you how to do that below.
Step 1. Download SyncToy and install it on your computer (note the installation location, you’ll need it to set up the automatic sync). You can open it from the start menu by searching for “synctoy”.
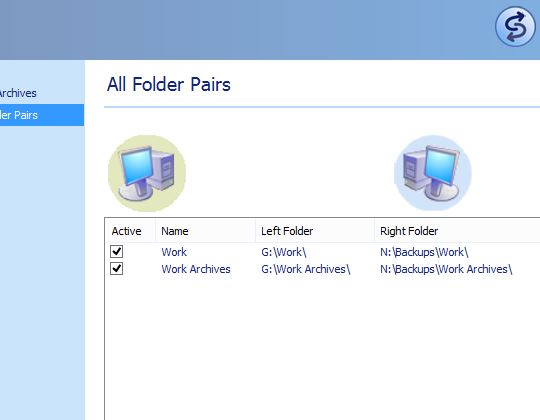
Step 2. SyncToy’s user interface is pretty simple – you can set up folder pairs that would sync when triggered. You can set up one folder to sync to several other folders, create independent pairs, and even daisy chain the folders so they all sync one after another by different rules (helpful for keeping two main folders up to date, while a third one acts as an archive, for example). All of this can only be done if you use the command line tool and Task Scheduler, as the SyncToy program itself doesn’t offer these capabilities.
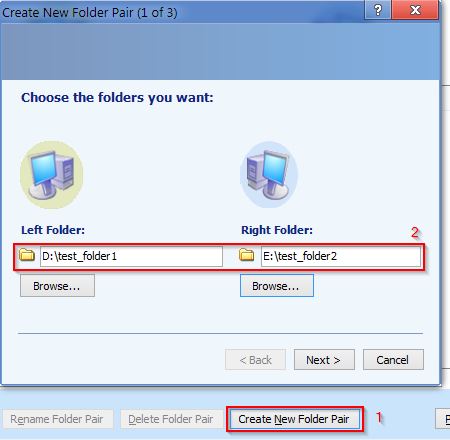
Anyway, setting up a folder pair is very easy – just click on “Create New Folder Pair” and select the folders.
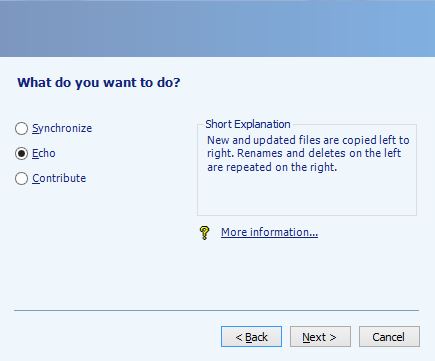
Step 3. On the next screen, you can choose the way the folders will be synced. Aside from all the files being created in both folders, the difference lies in the way renames and deletes are handled. “Synchronized” means both folders will be equal, i.e. deletes and renames in the right folder will be done in the left (main) folder. “Echo” gives priority to the left folder, with renames and deletes being repeated in the right folder, but not vice-versa. And “Contribute” only processes renamed files on the left, but does not delete any files in the second folder. Depending on your use type, you’ll need to select the best option yourself.
Step 4. After giving the pair a name, it will be ready to sync. You can do it manually in the SyncToy interface, but why do that when automation is much better (and fun)?
We’ll be using Task Scheduler to automate synchronizations, which basically involves running SyncToy’s CLI program and issuing the right command. You can see the commands in the help file (accessible from the main interface), under “SyncToy How To Topics -> Run SyncToy from Command Line”.
The sync commands are very simple actually – to run sync for all folder pairs, you would use “SyncToyCmd -R”, while “SyncToyCmd -R folder_pair_1” would only run the sync on folder_pair_1, as you might’ve guessed. So, start Task Scheduler by typing “task scheduler” in the Start menu/screen search field, and click on “Create Basic Task” on the right side of the program’s main window.
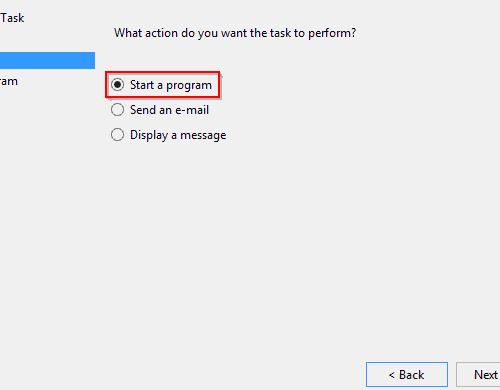
Give the task a name, then select a trigger – you can run the sync at logon or every day at a specific time, which is good enough for most needs. Next select “Start a Program”.
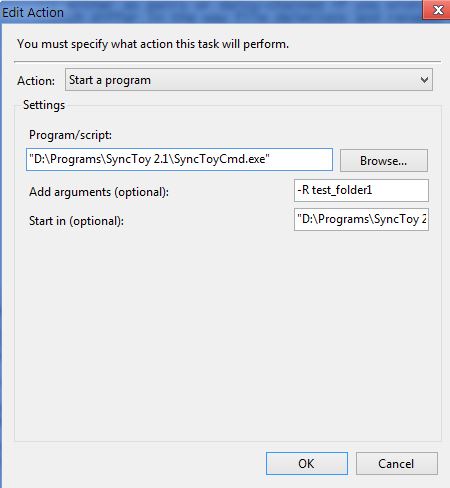
Step 5. The next screen has the most important stuff – you’ll need to find and add SyncToyCmd.exe in the “Program/script” field, add the folder where it’s located in the “Start in” field (you can also just leave it empty) and add the desired arguments in the “Add arguments” field. It’s all pretty simple – check out my config below for an idea of how it should look:
Once you finish the setup, the task will be added to the library and you can see it in action the next time the trigger is fired, or right away by running the task manually. I’ve been using it for a long time and it has never failed to work.
Conclusion
Keeping folders in sync can be very useful in a lot of cases, and with SyncToy you can easily automate the process, as well. Be sure to check out SyncToy and try to automate the synchronization process using this tutorial – I’m sure you’ll love it!

