 Batch converting multiple images or photos can be very useful, but there aren’t all that many tools that can do it right.
If you need to convert, rename, resize and/or crop multiple pictures at once, the best tool for the job is the FastStone Photo Resizer – in this article, I’ll show you just how easy it is to work with it.
How to batch resize/convert/rename photos and images
Converting an image or photo from one format to another or resizing it to fit the requirements of a website is pretty easy, but things can get really tedious when you have two dozen of these images in line. That’s where batch tools come in, and the FastStone Photo Resizer is the best one for converting multiple files between formats, renaming, cropping and resizing them.
Using Faststone Photo Resizer for batch image work
Working with a batch of files is a bit different than working with just one. You need to visualize the end result in your head as opposed to seeing it on-screen, as you don’t see it immediately – you set the parameters and after the work is done, you can see your results. Fortunately, Faststone Photo Resizer makes it really easy, and in this article, I’ll show you how to use it.
So, let’s say you’ve got a bunch of photos that you want to upload to an online site, but first need to convert to a supported format, change their size and give them all a different name. Here’s how you would go about it:
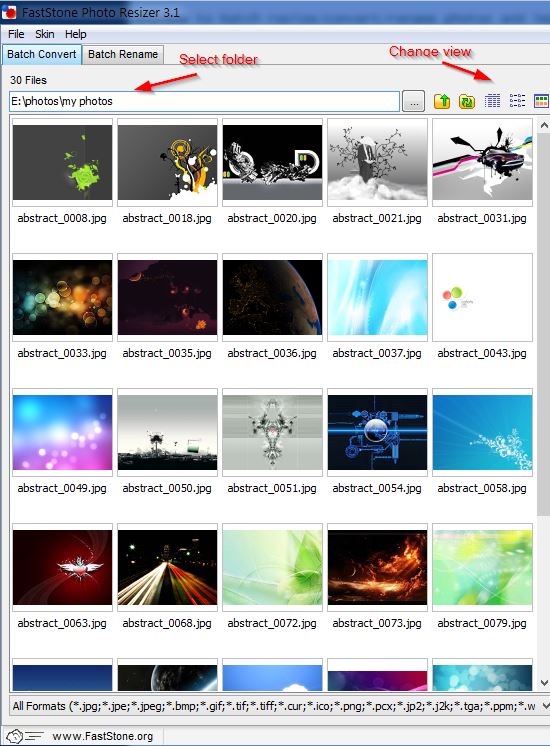
Step 1. Open FastStone Photo Resizer and in the main window on the left, navigate to the folder where your photos are. You can change the view (between list, icons and thumbnails) using the buttons right next to the address bar – I prefer the thumbnails view since it’s easier to select the photos I want.
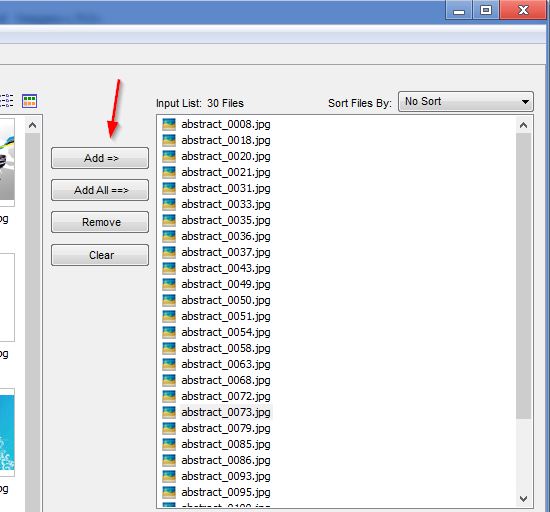
Step 2. You can add all the photos in the selected folder to the batch queue or just the ones you want using the “Add” and “Add All” buttons on the right. You should see the files added there as soon as you click the button. You can also remove individual pictures or everything from the queue with the “Remove” and “Clear” buttons, respectively.
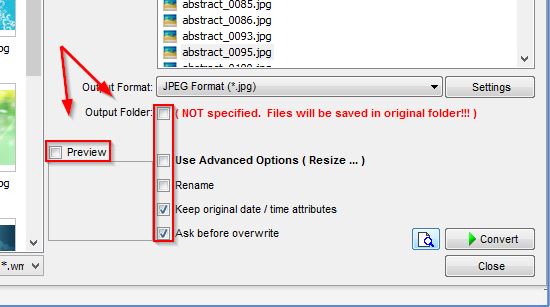
Step 3. The real magic happens in the bottom right corner – here you can set all the batch processing options you need. Check marking the boxes shown below will reveal advanced settings for each option. I’ll go into detail for each one of them.
Let’s get the easy options out of the way:
“Preview” lets you see a preview of any one of the selected images in the batch queue – this is NOT the end file preview, but rather a preview of the original file – it can be useful when you have a long list and don’t know which file is which.
“Keep original date/time attributes” will simply keep the original creation time/date information on the new file – if not checked, the new files will all have the date time when the batch process has finished (which is not really desirable for photos, for example).
“Ask before overwrite” will pop up a window asking what to do when there’s already a file with the same name in the output folder – it shouldn’t happen often, but it’s better to leave it checked, as unchecking it will overwrite any files automatically.
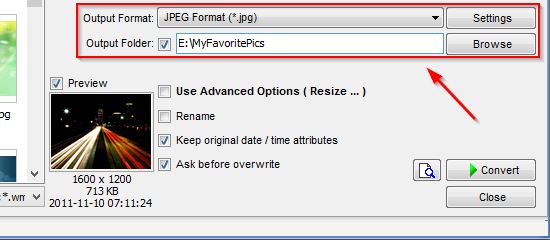
“Output Format” lets you select the output format – FastStone Photo Resizer supports the most popular formats, and each one has advanced options for setting the image quality (which directly affects the end file size).
“Output Folder” lets you specify an output folder for the processed files – if unchecked, the files will be placed in the same folder where the originals are, which can make it very hard and confusing to sort them out.
Step 4. Now, set the output format and output folder. In my case, I want smaller JPG file sizes, so I set the output format to JPEG and set the JPG quality to 50 in the Settings menu.
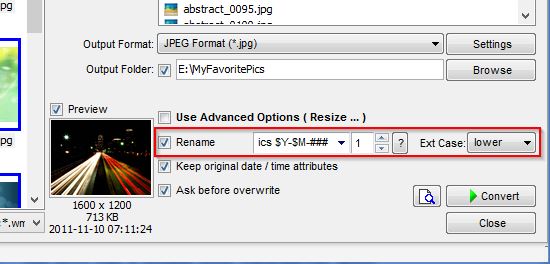
Step 5. The “Rename” option lets you set the way all your output files are named. You can click the “?” button for more information. In my case, I want all pictures to be named “MyFavPics” (it can be anything, like “My Birthday” or anything else), to contain the year and month they were created on and to be differentiated by a few numbers at the end. You can use dashes and spaces, too. Here’s how my settings (“MyFavPics $Y-$M-###”) look:
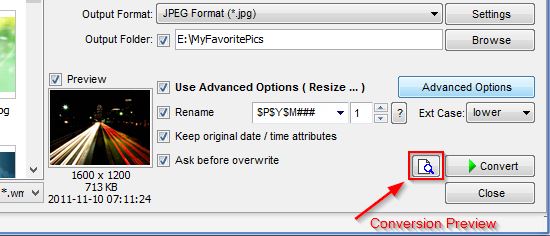
Step 6. And finally, I want to make all my images be exactly half their size – so a image will be resized to, a image to, and so on. This can be easily done in the “Advanced Options” menu. Here, you can resize, rotate, crop pictures, as well as change color options, DPI, add text, watermark or simple borders.

Step 7. If you want, you can preview how the end images will look and compare them with the originals by clicking the “Conversion preview” button (which is just an icon):
Step 8. After clicking “Convert”, you will see a window with information about the output files, their size and how much space you saved compared to the originals.
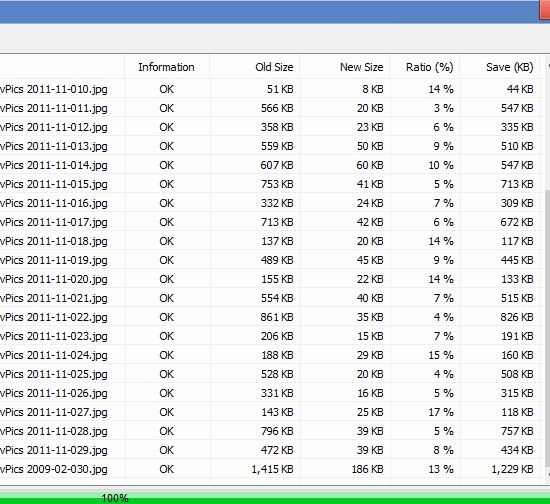
Once the progress bar gets to 100%, your images are ready to go!
Save time with batch image processing
Batch processing may seem hard at first, but once you get the hang of it, you’ll wonder how you could spend hours editing, converting and renaming all those files manually. Using FastStone Photo Resizer, you can do it in minutes and save a lot of time.

