We need to enable PAE in Windows 7 in order to address more than 4GB on Windows 7 32-bit. Here’s how.
![]()
Tip: If you don’t want to enable it manually, you can simply download this registry file that will enable PAE for you. Simply double-click on it after downloading and reboot. Done.
1. Step Read this tutorial How to open an elevated command prompt and open the cmd with admin rights.
2. Step Enter BCDEdit /set PAE forceenable
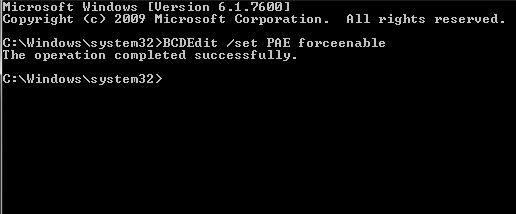
3. Step Reboot
4. Step Test your computer. Do whatever you use your PC for, launch your favorite applications? If everything is ok we can proceed. Should something NOT work, disable PAE again. (Open cmd.exe again and enter BCDEdit /set PAE forcedisable)
That’s it. PAE is enabled and working fine hopefully. You can now use a tool like Gavotte RAMdisk to use more than 4GB RAM in Windows 7
Disable PAE
To disable PAE simply write BCDEdit /set PAE forcedisable as mentioned above. Elevated command prompt is required again!


my computer is win7 ultimate. memRAM 8G, but the 32bit OS. I have a lot of searching on many sites …. finally got the solution.
the same way as you explain the PAE enabled force.
go to start menu, accesories, run commandprompt as administrator. then type bcdedit / set PAE forceenable enter, then comes a caption “The operation completed succesfully.
I was practicing, but the result is the same like wat? I checked the task manager and resource monitor total physical memory is still 3697M.
then, I restart the computer. but there is still no change.
what is wrong there? please advice
Hi noel,
did you also read our tutorial: How to use more than 4GB RAM in Windows 7 32-bit – if that is too difficult for you, you can try RAMDisk
Hope this helps
Oliver
hey noel
the problem is that the 32 bit OS “in theory” can support at maximum 4Gb,we calc it by 2^32=4294967296 bytes = 4096 Gb, and after that it cames the swap of windows and it takes some other space from the 4 Gb.
so if you want exploit all your 8 Gb i suggest the download a 64 Bits release of windows or ubuntu for free. hope it helps
Med
When i open my cmd, it only shows C:\User\user>
When i typed C:\User\user>BCDEdit /set PAE forceenable
Access is denied. Can you help me?
Karl, you need an elevated command prompt. Basically you open a regular command prompt, instead follow this guide
Thank you so much sir.
After rebooting my PC will my RAM become 4Gig?
And btw, what is the purpose of ramdisk?