Need to fix the .exe file assocation? More after the break.

Viruses and Trojans are always interested in your machine more then anything else would be and they would certainly make their most to damage your machine and deteriorate your computing experience. One of the most common issues confronted by many of the computer users is .exe file association. The .exe file association can be fixed by altering your computer’s registry and bringing it to the default structure for .exe files. The process is way too technical and we have tried to elaborate it as much as we can. You are still suggested to take a backup of your registry before acting on the instructions below.
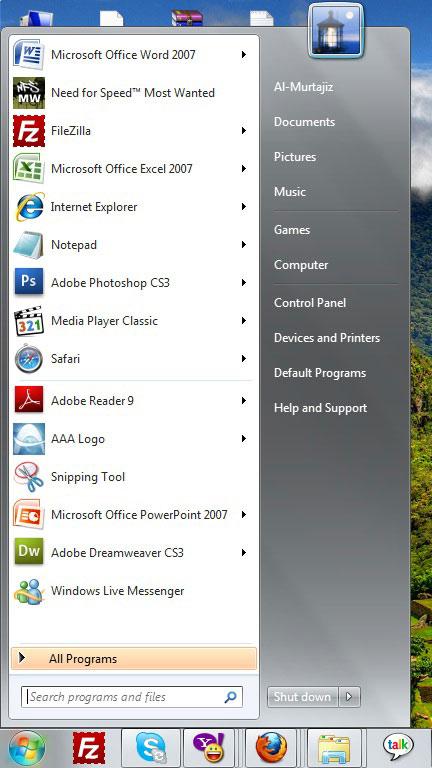
1. StepStart Menu is the haven to all your solutions related to your computer. Click on Start Menu.
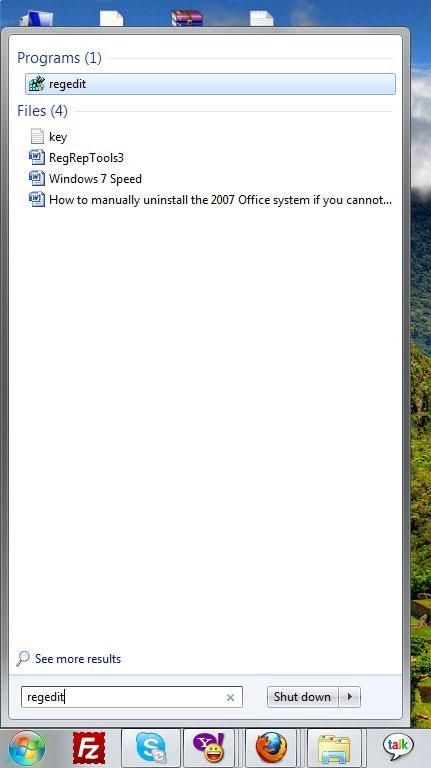
2. StepThe .exe file association fix can only be removed by registry editing and you need to open the registry editor for this job. Type “regedit” and you will see the Registry Editing Console on the top of the search result.
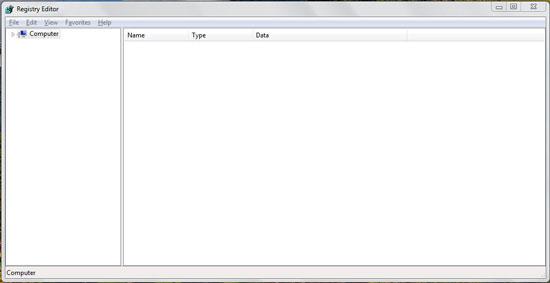
3. StepThe registry editor has complete registry tree of the computer and features every detail about the your machine registered with the Operating System.
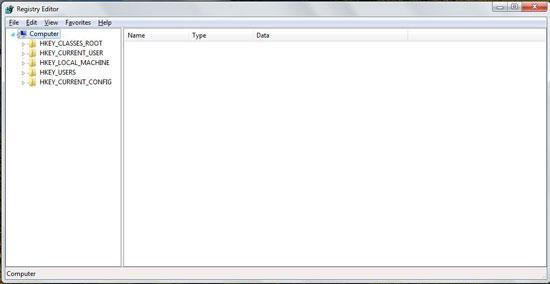
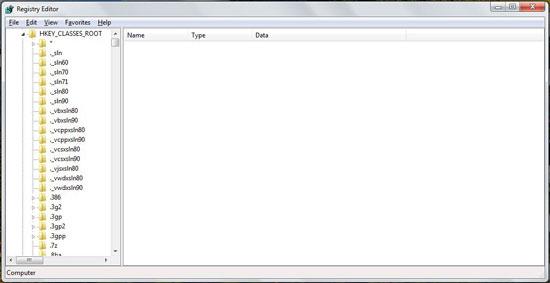
4. StepExand the Computer tree of the registry editor. HKEY_CLASSES_ROOT is the section of Registry associated with files and extensions. This defines the default program that will run a specific file extension.
5. StepExpand the HKEY_CLASSES_ROOT registry tree and you will see a huge number of file extensions listed. Each file extension listed and registered has a default program associated with the execution.
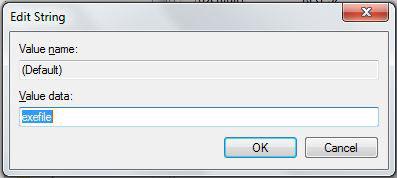
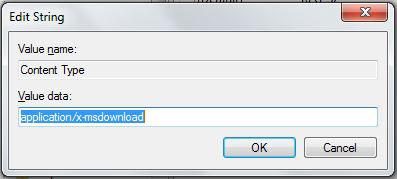
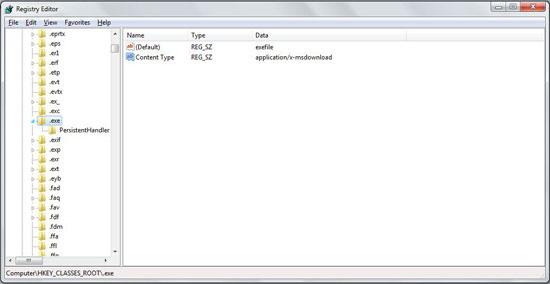
6. StepLocate .exe file extension from the tree. It will have two Strings by default. (Default) and Content Type.
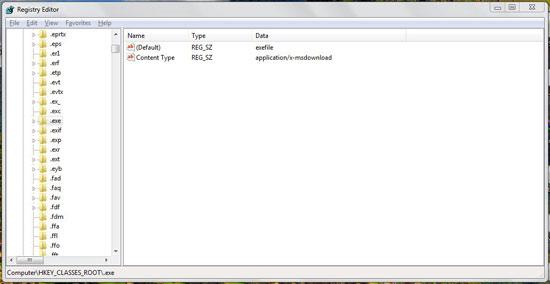
7.Set the values of both the strings as shown below. If the strings do not exist, you can create new strings with the abovesaid names.
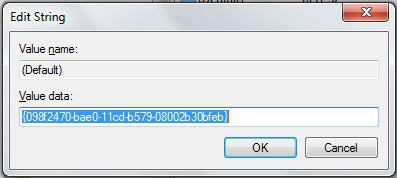
8. StepExpand the .exe branch and click on “PersistantHandler” section. It only has one string by default.
9. StepSet the value of string as shown in the screenshot below.
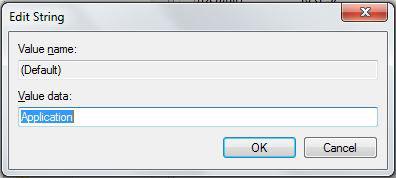
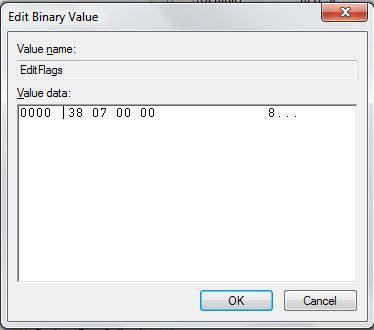
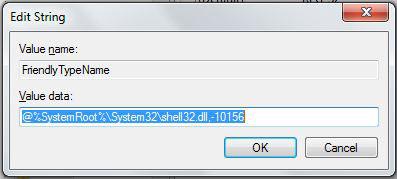
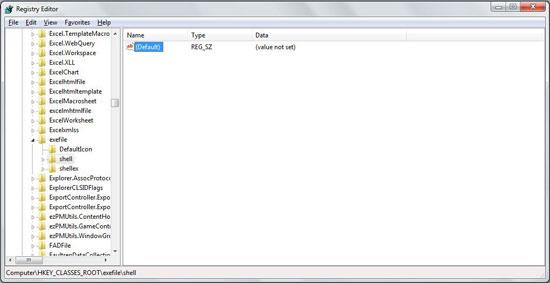
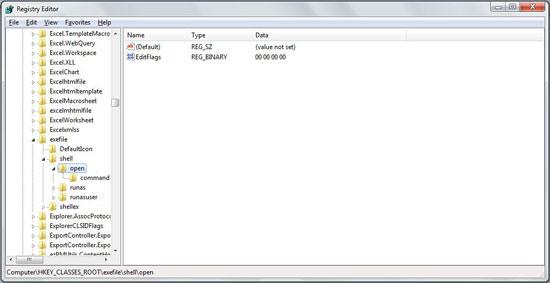
10. StepLocate “exefile” from the HKEY_CLASSES_ROOT branch that has three strings by default: (Default), EditFlags and FriendlyTypeName.
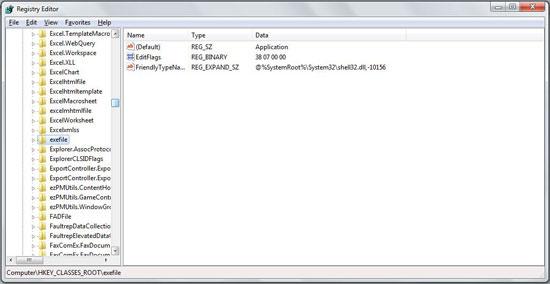
11. You need to set the values of each string as shown in the screenshots below.
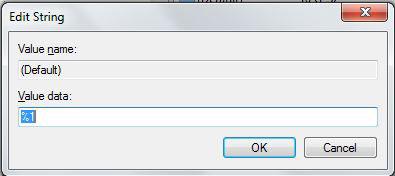
12. Move to the “DefaultIcon” section that has only one sting.
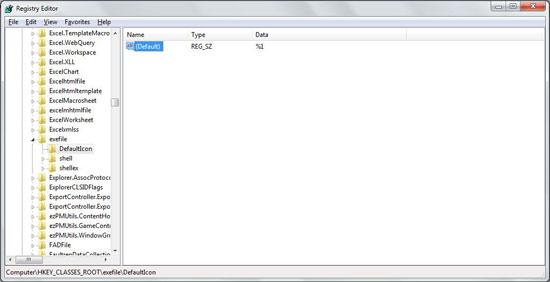
13. The string value should match to that shown in the image that follows.
14. Move to the “Shell” section of the “exefile” branch that has one key by default.
15. Make sure that it has no value data given as this is an empty string by default.
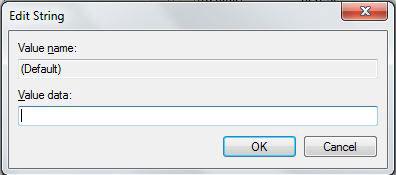
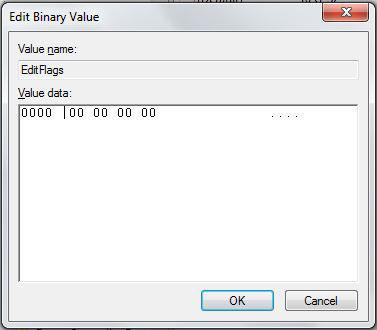
16. Move to Open section of the shell section. Make sure it has two strings only: Default and EditFlag.
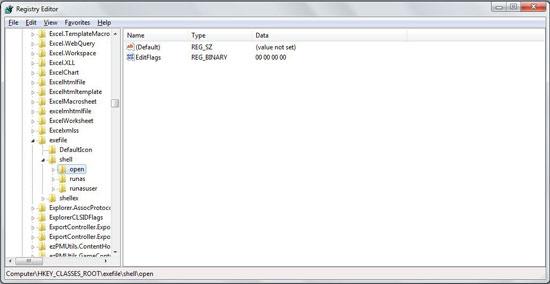
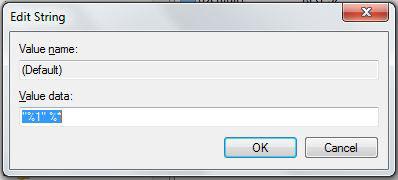
17. The (Default) string is empty by default while the following screenshot describes the value of EditFlags.
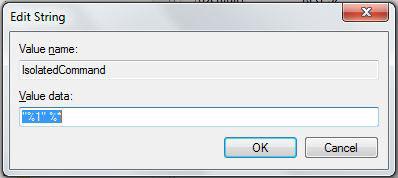
18. move to the Command section under the Open section. This too has two strings by default.
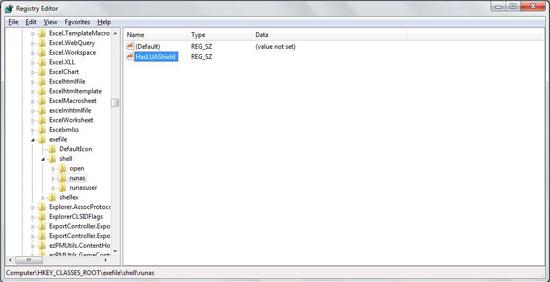
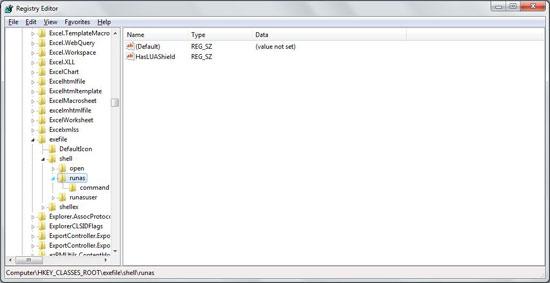
19. Following screenshots define the default value of each string under the command section.
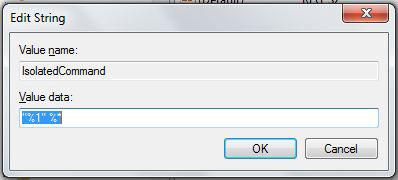
20. After setting the abovementioned to default, move to the runas section where you have two strings by default. The (Default) key has no value by default neither is there any value of string named HasLUAShield.
21. Expand the runas branch and move to command section. The command section has two strings by default.
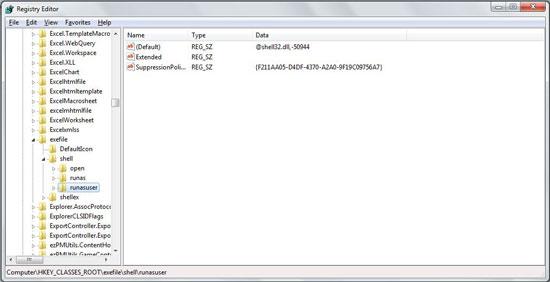
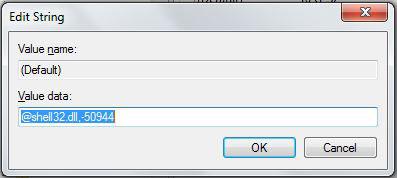
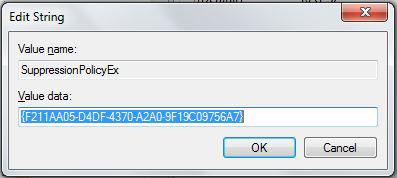
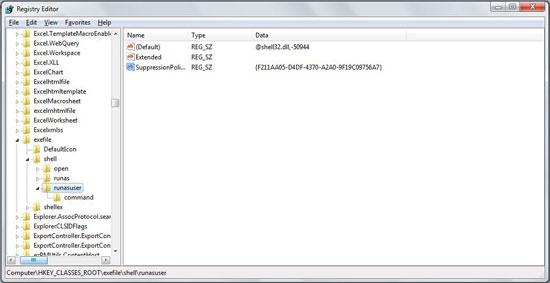
22. Set the string values same as they are shown in the image below.

23. Expand the runasuser section. This section has three strings by default: (Default), Extended and SuppressionPolicyEx. Extended string is empty by default.
24. The following screenshots define the default value of the other two mentioned strings. Make sure that you edit them accordingly.
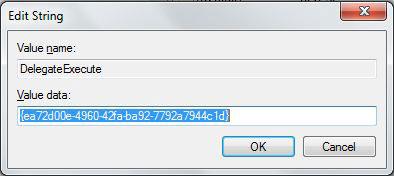
25. Expand the command section. It only has one string by default with the name of DelegateExecute.
26. Make sure that the DelegateExecute string value matches to that of the following screenshot.
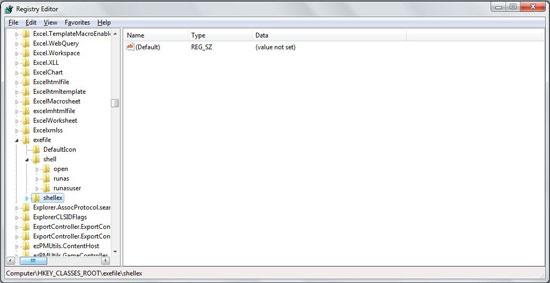
27. Expand the shellex section that has only one string (Default) with no string value. Make sure that it has no value and no additional string in the list.
28. Under the shellex branch is ContentMenuHandlers branch that has a (Default) string only.
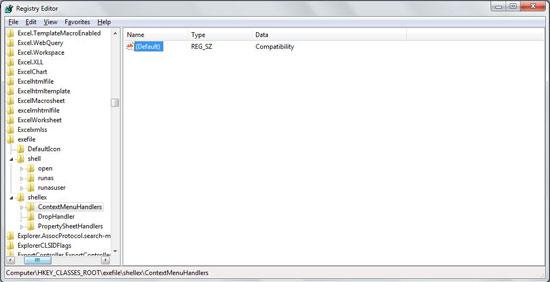
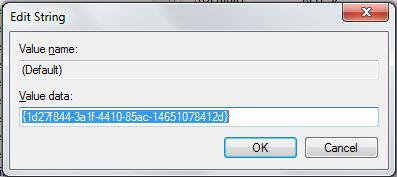
29. Make sure that the ContentMenuHandlers branch has the (Default) string value same as the following screenshot.

30. Expand the compatibility branch under teh ContentMenuHandlers section that too has just one key (Default).
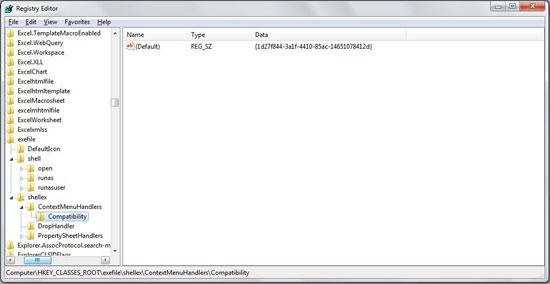
31. Set the value of (Default) string as the value shown in the following screenshot.
32. Expand the DropHandler section that has just one string: (Default).
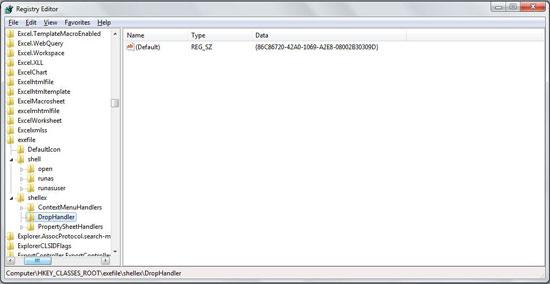
33. Set the value of (Default) to the value specified in the following screenshot.
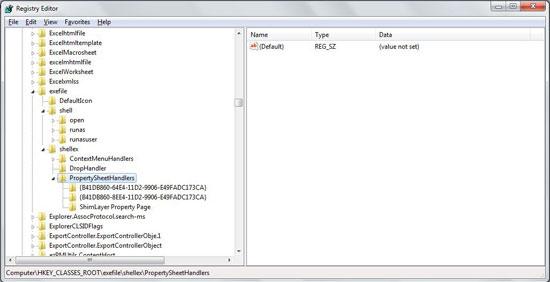
34. Next, expand the PropertySheetHandlers section of the Registry editor. It has just one string (Default) the string value of which is nothing.
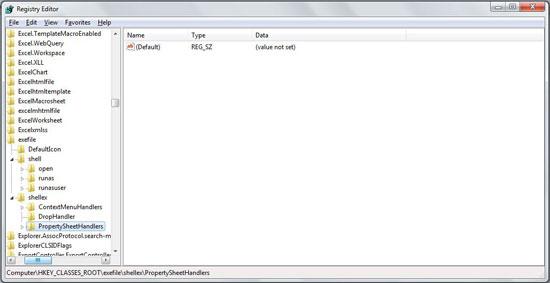
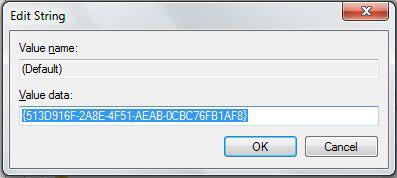
33. PropertySheetHandlers have three branches the first two of which are empty all the way.
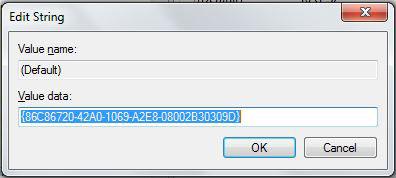
35. There is just one last string to edit under the ShimLayer Property Page section.
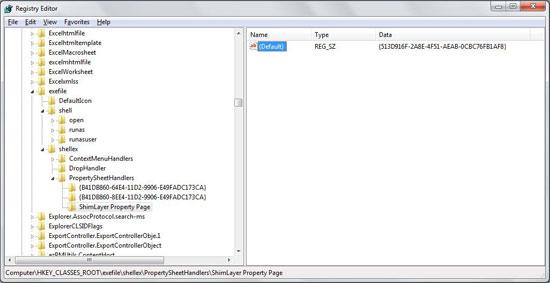
36. Set the value of (Default) string to the value specified in the screenshot below.
Sounds pretty hard to do. We agree. Give your system a restart and if everything worked perfectly, you’ve sorted one of the most chronic diseases of your computer all by yourself. Just in case you need our assistance, we’ll be here to help you out.

