 A lot of people, including me, who are using Google Chrome are experiencing a lot of problems, either Chrome is waiting for the cache and freezes or it hangs when it is trying to resolve a proxy on first load. Here are solutions
As many others, I was very unhappy with how Chrome performed. Naturally, I did an update to the latest version, but it didn’t fix the problem. Here are possible solutions that helped me to fix the freezes and hangs:
Solution 1: Moving Your Chrome Profile
IMPORTANT: The solution below moves your profile. Your profile includes bookmarks, which means they will not be available until you copy them to the new profile folder. Proceed carefully and make a backup of the folder Default
0. Close Chrome (open this tutorial in another browser or print it out!)
1. Step Open the Windows Explorer via Windows key + E
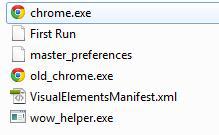
2. Step Go to C:\Users\username\AppData\Local\Google\Chrome\User Data
3. Step Right-click on Default folder and click Rename, enter Default2
4. Step Now Start Chrome and it will create a new folder called Default
5. Step Your old bookmarks are safely stored in Default2 should you need them
This may already fix the problem, but it didn’t work for me this time around (it worked previously, but not now)
Solution 2: Change the location of your Chrome cache and change the size
0. You can skip step 1-2 if you already have a Chrome desktop shortcut. If you don’t proceed with 1-2
1. Step Open the Windows Explorer and browse to C:\Users\sOliver\AppData\Local\Google\Chrome\Application
2. Step Right-click on Chrome.exe and click on Send To -> Desktop
3. Step Go to your desktop and right-click on the Chrome shortcut, click into the field “Target” and press the Space button, then copy and paste this text: --disk-cache-dir="E:\chrome\cache" --disk-cache-size=50000000
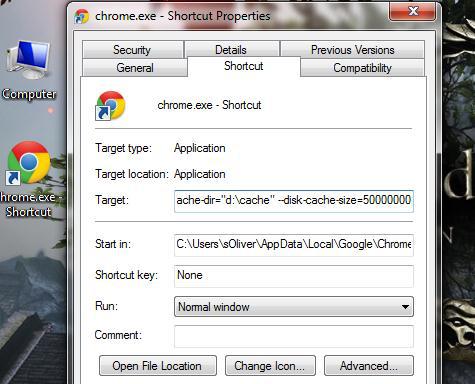
4. Step The disk cache size is specified in bytes, so this is roughly 50MB. You can fully customize the path – if you want to store the Cache on E:\Chrome\cache, then enter the same as I did
5. Step Click on Start and enter regedit into the search bar, hit Enter
6. Step Uncollapse HKEY_CLASSESS_ROOT, select the top entry folder * and enter Chrome
7. Step Select and uncollapse ChromeHTML, shell, open, command
In the right pane of HKEY_CLASSESS_ROOT\ChromeHTML\shell\open\command double-click Default and at the end locate -- "%1".
Enter the same we did for the shortcut BETWEEN .exe” and --"%1". It should look like this:
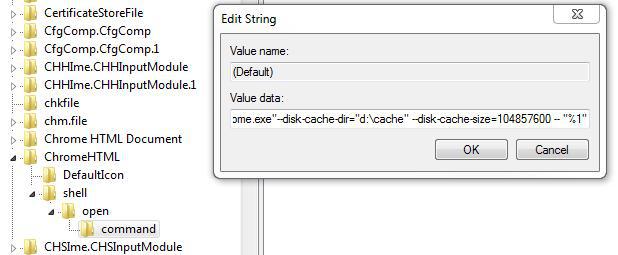
The final string:
"C:\Users\username\AppData\Local\Google\Chrome\Application\chrome.exe"--disk-cache-dir="E:\chrome\cache" --disk-cache-size=50000000 -- "%1"
Conclusion
If you follow the steps above you should not only have a faster Chrome, you can only optimize Chrome for SSD’s (solid state disks) and avoid that Chrome is hammering your SSD with frequent read and write operations and thereby altering your SSD and decreasing its lifespan.

