 HDClone is one of the best programs for hard drive and partition backup and restoration – the premium version also lets you schedule fully automatic backups, and in this article I’ll show you how to set it up.
Setting up automatic disk or partition backups
I’ve already written about using HDClone to backup drives and partitions manually, but if you’re serious about keeping your data safe, automatic scheduled backups are the way to go. Only the paid versions of HDClone support that, but it’s worth it if you want to have a completely automated backup system that would store a copy of your system drive on an external hard drive every day, and keep multiple images, as well.
How to automatically back up a partition or hard drive using HDClone
Setting up an automatic backup with HDClone is pretty easy, although you’ll have to learn a bit of command line code. You’ll only need to run a command using Task Scheduler, and HDClone’s command line interface utility will take care of the rest.
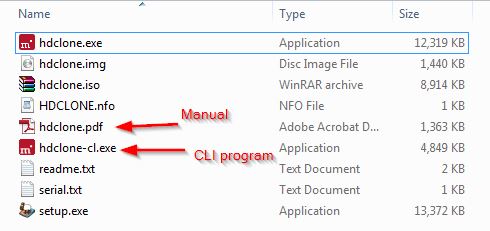
1. Step Automated backups are only possible in the premium versions, so I’m assuming you purchased the program and extracted it to a suitable folder on your hard drive (it’s better if it isn’t the system drive). In the folder, you’ll find a program called “hdclone-cl.exe” – this is what we’ll be using. You’ll need to read more about the automation process and commands in the HDClone manual (in .pdf format) in the same folder.
2. Step The theory is simple – we create a task in Task Scheduler that would run hdclone-cli.exe and issue a command, which will back up your system partition every day at 4am or as soon as you power on your computer, for example. To start, open Task Scheduler by typing “task scheduler” in the Start menu’s search field and pressing Enter. Click on “Create Basic Task”, give it a name, set the trigger to “Daily”, set the time and select “Start a Program”. The main settings are on the “Start a Program” screen.
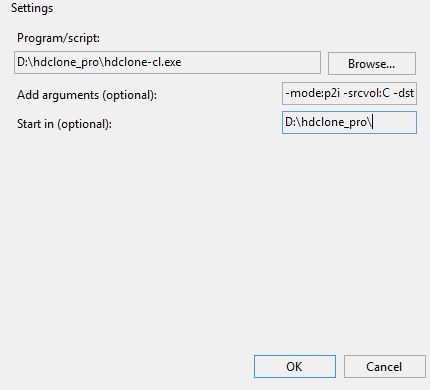
3. Step As you can see from the screenshot above, you need to:
– Select the “hdclone-cl.exe” program;
– Add the right arguments. Read the manual with attention, in my case it was “-mode:p2i -srcvol:C -dstvol:G -dstimg:daily_backup -compression:on”, which saves the C partition to a compressed image on disk G;
– Add the path to the folder where “hdclone-cl.exe” is located in the “Start in” field – don’t forget to wrap it in double quotes if the path contains a space anywhere (in my case it doesn’t);
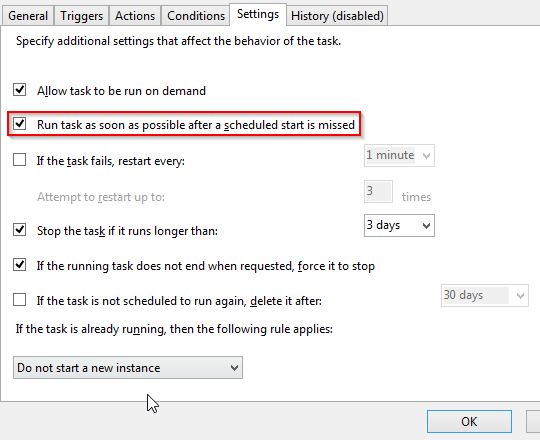
4. Step If your computer will be shut down when the scheduled time comes, you may also want to check “Run task as soon as possible after a scheduled start is missed” in the Settings tab of the Properties menu (accessible by right-clicking the task in the Task Library after you finished creating it).
And that’s pretty much it – it’s very simple once you figure out the command line arguments! Task Scheduler and the HDClone CLI tool do all the work for you, never missing a beat.
Conclusion
The free version of HDClone is a really useful tool, but the paid version is worth getting if you want the most features, including the ability to automatically back up any disk or partition on a schedule. If you have the paid version, be sure to try setting up scheduled backups as explained in this article.

