Mozilla Thunderbird is one of the most powerful email clients for Windows, and if you want more features than your email provider is offering, you should definitely try it out.
Here’s how to set up Thunderbird and get a new mail account running in no time.
Using a desktop email client on Windows

Web email clients are all the rage nowadays, and indeed they are simple to use and don’t require any special software or many resources. But if you want to get more out of email or you’re a professional who needs certain features, installing a desktop client is one of the best ways to go.
How to get up and running with Mozilla Thunderbird
You may already know or use Microsoft’s Outlook, but there’s another email client out there that is just as good and in many respects, trumps it – Mozilla Thunderbird. It’s free, it has a nice interface, it’s easy on the resources and fast, and it has a lot of inbuilt features, as well as a nice collection of third party addons. Here’s how to set it up and start using it:
1. Step Download the Mozilla Thunderbird installer from the official website: https://www.mozilla.org/en-US/thunderbird/download .

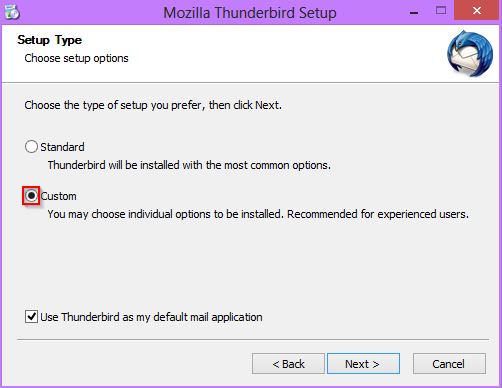
2. Step The installation is pretty easy, but I’d recommend you choose the “Custom” option in order to customize a couple of things for a better experience.
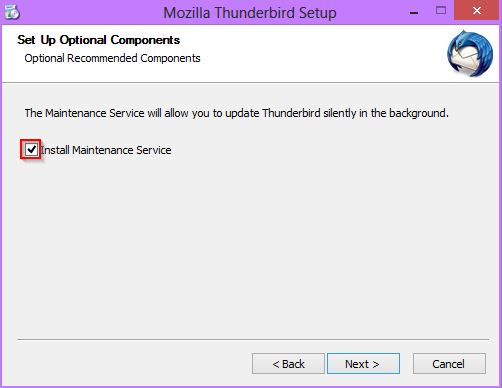
3. Step I recommend you check the “Install Maintenance Service” box – the service runs in the background and installs the latest updates automatically. However, if you plan on using multiple addons, it may be better to uncheck it as an update may break compatibility.
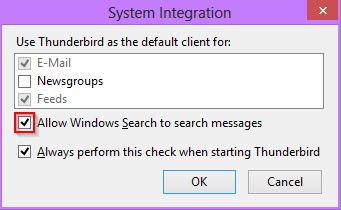
4. Step After the installation has finished, you’ll be prompted to select Thunderbird as the default app for eMails, RSS feeds (yes, it can do that, too) and Newsgroups. I’d also recommend allowing Windows Search to search through the messages, especially if you use Windows Search often (this is the default setting for Outlook, as well).
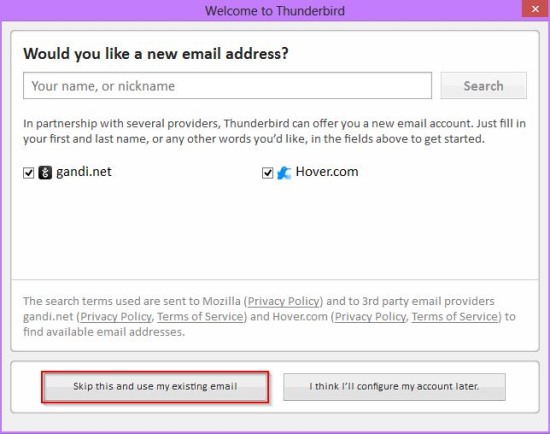
5. Step On the next window, you’ll be prompted to create an email account on one of several (relatively obscure) services, or set up an existing email account in Thunderbird. I’m assuming you already have an email account, so you should go with the latter option, of course.
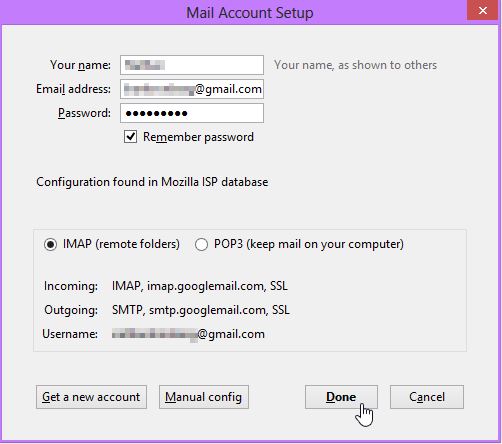
6. Step Setting up an email account with Thunderbird is amazingly easy – you don’t need manual configuration for pretty much any of the popular services. In Outlook, you need to set up GMail accounts manually – in Thunderbird, it’s completely automated! Just enter your credentials, click Continue and then see if the automatic settings are correct (they should be, but if they’re not, you can use the Manual Config button to set them up manually).
7. Step The basic set up is now done – Thunderbird will sync all the folders and emails on the remote server and you can use it right away. The default settings are great for 95% of all users, but if you need to change anything, there is an overwhelming amount of options hidden behind an inconspicuous three lines button in the top right corner.
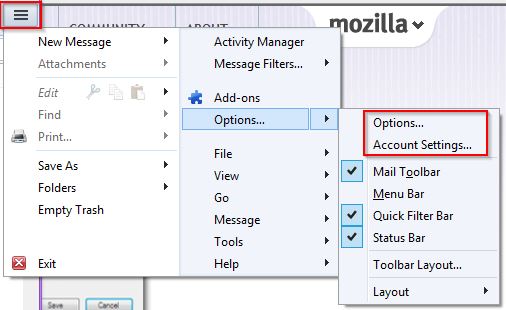
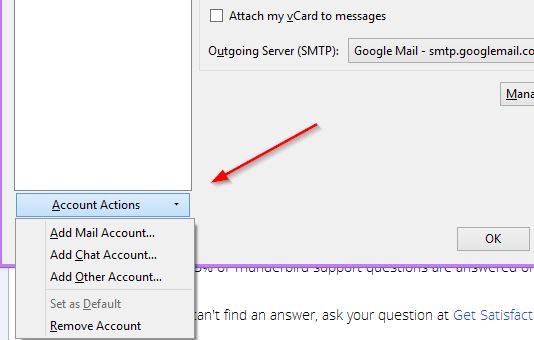
8. Step Also under that button is the Account Settings menu, where you can change settings for current accounts and add new email accounts if you need to.
That’s it with the setup – now you can work from your desktop with all of your email accounts at once. Be sure to check out the various addons and all the features in Thunderbird – there are plenty of them!
Conclusion
If you find your web email client’s features limited, be sure to try out Mozilla Thunderbird – it’s free and it has a lot of unique functionality that is simply not possible with the usual web apps.

