If you install a new hard drive in your PC you must first initialize the hard drive in Windows 7. This can be done via a GUI, so even beginners can do it. Here’s how.
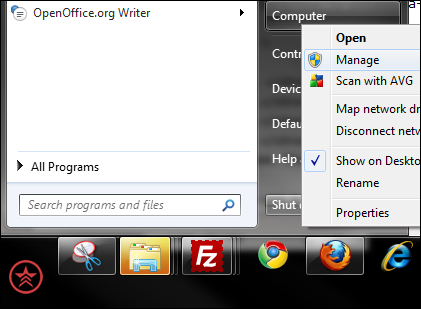
1. StepClick on Start and right-click on the entry Computer on your Start menu
2. Step Click on Manage
3. Step Double-click on Storage, then on Disk Management(Local)
4. Step You will be prompted with a message. You now have to decide which partition style you want to use for the selected disk. This can be either MBR (Master Boot Record) or GPT (GUID Partition Table).
Unless you use a drive that is larger than 2TB (Terabyte) use the partition style MBR. GUID/GPT is only readable by Windows XP 64-bit, Windows Vista, Windows 7, Windows Server 2003. And only Itanium systems can boot from such a disk. So, if you don’t know what GPT is you will not need it.
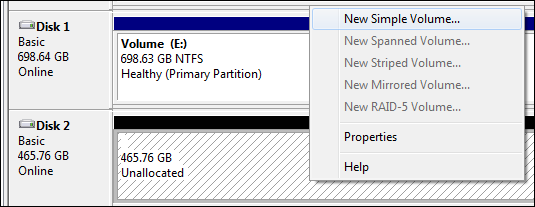
5. Step Next, you will see a list of your current hard drives. All disk with a blue bar have allocated disk space and are primary partitions. In order to initialize a hard drive, you need to allocate the disk space.
So, right-click on the hard drive with the black bar and click on New Simple Volume:
6. StepA wizard will guide you through the initialization process
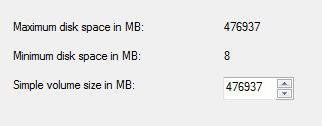
7. Step Enter the amount of MB you want to allocate. By default it will use all available disk space
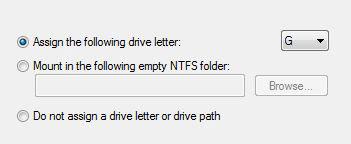
8. StepAssign a new drive letter to the drive is also part of the initialization process:
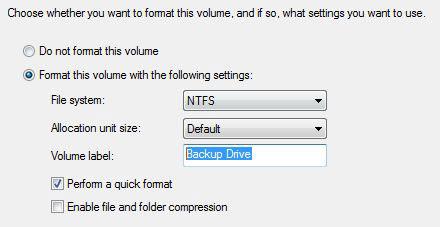
9. Step Instead of New Volume enter a name for the hard drive, something that will clearly identify what the purpose is. By default the option “Perform a quick format” is selected, which is recommended. If you want to save disk space, also select Enable file and folder compression.
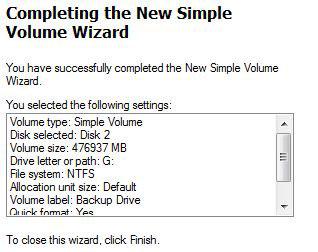
10. Step Finally, review your disk initialization information and click on Finish. If you noticed a wrong setting, you can always go back and change it. Even after clicking on finish you can still change the volume size, label, drive letter and enable compression on it.
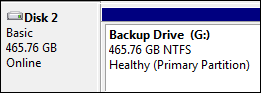
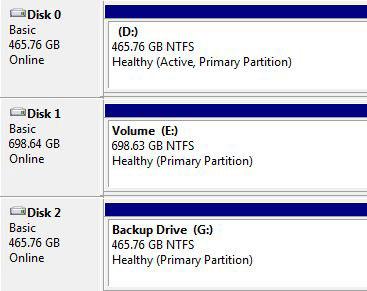
11. Voilà, you have successfully initialized your new hard drive, Disk 2 now has a blue bar (primary partition)
If you still have problems initializing a hard drive or if you are unsure about some of the settings, post your question below and we’ll get back to you as soon as possible.


Just the help I needed thank you so very very much
I received a new laptop and it included a solid state “c” drive along with an external 500GB drive. The external drive was partitioned by the seller. I would like to re-partition the drive to fit my needs. Is this possible using the above info or is there another set of steps I need to do this.
System is Win 7 64 bit.
Regards…..TomW
Finally, someone has given clear and precise instructions on adding a new HD. When I built my first computer, I installed three HD’s, because I wanted plenty of program room for graphics design. It took me three times to get it right, because the instructions were nearly incomprehensible. I wish I had your method available to me then. When I build another computer, I will have your instructions to make things easier. Thanks!
You’re making it too complicated. Just install the drive, make sure device manager sees it and put (in my case) Partition Wizard to work to take care of the unallocated space on the drive and format it in NTFS. You can even set the drive letter before formatting if you want something different than the next letter in line. That’s all it takes.
please i try to initialize following the step listed above but it does work, my drive cannot give option NEW SYMPLE VOLUME when i write click, PLEASE HELP ME OUT.THANKS
my external drive is prompting me to initialise while it has data which am need of. how can I recover the data
I have a new 3TB Barracuda which initialized, with VISTA, showing only 748GB. Is this a hardwareproblem or a problem with the initialization process. This is the second HD I have had the problem with, with this HW and VISTA O/S. Thanks
Hi, problem. I go to Disk Management, and I do not get a message prompt. The computer spots my HD, but I just don’t get a message prompt. Thanks.
Thanks for very helpful how-to.
I also did not get the New Simple Volume menu item – after rescanning a few times it finally appeared – you might want to consider adding a comment in that step…
CC
GREAT ARTICLE —> BEST EXPLANATION OF INITIALIZATION PROCESS I’VE FOUND YET!!!
Glad it helped Robert.
Sometimes an old BIOS can cause some hard drives to show up less GB/TB than the drive actually has. That or driver problems. In both cases, you should look up the specific manufacturer and if there are other people reporting similar problems for that particular model
hi, iam the problem when i login my portal ? i find a error massege ? massage are ” error : type error : unable to get property ” initialize ” of undefined or null reference ” pls help me how can i solve it
Many viewers have this problem and get hung at Step 6. No wizard appears, but they get the Error message – “Incorrect Function”
The disk is not initialized, and you can’t get past this step to partition or format or assign a letter or anything else.
I discovered (by accident) that if I right clicked on the grey area to the left of the Black lined un-initialized disk, it opens a “ATA SCSI Disk Device Properties” window. Select the “Policies” tab, and check the “Enable write caching on the device” box. Click OK and back out.
Everything from that point forward worked. I made a simple partition, did a quick format, and assigned a drive letter.
Done. Good luck.