Did you know that Windows 7 includes a built-in memory test? Tools like memtest are definitely handy, but using built-in features can be beneficial. Let’s try out the Windows 7 memory diagnostic tool (after all many of you would like to see a hardware diagnostic tool in Windows 8)
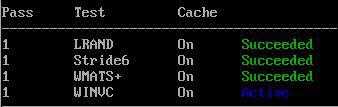
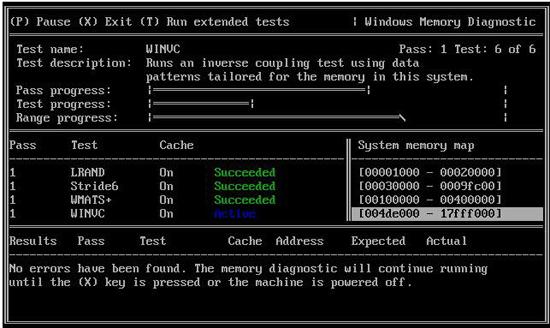
If you experience any problems running Windows 7, you might want to use the Windows Memory Diagnostic Tool to figure out if your hardware is responsible for it. So, simply run a few tests using the Memory Diagnostic Tool and then you’ll know if it’s the RAM or not. If you love to overclock your system, you can use the tool to find out if your system is stable with the current latency settings.You can even run some advanced tests and modify the Windows 7 memory tests by pressing F1 (while the tool is opened).
Start Windows 7 Memory Test via Start Menu
1. Step Click on Start and enter memory into the search field
2. StepAt the top you will see the entry Windows Memory Diagnostic, click on it
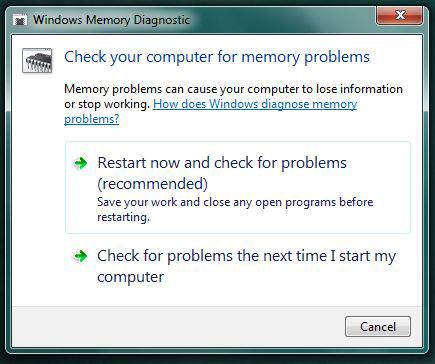
3. Step Close all programs and when you are ready click on “Restart now and check for problems”:
Start Windows 7 Memory via Command Prompt
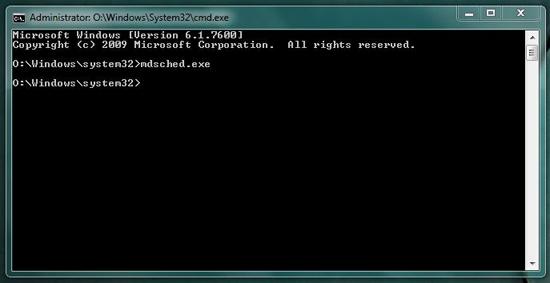
1. Step Open an elevated command prompt
2. Step Enter mdsched.exe
3. Step Close all program and when you are read click on “Restart now and check for problems”:

