 Logitech is still the leading manufacturer of mices, keyboards and other peripherals. To get the most out of your devices, you should download the Logitech Setpoint software that has been recently updated
Download And Install The Software
This software not only will make it possible to change your pointer speed, it has a lot of awesome features. Gamers for example might want to disable mouse acceleration or enable it (depending on their gaming style). Pro-gamers regularly tweaks all of those settings using Setpoint
But there’s much more to Logitech’s Setpoint software – it allows you to boost your productivity ten-fold if you use it smartly. Below we will quickly walk you through configuring Logitech Setpoint and some advanced uses in combination with Autohotkey
Configuring Logitech Setpoint
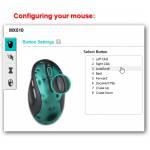
1. Step Open the Setpoint software and go to the tab “My Mouse” if it’s not selected
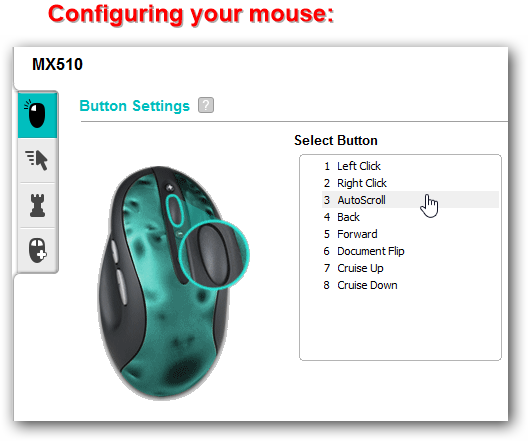
2. Step From here you can assign all sorts of shortcuts or built-in functions to your mouse buttons
Assign Keystroke To Your Mouse Buttons
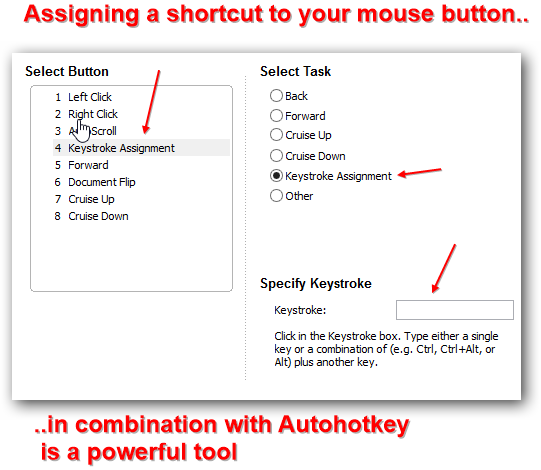
3. Step It’s easy to bind a key to your “forward” and “back” buttons. Using those keys for browsing the web might be a time saver at first, but trust me, using this feature of Setpoint in combination with Autohotkey is far more efficient!
Advanced: Assign “Strings” To Mouse Buttons
4. Step Here is an extract from my own Autohotkey file. This might look complicated at first, but let me tell you this: The time you invest into this will pay off more than ten times and more. Binding “strings” to one of your mouse buttons is a no-brainer
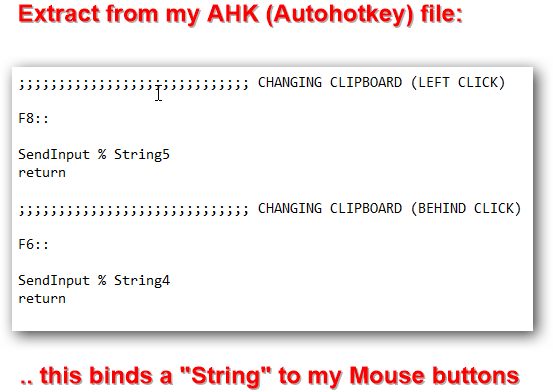
5. Step
;;;;;;;;;;;;;;;;;;;;;;;;;;;;; CHANGING CLIPBOARD (LEFT CLICK)
F5::SendInput % String5
return;;;;;;;;;;;;;;;;;;;;;;;;;;;;; CHANGING CLIPBOARD (BEHIND CLICK)
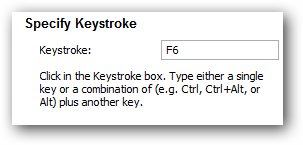
F6::
SendInput % String6
return
6. Step You can copy my code above and play around with it. This binds String5 to F5 and String6 to F6
7. Step Now what can you do with Autohotkey? For example it could append a string whenever you copy something into your clipboard. The code for this is really simple. Let’s take a look at some code
String := “” ; Clears the string variable for new content
Loop, Parse, Clipboard, `n, `r
{Row%A_Index% := “YOUR TEXT HERE – A_LoopField – MORE TEXT”
If (!String)
String .= Row%A_Index% ; Add this if nothing is in the string variable
else
String .= “`n” Row%A_Index% ; add this if something is in it}
What the code does is go through text in your clipboard. You can append text before the text in your clipboard or after using the variable A_LoopField. You should also be aware of the Autohotkey function OnClipBoardChange: and "RegExReplace" both can be used to program some pretty nifty scripts to replace whatever you copy into the clipboard and fully modify it
8. Step The code above is just a simple example of what you can do – the sky is the limit here. Modifying your clipboard content can be a real time-saver for sure!

